> ## Documentation Index
> Fetch the complete documentation index at: https://docs.useinvent.com/llms.txt
> Use this file to discover all available pages before exploring further.
# AI Routing
> Let your assistant hand conversations to the right teammate, using plain-language descriptions of who handles what
When a customer needs a person, your assistant hands the conversation to the right teammate on its own. It chooses who from each member's role and a short, plain-language description of what they handle. No rules, no decision trees.
Manage routing at [useinvent.com/o/settings/routing](https://useinvent.com/o/settings/routing), or per assistant under **General → AI Routing**.
 ## How It Works
The customer asks for a person, or the assistant reaches something it shouldn't answer on its own.
From the available agents, it picks the best fit — a specific person, or anyone on a matching role or team — using their roles and descriptions. If nothing clearly matches, it assigns by availability and current workload.
It lands in the Inbox under **Waiting for Human**, assigned to that teammate so they're notified.
The conversation stays **Unassigned** and anyone permitted can claim it with **Take Over**.
When **AI Replies** is off, new conversations are auto-assigned to an available agent straight away, so your team is notified even before the AI weighs in.
## Turn On Routing
Routing runs through the **Transfer to Agent** capability. Open an assistant, go to **General → AI Routing**, and enable **Transfer to Agent**. This lets the assistant decide when to hand a conversation to one of your agents.
The same **AI Routing** section has an optional **Routing instructions** field — free-text guidance that steers how this assistant chooses between agents (which person or team to prefer, when to escalate). Leave it empty to route purely on roles and descriptions.
Transfers are disabled inside private chats.
## Choose Who an Assistant Routes To
By default, every organization member is eligible to take over. Add specific agents to limit an assistant to a chosen group:
In the assistant's **General → AI Routing** section, or from **Settings → AI Routing**, find the assistant.
Click **Add Agent** and pick members. The assistant now routes only among them.
Remove someone with the trash icon, or toggle their availability without removing them.
Managers can only add members they're allowed to see. On white-label workspaces that excludes Admins and Developers.
## How It Works
The customer asks for a person, or the assistant reaches something it shouldn't answer on its own.
From the available agents, it picks the best fit — a specific person, or anyone on a matching role or team — using their roles and descriptions. If nothing clearly matches, it assigns by availability and current workload.
It lands in the Inbox under **Waiting for Human**, assigned to that teammate so they're notified.
The conversation stays **Unassigned** and anyone permitted can claim it with **Take Over**.
When **AI Replies** is off, new conversations are auto-assigned to an available agent straight away, so your team is notified even before the AI weighs in.
## Turn On Routing
Routing runs through the **Transfer to Agent** capability. Open an assistant, go to **General → AI Routing**, and enable **Transfer to Agent**. This lets the assistant decide when to hand a conversation to one of your agents.
The same **AI Routing** section has an optional **Routing instructions** field — free-text guidance that steers how this assistant chooses between agents (which person or team to prefer, when to escalate). Leave it empty to route purely on roles and descriptions.
Transfers are disabled inside private chats.
## Choose Who an Assistant Routes To
By default, every organization member is eligible to take over. Add specific agents to limit an assistant to a chosen group:
In the assistant's **General → AI Routing** section, or from **Settings → AI Routing**, find the assistant.
Click **Add Agent** and pick members. The assistant now routes only among them.
Remove someone with the trash icon, or toggle their availability without removing them.
Managers can only add members they're allowed to see. On white-label workspaces that excludes Admins and Developers.
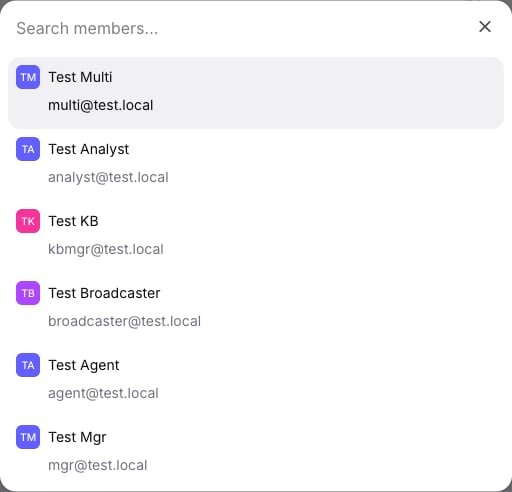 **Example:** put your support team on the Support assistant and your sales team on the Sales assistant, so each conversation reaches the right group.
## Describe What Each Member Handles
This is what makes routing accurate. Give each member a short, plain-language description of what they cover:
> Billing disputes and refunds. English and Spanish.
The assistant reads the description alongside the member's roles to choose the right person or team. Descriptions are **visible to the AI** and edited by managers, from **Settings → Members** or the **AI Routing** section.
If you haven't added specific agents, the assistant only routes to members who have a description. Writing one is how a member opts in to being routed to. Once you add explicit agents, every available agent is eligible, description or not.
Descriptions are optional. Skip them when everyone handles the same things, when you route by role, or when a member's role already says what they do.
## Availability
Every member has an availability status that controls whether the assistant assigns them work:
**Available**: the assistant can assign conversations to them.
**Unavailable**: skipped for new assignments (for example, while away), but keeps full access and can still take over conversations manually.
Members set their own status from the account menu. Managers can set anyone's from **Settings → Members**.
## Roles and Access
Any member can be added as an agent. Admins and Developers always have access to every assistant's conversations, so you rarely need to add them explicitly. On white-label workspaces, Managers and Agents don't see Admin or Developer members.
## Manual Assignment
You're never locked into automatic routing. From the Inbox you can:
* Assign a conversation to any teammate from the agent dropdown.
* Click **Take Over** to claim a conversation yourself.
* Click **Resolve** when it's handled, or **Hand Over to AI** to return it to the assistant.
Resolved conversations reopen automatically if the customer replies.
## Best Practices
Steer routing with the **Routing instructions** field (in the assistant's AI Routing section). Routing itself just matches on roles and descriptions — any preference beyond that ("send payment issues to the Billing team first", "only involve a manager if the customer asks for one") goes there, where it can be as specific as you like. There's no fixed seniority order baked in.
* **Write descriptions the way customers describe their problem**, not in internal jargon. "Refunds, billing, and payment disputes" routes better than "AR/AP specialist."
* **Keep them short and specific.** Include specialties, languages, and coverage — "Onboarding and setup. Spanish. EMEA hours." One or two lines is plenty.
* **Use roles for interchangeable teams, descriptions for specifics.** If anyone on a team can take the question, a shared role does the job; reach for descriptions when people cover different things.
* **Keep availability current.** Flip to Unavailable when you step away — the assistant never routes to someone marked unavailable, so stale statuses send work to the wrong place.
* **Scope assistants with explicit agents.** Leaving an assistant open means anyone with a description is eligible; adding agents restricts it to that group. For large teams, assign the specific people who should handle each assistant so routing stays focused.
* **You don't have to describe everyone.** If a conversation doesn't clearly match anyone, the assistant assigns by availability and workload — so describe the people whose specialty actually matters.
## Use Cases
**Specialized teams**: route billing to finance and bugs to engineering by describing what each person handles.
**Language or region**: add "English and Spanish" or "EMEA hours" to a description and the assistant matches accordingly.
**Tiered support**: add only senior agents to a high-touch assistant.
**Time away**: flip to Unavailable at capacity or off-shift, and the assistant stops assigning you new conversations.
## Next Steps
Manage conversations and monitor handoffs in the Inbox
Invite team members and assign roles for agent access
**Example:** put your support team on the Support assistant and your sales team on the Sales assistant, so each conversation reaches the right group.
## Describe What Each Member Handles
This is what makes routing accurate. Give each member a short, plain-language description of what they cover:
> Billing disputes and refunds. English and Spanish.
The assistant reads the description alongside the member's roles to choose the right person or team. Descriptions are **visible to the AI** and edited by managers, from **Settings → Members** or the **AI Routing** section.
If you haven't added specific agents, the assistant only routes to members who have a description. Writing one is how a member opts in to being routed to. Once you add explicit agents, every available agent is eligible, description or not.
Descriptions are optional. Skip them when everyone handles the same things, when you route by role, or when a member's role already says what they do.
## Availability
Every member has an availability status that controls whether the assistant assigns them work:
**Available**: the assistant can assign conversations to them.
**Unavailable**: skipped for new assignments (for example, while away), but keeps full access and can still take over conversations manually.
Members set their own status from the account menu. Managers can set anyone's from **Settings → Members**.
## Roles and Access
Any member can be added as an agent. Admins and Developers always have access to every assistant's conversations, so you rarely need to add them explicitly. On white-label workspaces, Managers and Agents don't see Admin or Developer members.
## Manual Assignment
You're never locked into automatic routing. From the Inbox you can:
* Assign a conversation to any teammate from the agent dropdown.
* Click **Take Over** to claim a conversation yourself.
* Click **Resolve** when it's handled, or **Hand Over to AI** to return it to the assistant.
Resolved conversations reopen automatically if the customer replies.
## Best Practices
Steer routing with the **Routing instructions** field (in the assistant's AI Routing section). Routing itself just matches on roles and descriptions — any preference beyond that ("send payment issues to the Billing team first", "only involve a manager if the customer asks for one") goes there, where it can be as specific as you like. There's no fixed seniority order baked in.
* **Write descriptions the way customers describe their problem**, not in internal jargon. "Refunds, billing, and payment disputes" routes better than "AR/AP specialist."
* **Keep them short and specific.** Include specialties, languages, and coverage — "Onboarding and setup. Spanish. EMEA hours." One or two lines is plenty.
* **Use roles for interchangeable teams, descriptions for specifics.** If anyone on a team can take the question, a shared role does the job; reach for descriptions when people cover different things.
* **Keep availability current.** Flip to Unavailable when you step away — the assistant never routes to someone marked unavailable, so stale statuses send work to the wrong place.
* **Scope assistants with explicit agents.** Leaving an assistant open means anyone with a description is eligible; adding agents restricts it to that group. For large teams, assign the specific people who should handle each assistant so routing stays focused.
* **You don't have to describe everyone.** If a conversation doesn't clearly match anyone, the assistant assigns by availability and workload — so describe the people whose specialty actually matters.
## Use Cases
**Specialized teams**: route billing to finance and bugs to engineering by describing what each person handles.
**Language or region**: add "English and Spanish" or "EMEA hours" to a description and the assistant matches accordingly.
**Tiered support**: add only senior agents to a high-touch assistant.
**Time away**: flip to Unavailable at capacity or off-shift, and the assistant stops assigning you new conversations.
## Next Steps
Manage conversations and monitor handoffs in the Inbox
Invite team members and assign roles for agent access