> ## Documentation Index
> Fetch the complete documentation index at: https://docs.useinvent.com/llms.txt
> Use this file to discover all available pages before exploring further.
# Segments
> Group contacts into segments to target the right people with broadcasts
Segments let you group contacts together for easy targeting. Instead of broadcasting to your entire audience, you can send messages to specific groups, like "VIP Customers", "Newsletter Subscribers", or "Beta Testers".
Open **Audience → Segments** in the sidebar to see all your segments.
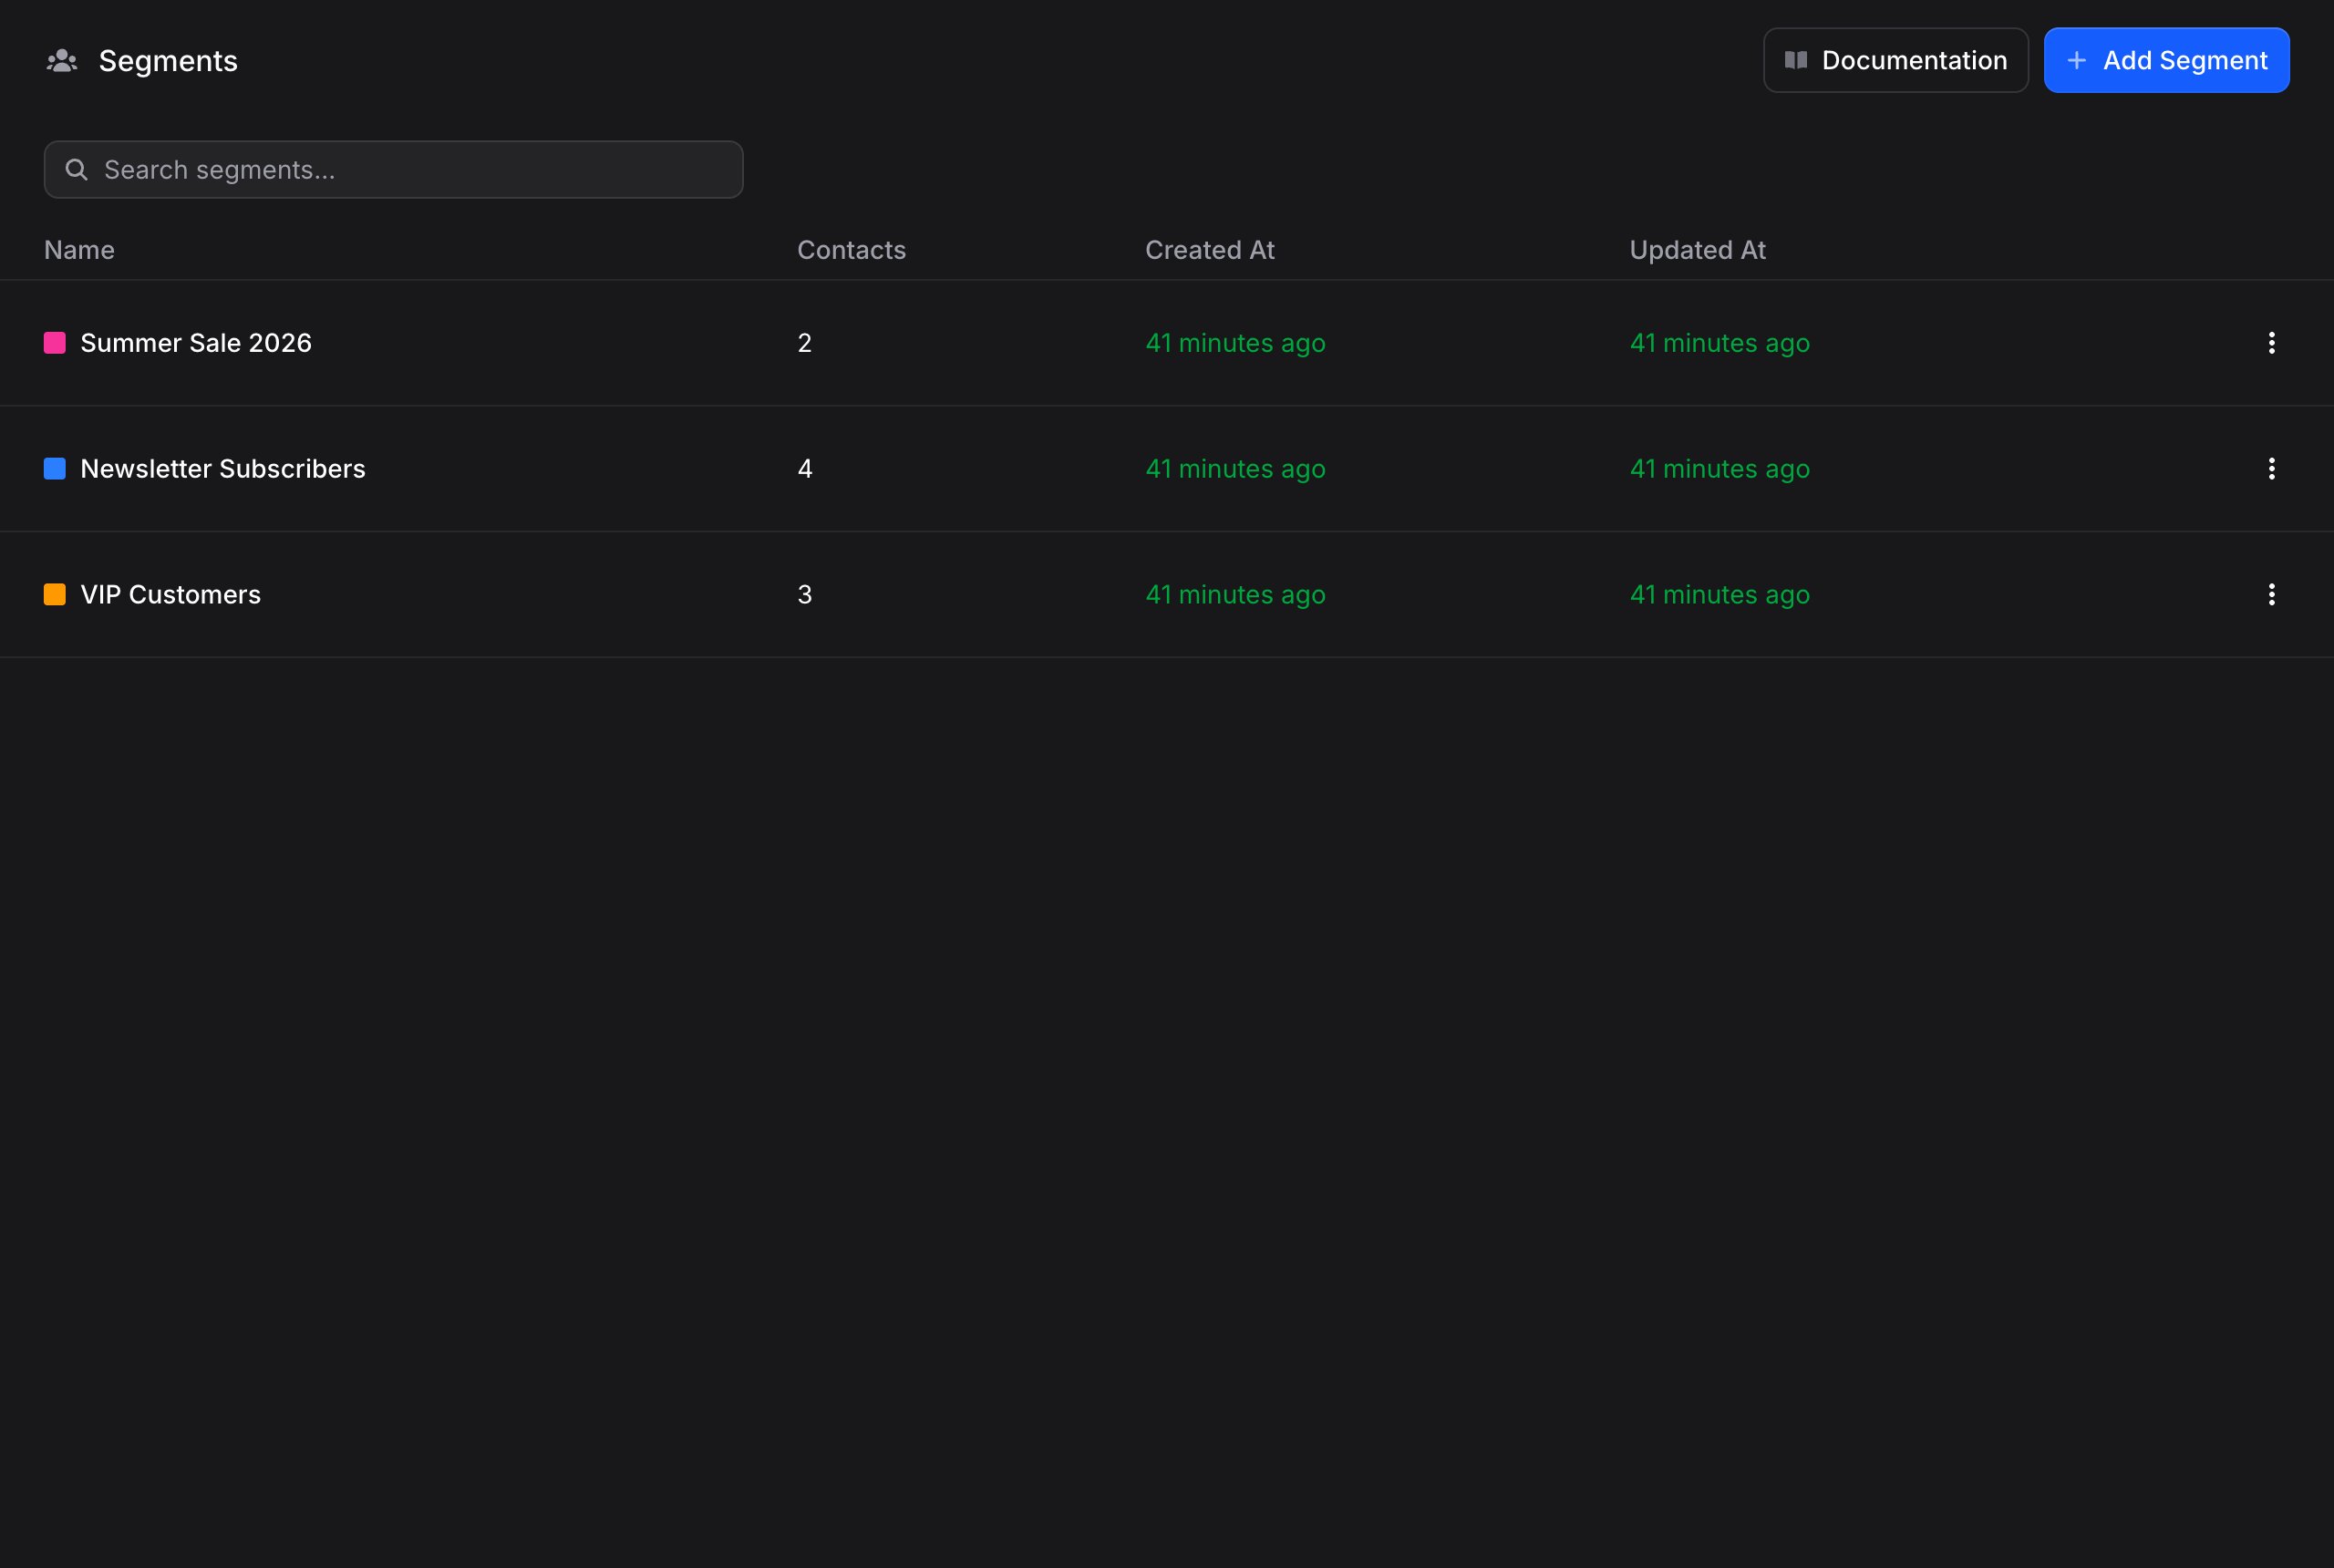 Each segment shows:
* **Color and Name**: The segment's color dot and name
* **Contacts**: How many contacts are in this segment
* **Created At**: When the segment was created
* **Updated At**: When the segment was last modified
Use the search bar to find a segment by name.
Segments are the foundation for [Broadcasts](/guides/broadcasts/introduction). When you create a broadcast, you pick the segments to send it to, so a well-organized audience makes targeting effortless.
## Creating a Segment
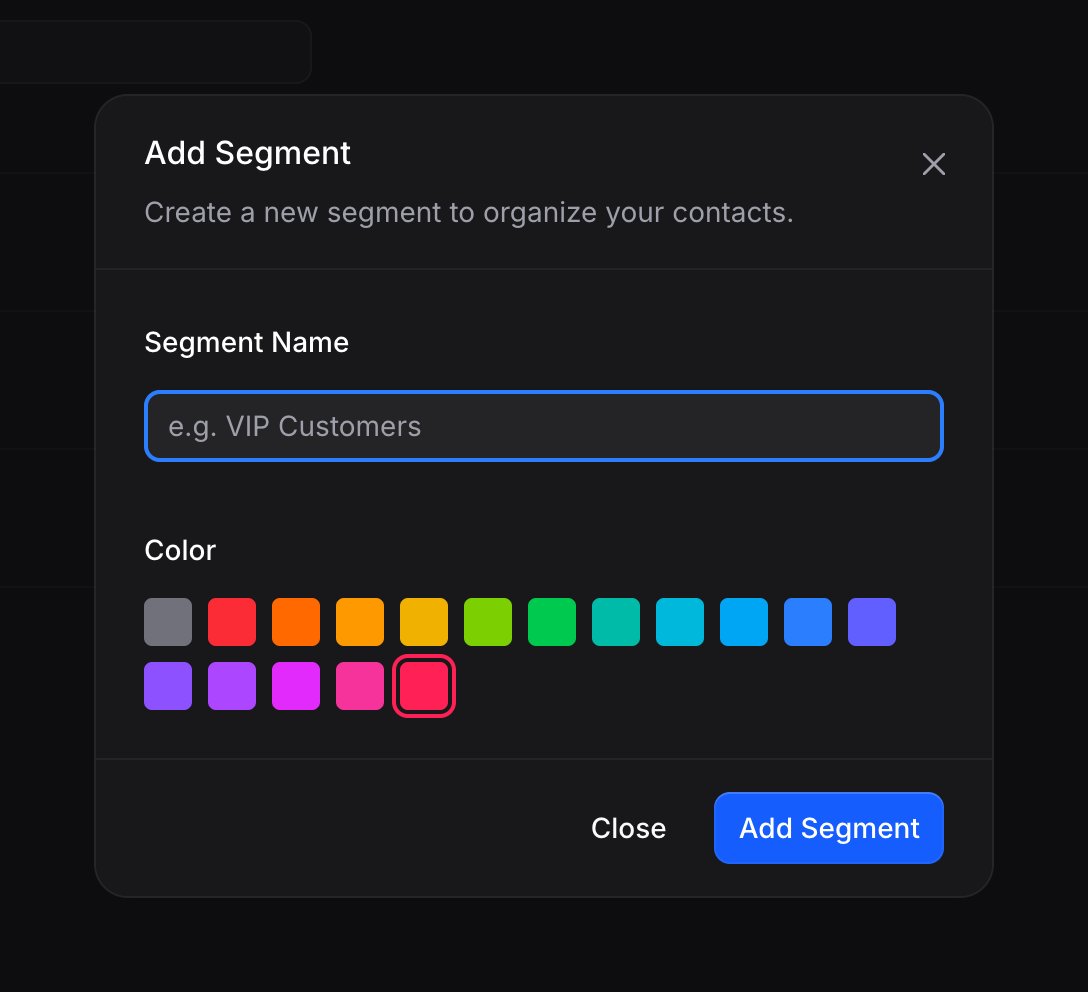
A dialog appears with fields for the segment name and color.
Give your segment a descriptive name (e.g., "VIP Customers", "Product Updates", "Beta Users").
Choose a color from the palette. The color appears as a dot next to the segment badge throughout the app, making it easy to visually distinguish segments in the contacts list, contact panel, and filters.
Your new segment is created. It starts with 0 contacts.
Each segment shows:
* **Color and Name**: The segment's color dot and name
* **Contacts**: How many contacts are in this segment
* **Created At**: When the segment was created
* **Updated At**: When the segment was last modified
Use the search bar to find a segment by name.
Segments are the foundation for [Broadcasts](/guides/broadcasts/introduction). When you create a broadcast, you pick the segments to send it to, so a well-organized audience makes targeting effortless.
## Creating a Segment
A dialog appears with fields for the segment name and color.
Give your segment a descriptive name (e.g., "VIP Customers", "Product Updates", "Beta Users").
Choose a color from the palette. The color appears as a dot next to the segment badge throughout the app, making it easy to visually distinguish segments in the contacts list, contact panel, and filters.
Your new segment is created. It starts with 0 contacts.
 ## Managing a Segment
Click on any segment to see the contacts within it.
## Managing a Segment
Click on any segment to see the contacts within it.
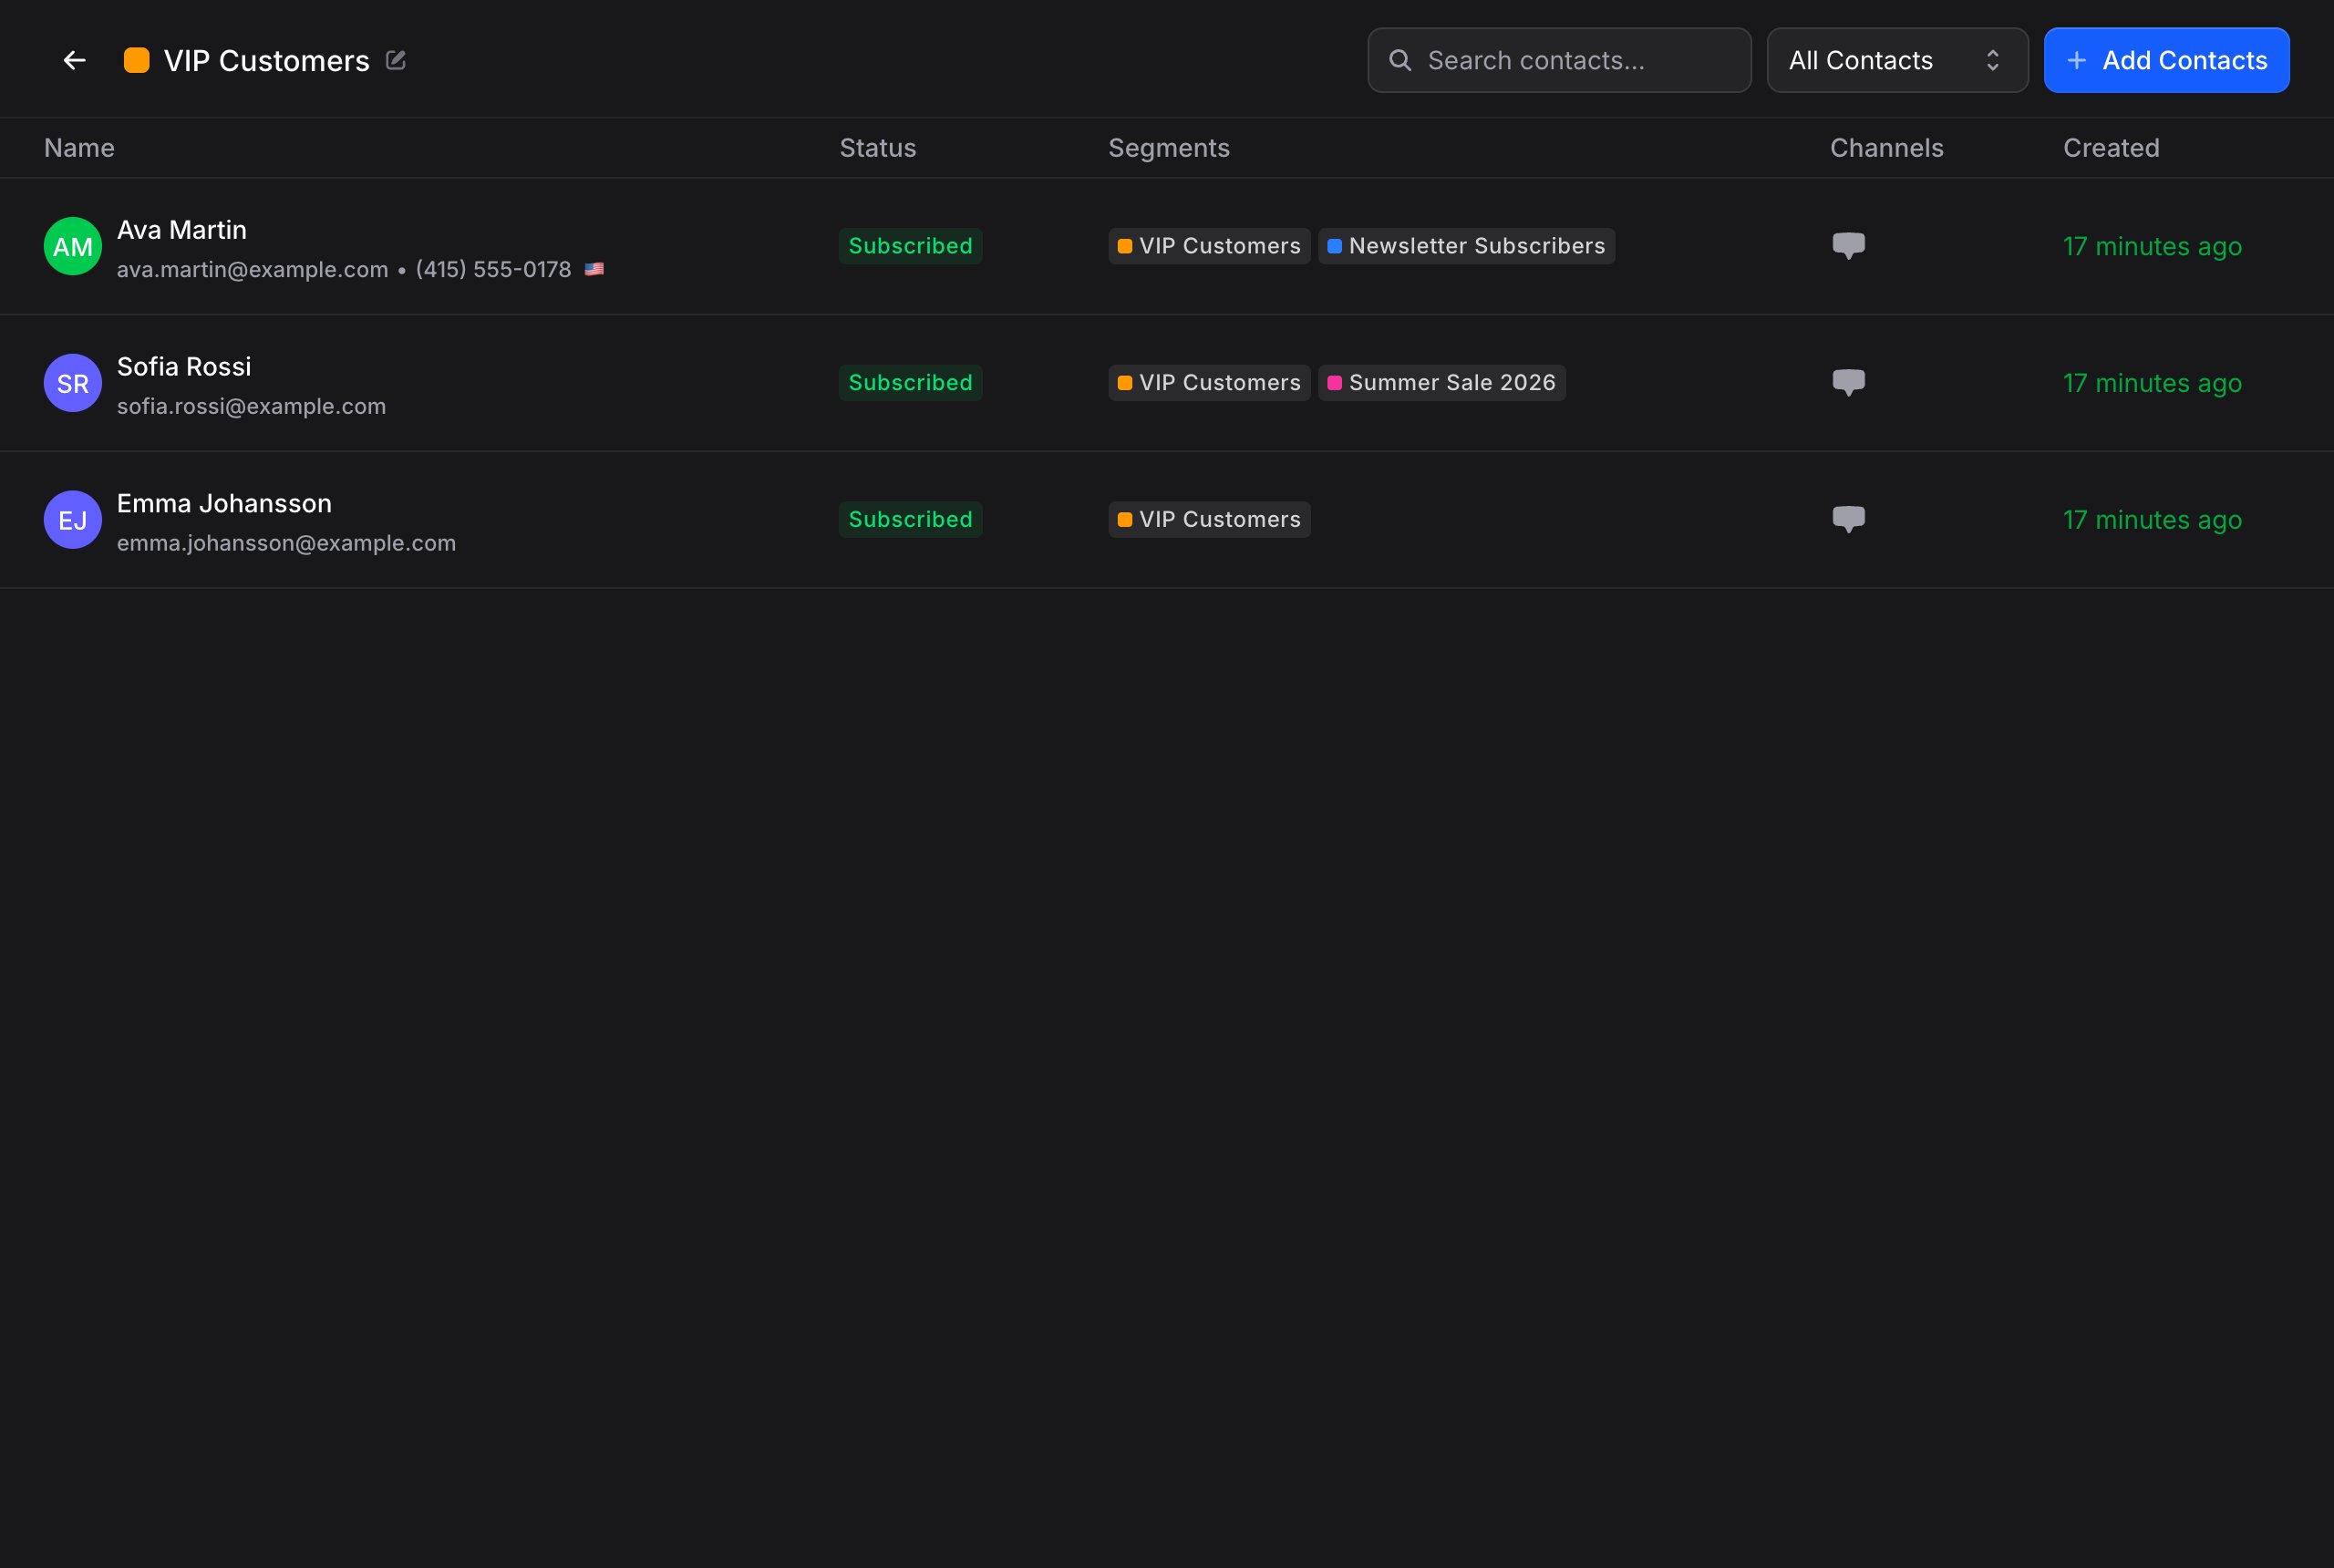 From this view, you can:
* **Search contacts** within the segment
* **Add contacts** to the segment (manually or via import)
* **Rename the segment** by clicking its name in the header
* **Change the color** by clicking the color dot next to the name
Back in the segments list, use the three-dot menu next to each segment to rename or delete it. Deleting a segment does not delete its contacts; they simply leave the group.
## How Contacts Get Added to Segments
Contacts can be added to segments in several ways:
1. **When adding a contact manually**: Select segments during creation
2. **When importing contacts**: Assign all imported contacts to a segment
3. **From the contact profile**: Add or remove segments from the profile panel
4. **From within a segment**: Click **+ Add Contacts** while viewing a segment
A contact can belong to multiple segments at once.
## Best Practices
1. **Create segments early**: Set up segments like "Promotions", "Product Updates", and "VIP" before you start broadcasting. This makes targeting much easier later
2. **Use descriptive names**: "Beta Users - iOS App" is better than "Group 1"
3. **Keep segments clean**: Regularly review and remove contacts who are no longer relevant
4. **Combine with broadcasts**: Segments are most powerful when used with broadcasts to send targeted messages to the right people at the right time
## Next Steps
Send targeted messages to your segments via WhatsApp and more
Store custom data on every contact with properties
From this view, you can:
* **Search contacts** within the segment
* **Add contacts** to the segment (manually or via import)
* **Rename the segment** by clicking its name in the header
* **Change the color** by clicking the color dot next to the name
Back in the segments list, use the three-dot menu next to each segment to rename or delete it. Deleting a segment does not delete its contacts; they simply leave the group.
## How Contacts Get Added to Segments
Contacts can be added to segments in several ways:
1. **When adding a contact manually**: Select segments during creation
2. **When importing contacts**: Assign all imported contacts to a segment
3. **From the contact profile**: Add or remove segments from the profile panel
4. **From within a segment**: Click **+ Add Contacts** while viewing a segment
A contact can belong to multiple segments at once.
## Best Practices
1. **Create segments early**: Set up segments like "Promotions", "Product Updates", and "VIP" before you start broadcasting. This makes targeting much easier later
2. **Use descriptive names**: "Beta Users - iOS App" is better than "Group 1"
3. **Keep segments clean**: Regularly review and remove contacts who are no longer relevant
4. **Combine with broadcasts**: Segments are most powerful when used with broadcasts to send targeted messages to the right people at the right time
## Next Steps
Send targeted messages to your segments via WhatsApp and more
Store custom data on every contact with properties