

Roles
Every member has either a system role or one or more custom roles. System roles cover the common cases:
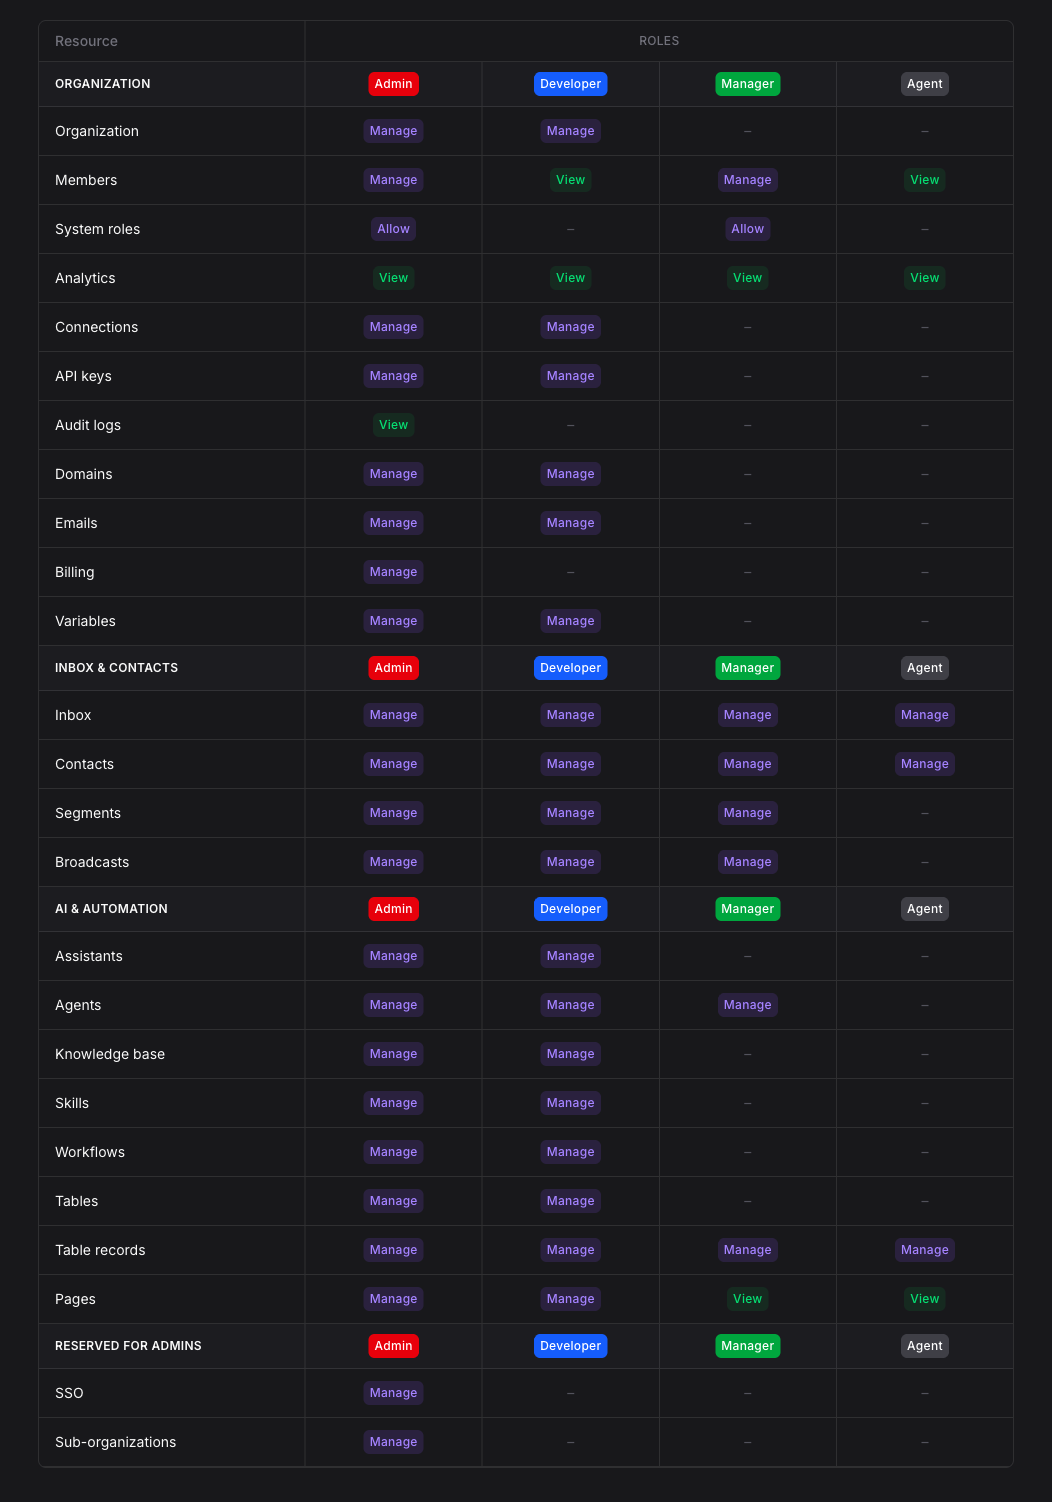
For anything more specific, create a custom role with an exact, resource-by-resource permission set. To compare what every role can do side by side, open Settings → Members & Roles → Permissions Matrix.
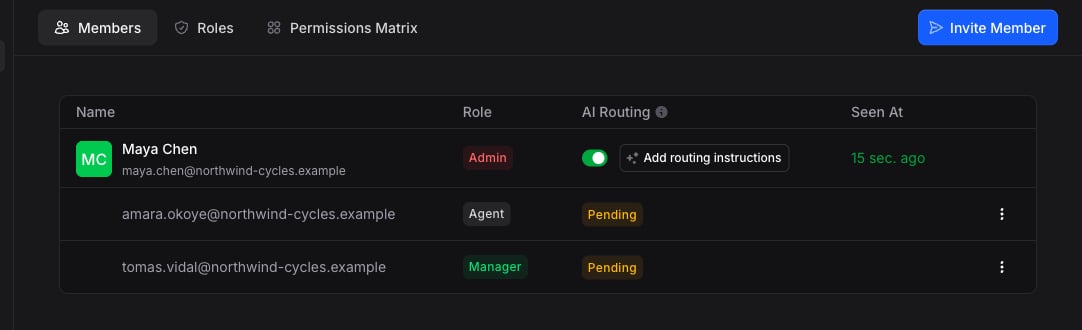
The Members area has three tabs: Members (the people list), Roles, and Permissions Matrix. The Roles and Permissions Matrix tabs are visible to Admins only.
Inviting members
1
Open the invite dialog
Go to Settings → Members & Roles and select Invite Member.
2
Enter the email
Add the teammate’s email address.
3
Choose a role
Pick one system role, or select one or more custom roles. You can only grant roles whose permissions you hold yourself.
4
Send
Select Send Invite. The invitee receives a branded invitation email and joins with the role you chose when they accept.
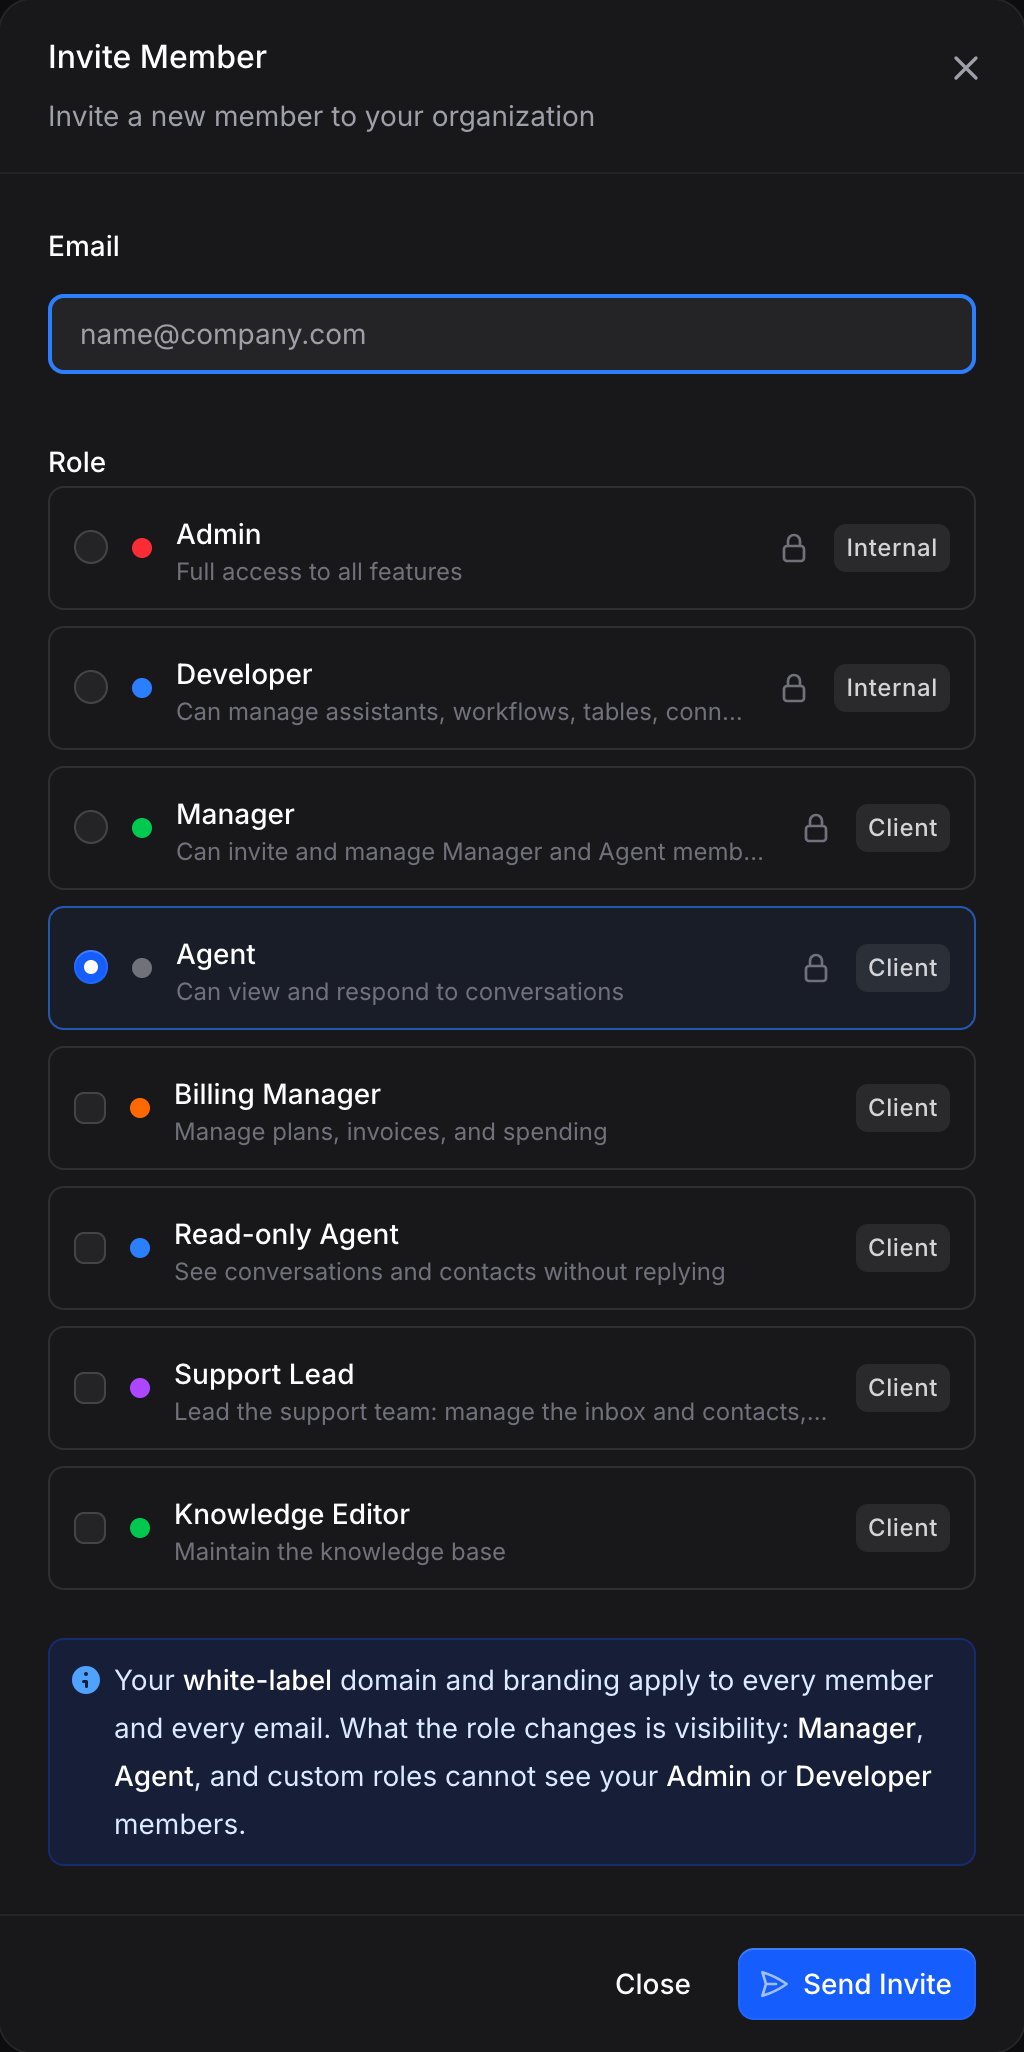
Once your organization runs on a custom domain, each role is marked Internal or Client in the picker. Client roles — Manager, Agent, and custom roles — only see Manager and Agent members, so your Admin and Developer members stay hidden from them. Your white-label domain and email branding apply to every member either way.
Pending invites
Pending invitations appear in the members list with a “Pending” status. From the member options menu you can Resend the invitation email or Revoke the invitation.Changing a member’s role
Use the role dropdown to switch a member between system roles, or Edit roles to assign custom roles. You can only change a member to a role with equal or lower access than your own.Availability
The Active toggle in the members list controls whether a member is available to receive conversation assignments and assistant handoffs. Turn it off to take someone out of rotation without changing their role or removing them. Managers, and roles with member-assignment access, can change a member’s availability.Removing members
To remove a member, open the three-dot Member options menu and select Remove Member. Removed members immediately lose access to your organization.Best practices
- Grant the minimum needed. Start narrow; you can always widen access later.
- Use custom roles for precise access. When a system role is too broad or too narrow, a custom role gives you exactly the surface you want.
- Reserve Admin for owners. Only give Admin to people who need full control, including billing and security.
- Review access regularly. Remove members who no longer need access, and turn off availability for anyone temporarily out of rotation.