

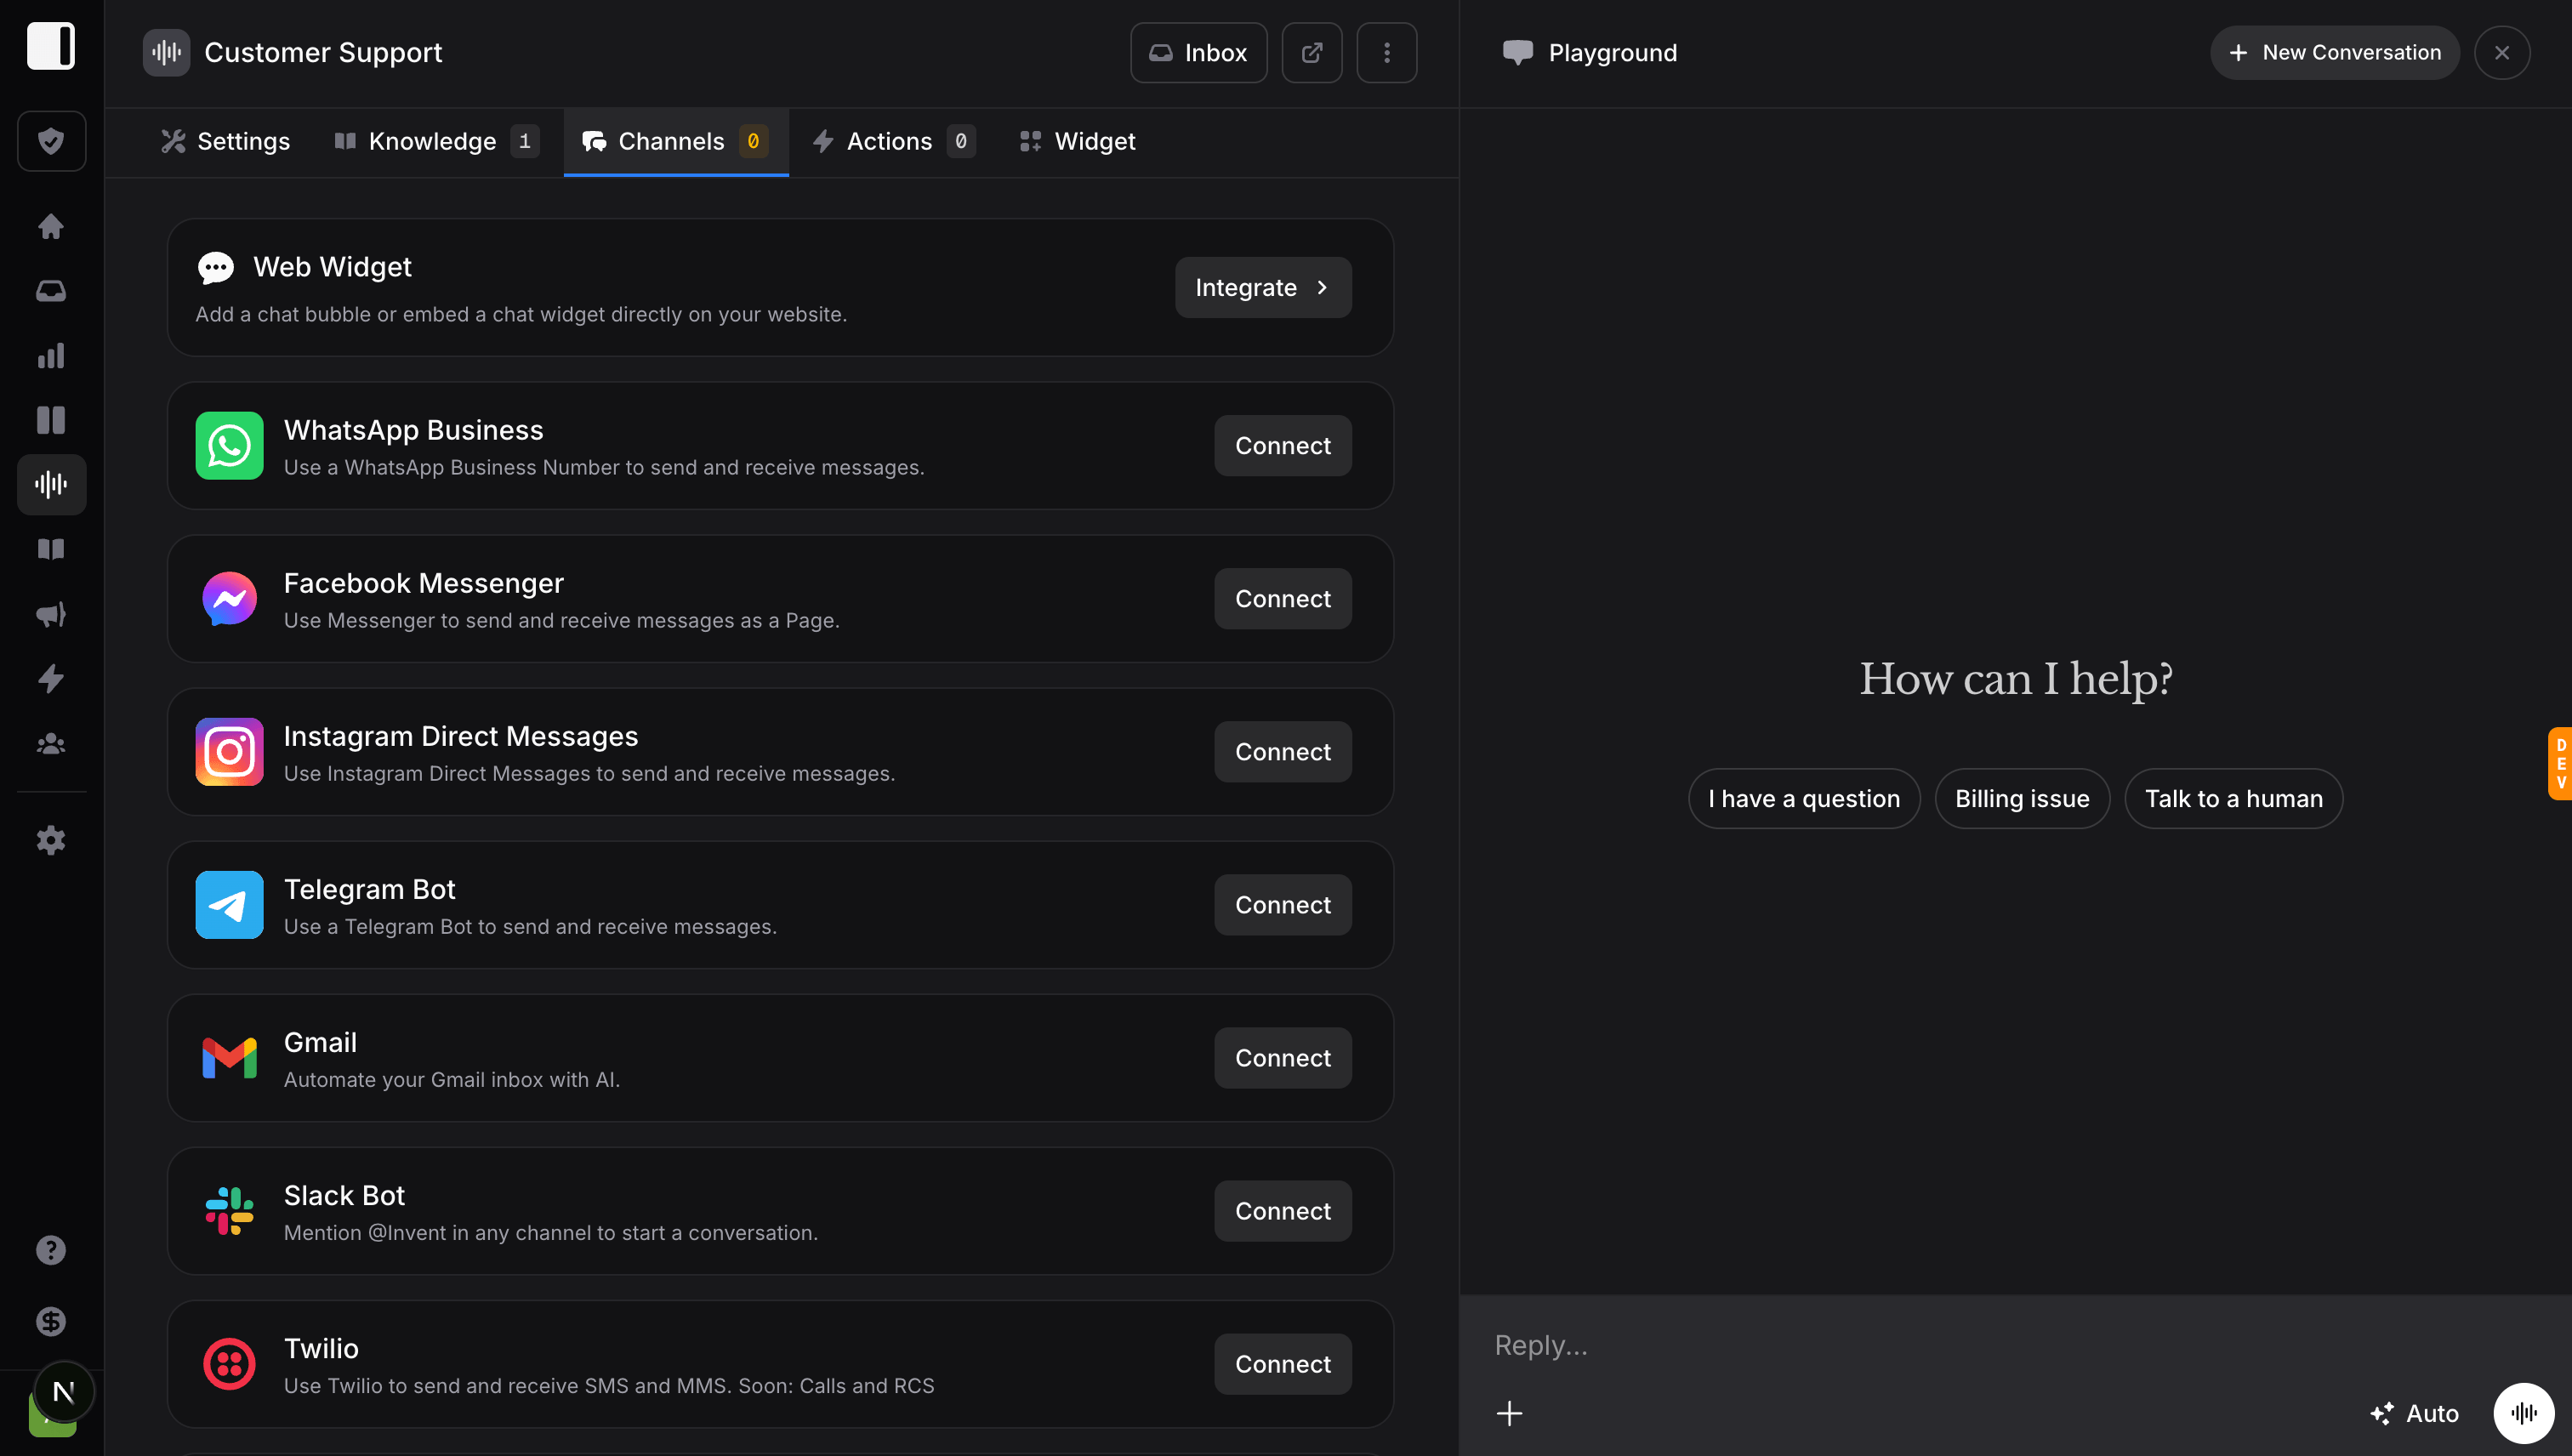
Every Channel
How Channels Work
Every channel in Invent follows the same shape:- A channel type, one of the rows above.
- A reusable Connection that holds the authenticated link to that provider (your Meta account, your Telegram bot token, etc.).
- A per-assistant binding that picks a specific resource on that connection (a WhatsApp phone number, a Facebook Page, an Instagram account) and turns it on.
The Universal Connection Flow
Adding any channel to an assistant follows the same five steps. The only thing that changes is the provider’s sign-in screen in the middle.1
Click Connect on the channel
Open your assistant’s Channels tab, find the channel you want to add, and click Connect. A dialog opens with two fields: a Connection (the authenticated link to the provider) and the channel-specific resource picker (phone number, page, bot, etc.). The example below shows the WhatsApp dialog the first time it is opened, but every channel works the same way.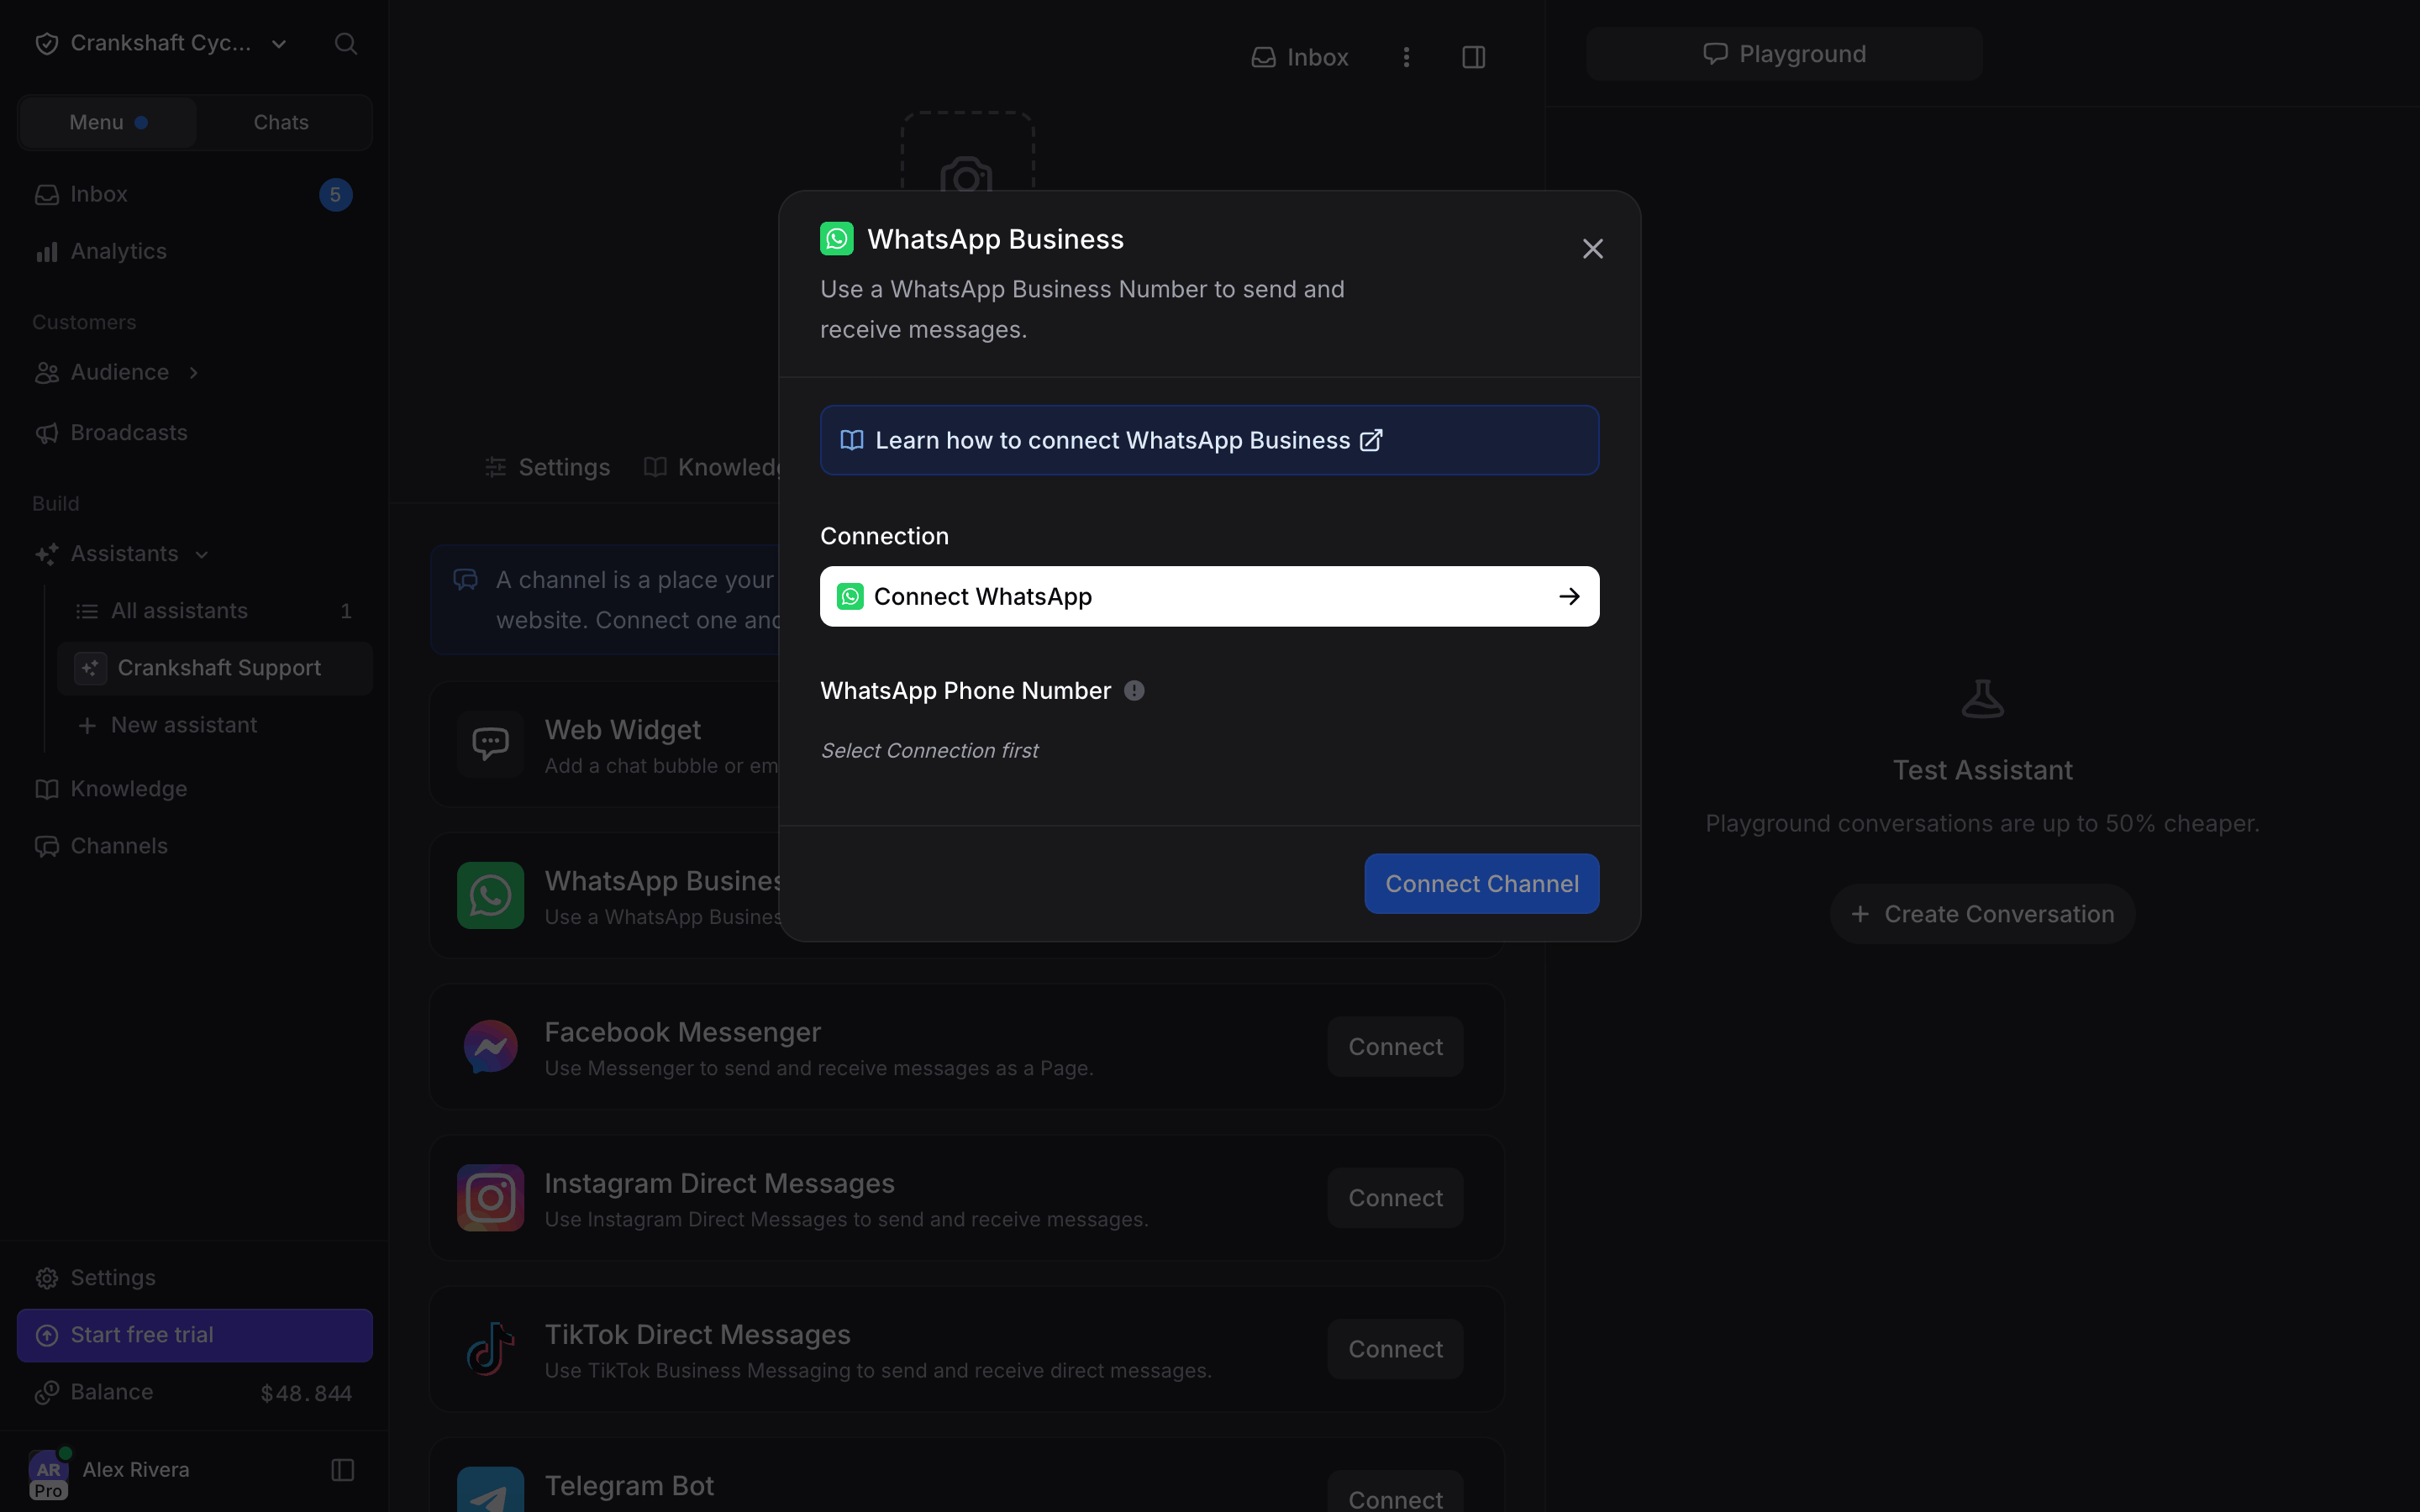
2
Authenticate with the provider
Invent opens the channel’s standard sign-in flow in a popup or new tab. This is the provider’s own screen, run by Meta, Telegram, or whoever owns the channel, so your credentials are only entered on their domain, never on Invent’s.Finish the provider’s flow as you normally would: pick the business, select the number, page, or account to grant access to, and confirm the permissions.When you are done, the provider redirects you back to Invent automatically.
3
Name the connection
Back in Invent, you are asked to give this connection a label (for example, “Acme WhatsApp” or “Support Team Messenger”). This is just the name you will see inside Invent, it does not change anything on the provider.Click Create and Invent stores the connection in Settings → Connections, where you can rename or disconnect it at any time.
4
Pick the channel-specific resource
The channel dialog reopens with your new connection already selected and any channel-specific fields listed underneath. Invent fetches the available options for you, so you just pick from a dropdown: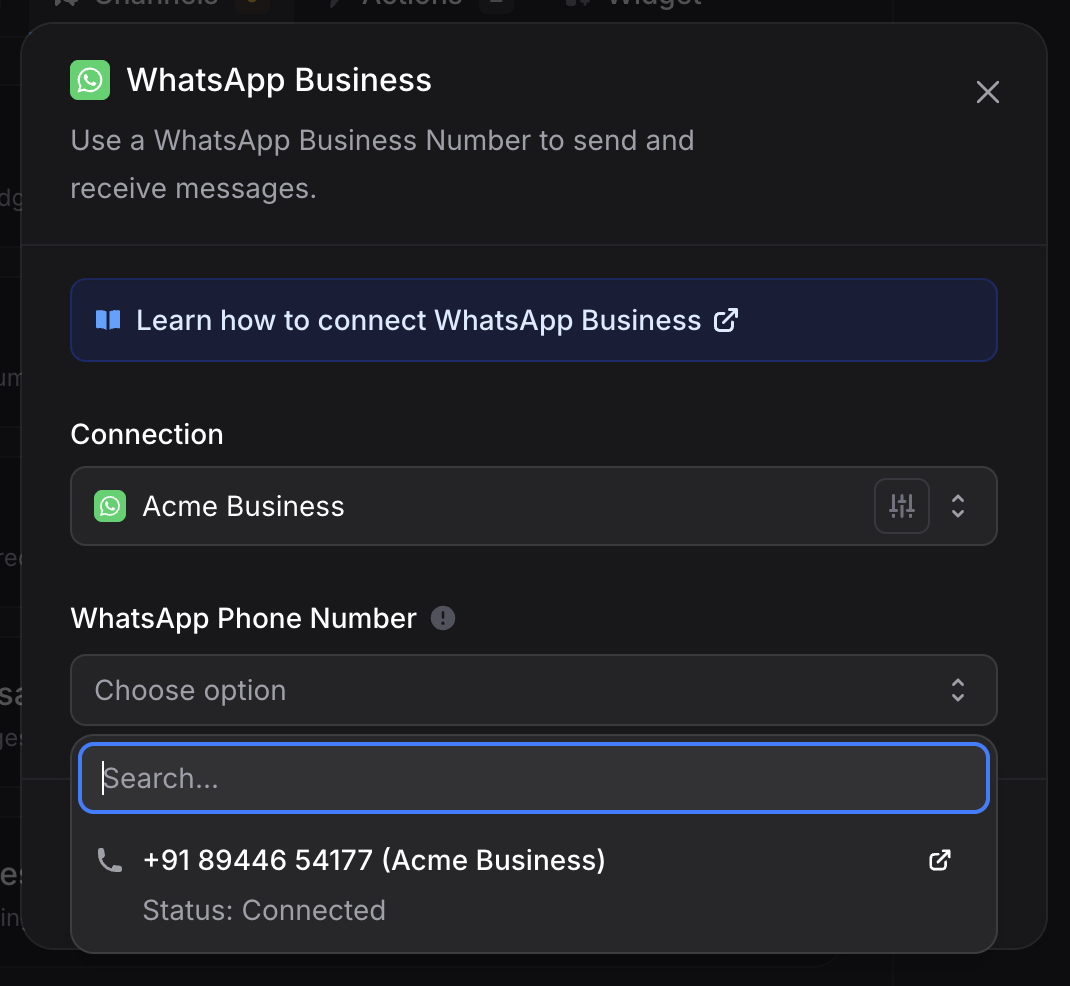
- WhatsApp Business → pick the phone number to receive and send messages on
- Facebook Messenger → pick the Page
- Instagram → pick the connected Instagram account
- Telegram → pick the bot
5
Click Connect Channel
Invent binds the resource to this assistant. The channel appears in the Channels tab with an Enabled toggle and a Manage button. Send it a test message, and you are live.
Managing Connected Channels
Each channel you have added to an assistant shows up as its own row with:- Identifier: the phone number, Page name, account handle, or bot username for this binding.
- Status: Connected when the connection is healthy (Disconnected when disabled), or a warning if the provider requires re-authentication.
- Enable / Disable toggle: pause the channel without removing its configuration. Useful during maintenance or while you refine Instructions.
- Manage: open channel-specific settings.
- Disconnect: remove this binding from the assistant. The underlying Connection itself is untouched, so other assistants that share it keep working.
Multiple Connections Per Channel
A single assistant can have more than one connection of the same channel type. Add two WhatsApp Business numbers, three Facebook Pages, a mix of Instagram accounts, or any combination, all under the same assistant running in parallel.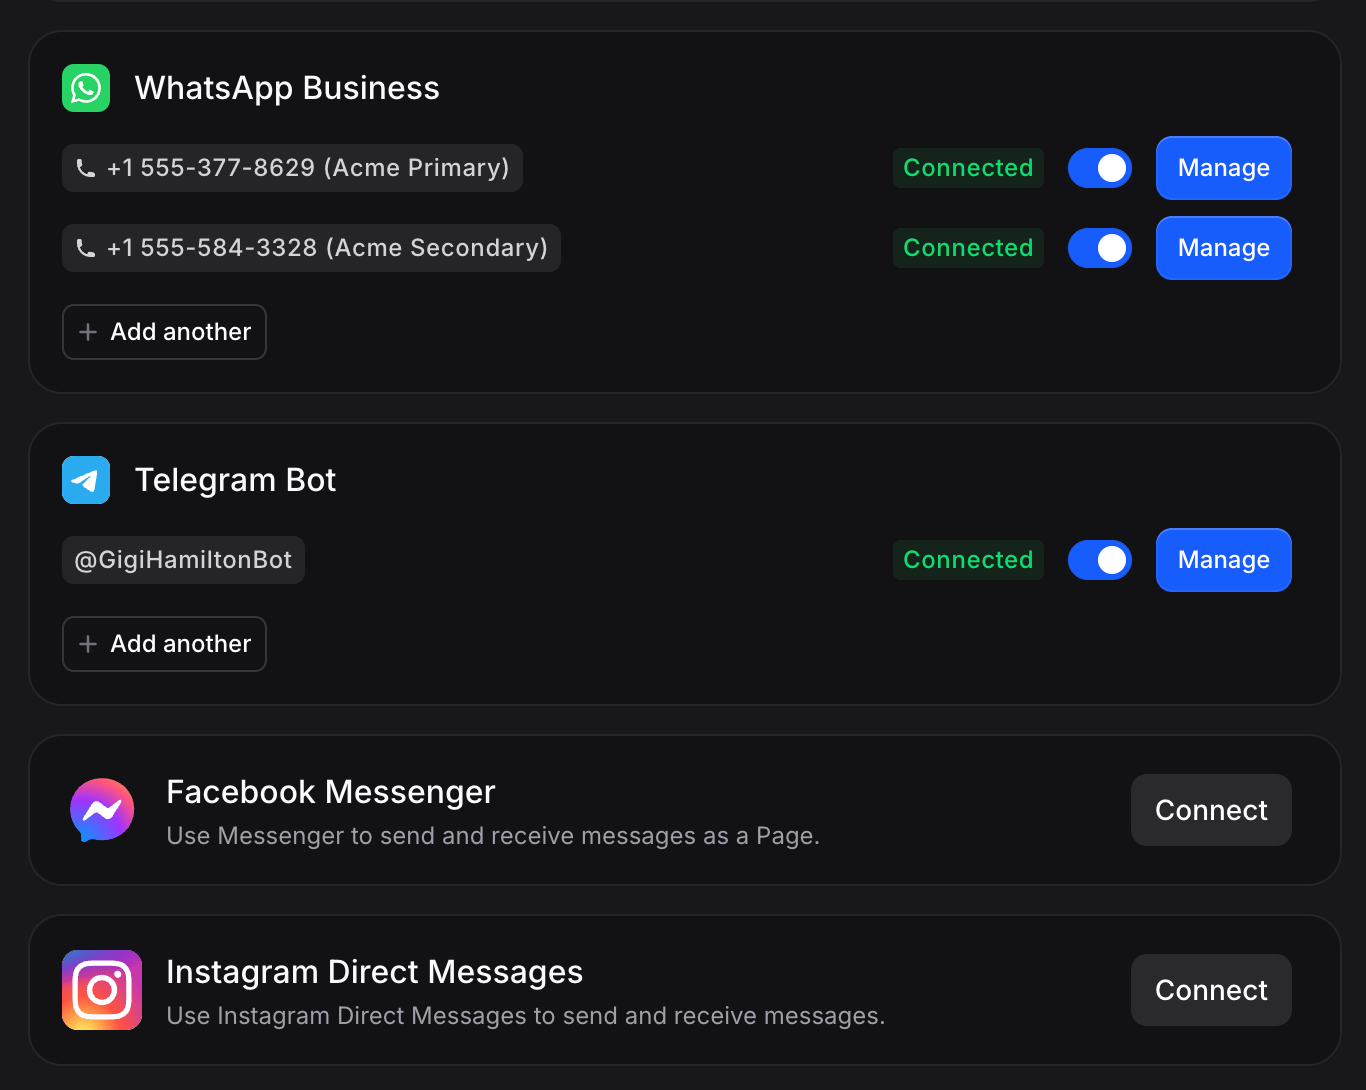
When to Use Multiple Connections
- Regional numbers: one WhatsApp number per country or language, all sharing the same Instructions, Knowledge, and Memory.
- Brand portfolio: several Facebook Pages from different product lines routed to a single assistant.
- Migrations and handoffs: keep a legacy number active alongside a new one during a rollout, then disable the old connection when you are ready.
- Team and department splits: route sales and support numbers to the same assistant without duplicating its configuration.
One Assistant, Every Channel
A single assistant handles every connected channel at once. A customer might:- Ask a question on Instagram
- Continue the conversation on WhatsApp a few days later
- Complete a purchase on your website
Channel-Specific Capabilities
Your assistant’s personality is consistent everywhere, but each channel has its own native features and the assistant uses them automatically:- WhatsApp: voice messages, images, documents, contact cards, location sharing, typing indicators, read receipts, interactive buttons.
- Instagram: DMs, story mentions, image messages.
- Messenger: Page messages, quick replies.
- TikTok: direct messages with reply buttons, inside a 48-hour reply window.
- Telegram: bot commands, inline buttons.
- Slack: people @mention the bot in a channel or message it directly. The assistant replies in a thread under that message, shows a thinking status while it works, and keeps following the thread without a new mention, with buttons. In a thread that started without a mention, the assistant joins when a reply mentions it and follows the thread from there. The binding’s Channel or user field (default Any channel or user) limits it to one channel or one member’s direct messages. When one assistant listens on Any and another on a specific channel, the specific one answers there and the Any one stays quiet. Replies post under the assistant’s name and avatar unless the binding’s Bot Name and Avatar fields set their own.
- Microsoft Teams: people message the app directly, or @mention it in a group or channel. In a channel the assistant keeps following the thread it answered in without a new mention; in a group chat only mentions reach it. The binding’s Channel field (default Any channel) limits it to one channel. When one assistant listens on Any and another on a specific channel, the specific one answers there and the Any one stays quiet. Replies carry buttons, up to 6 options.
- Gmail and Outlook: threaded email replies with attachments. Two-way email runs on Gmail and Outlook; the Email channel sends only.
- SMS: plain text and MMS.
- Web Widget: rich cards, suggested questions, inline embed or bubble button.
Seeing It in Action
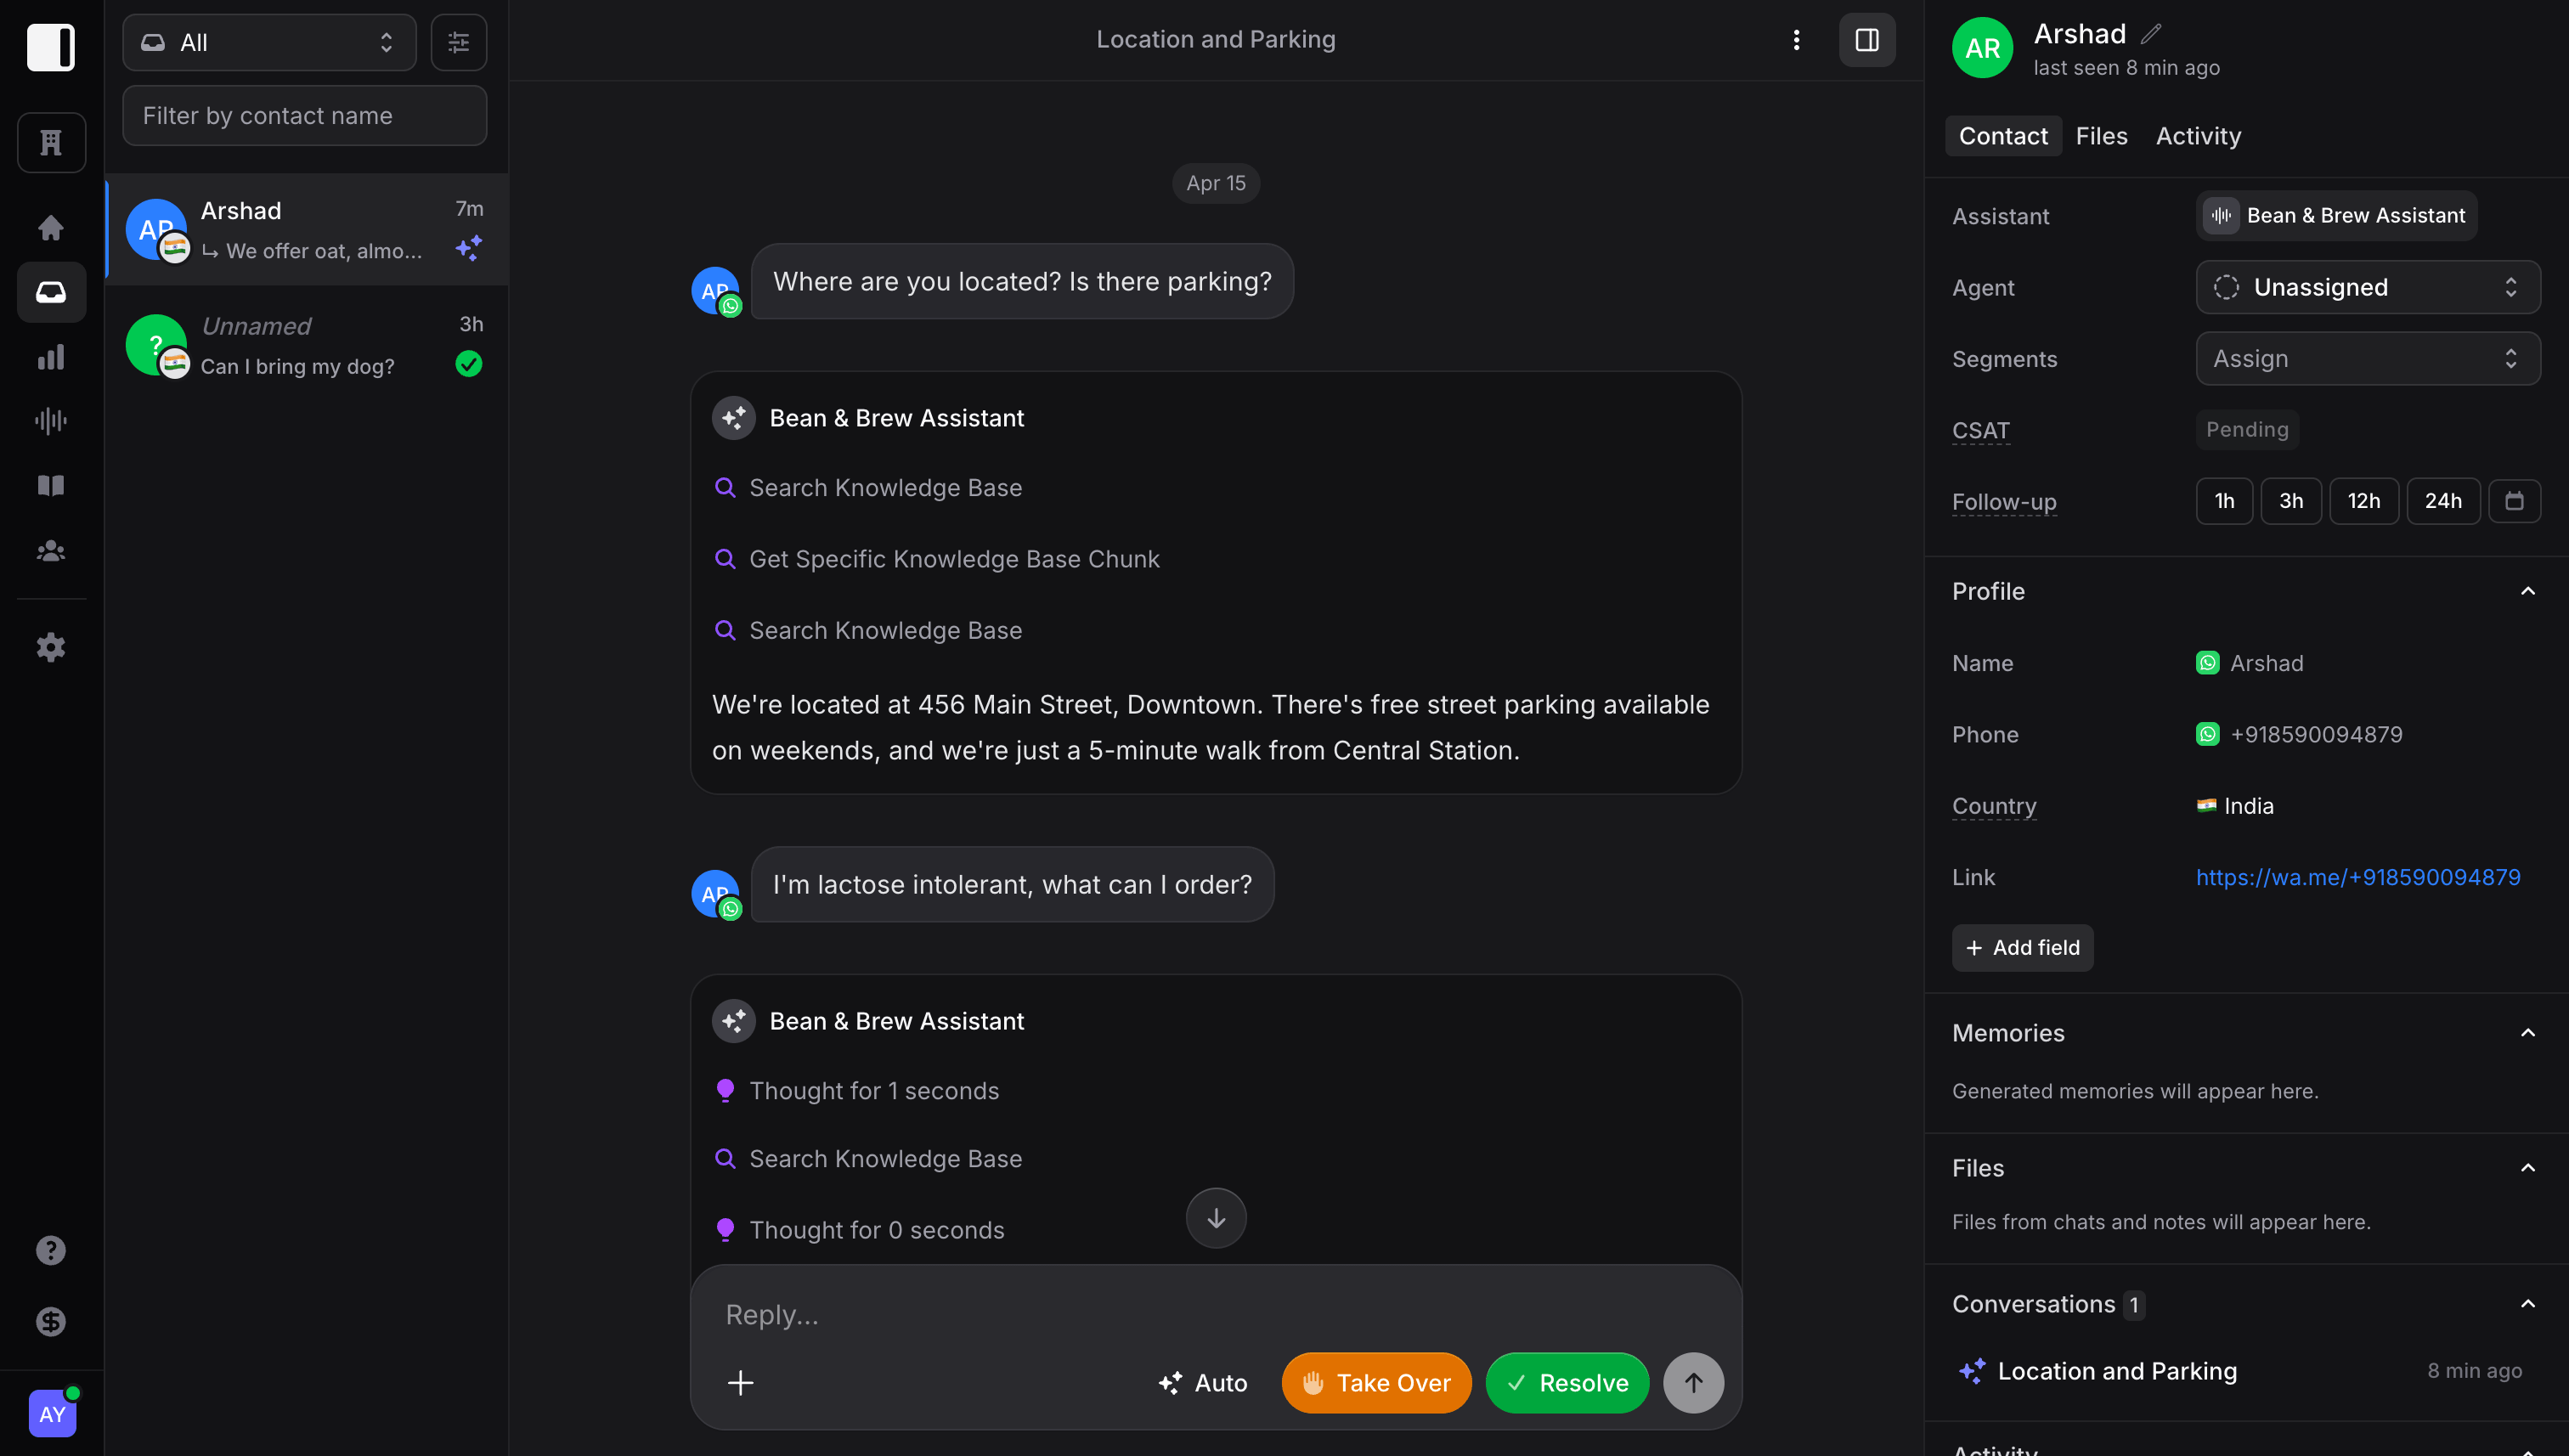
Once a channel is connected, customers can message your assistant directly from that platform. Here is what it looks like when a customer sends a message through WhatsApp: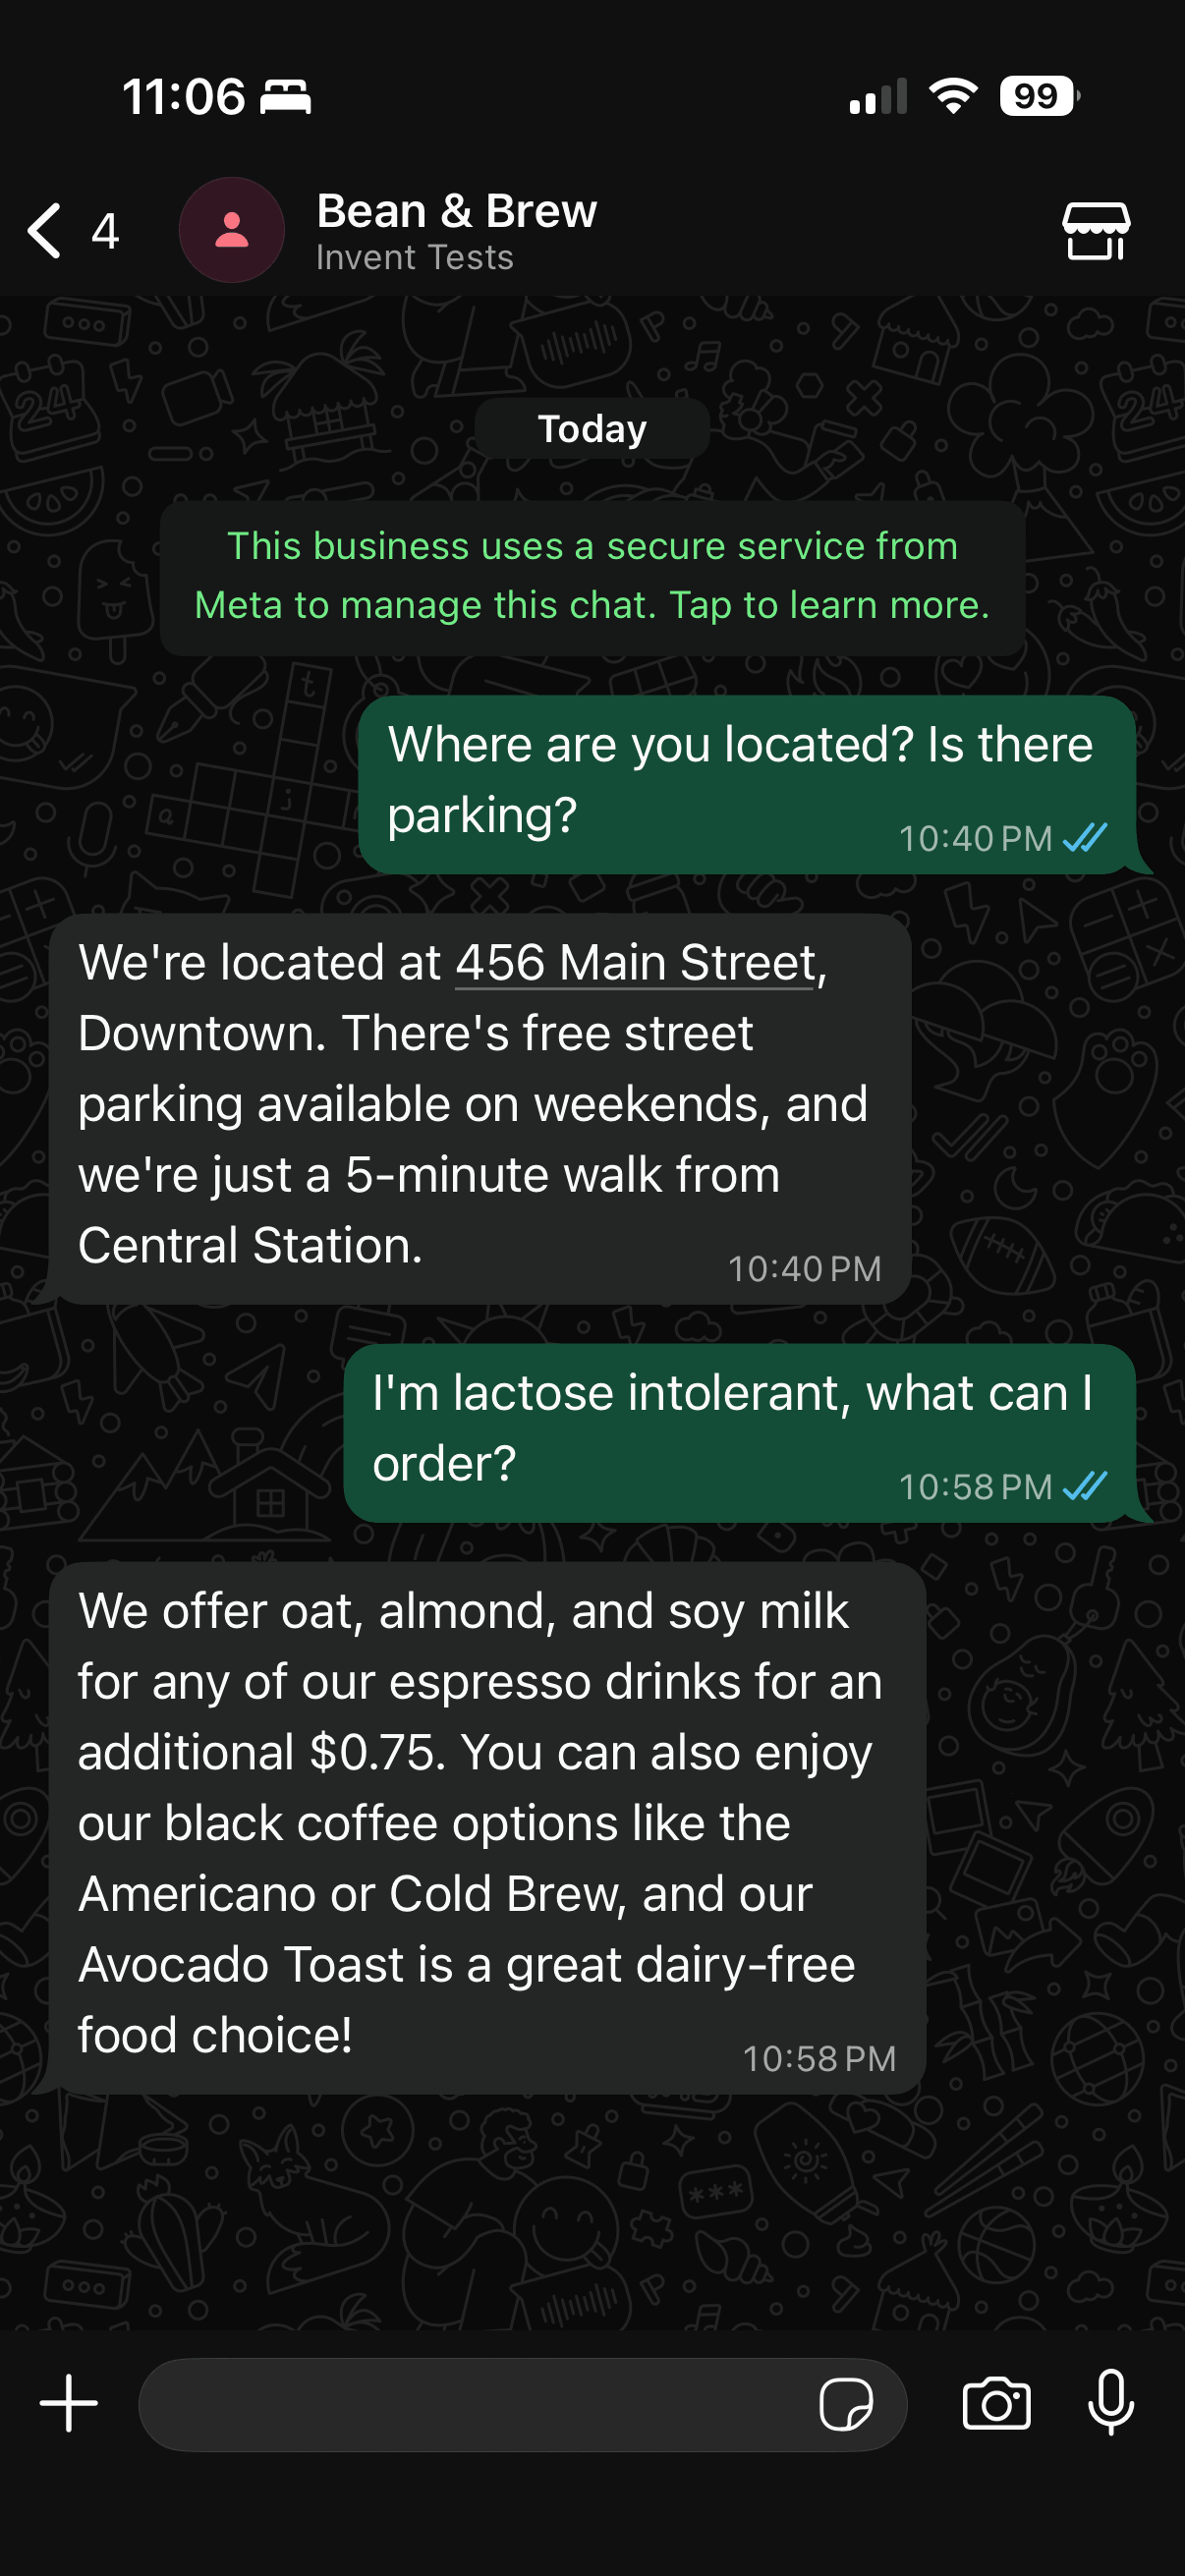
Channel Guides
Each channel has its own authentication screens and requirements. Pick a channel below for the full setup walkthrough, including prerequisites, screenshots, and channel-specific settings.WhatsApp Business
Connect a WhatsApp Business phone number through Meta’s embedded signup and start replying in minutes
Facebook Messenger
Put your assistant on Messenger for your Facebook Page with Meta login and Page authorization
Instagram Direct Messages
Reply to Instagram DMs, Story replies, and Reel shares from a professional account in one popup
Telegram Bot
Spin up a Telegram bot with @BotFather, paste the token, and start replying in under five minutes
TikTok Direct Messages
Answer TikTok DMs from a Business Account, with reply buttons and a 48-hour reply window
More channel guides are on the way. For channels not yet documented here, everything still follows the universal connection flow above: click Connect, authenticate with the provider, name the connection, pick the channel resource (Page, bot, number, etc.), then Connect Channel.
Best Practices
- Start with one channel: get the experience right on a single channel before turning on more.
- Match your customers: add the channels your customers already use, not every channel you can find.
- Keep branding consistent: use the same assistant name and avatar across all channels so the experience feels unified.
- Test every channel after connecting: send a real message from your own device to confirm round-trip works.
- Reuse connections: authenticate once per provider and share the same Connection across every assistant that needs it.
- Monitor the Inbox: check it regularly, especially “Waiting for Human” conversations the AI transferred.
Next Steps
Connections
Manage every authenticated link to external platforms in one place
Capabilities
See everything your assistant can understand and send on each channel
Web Widget
Embed the chat widget on your website with platform-specific install guides
Inbox
Manage every conversation from every channel in one unified space