

Custom domains and “Remove Powered by” branding require a Business or Enterprise plan. The Customization fields (logo, organization name, contact email, address, terms, privacy) are available on every plan, including Pay As You Go. View plans
- Customization: logo, organization name, contact email, address, terms, and privacy links. These values appear to members, in branded emails, in portals, and in invites.
- Domain: the custom domain your team and your customers use to reach the organization. The domain is what unlocks branded emails and a URL that never mentions
useinvent.com. - Modules: which sections of the product are visible in this organization. Shown to members who can manage the organization.
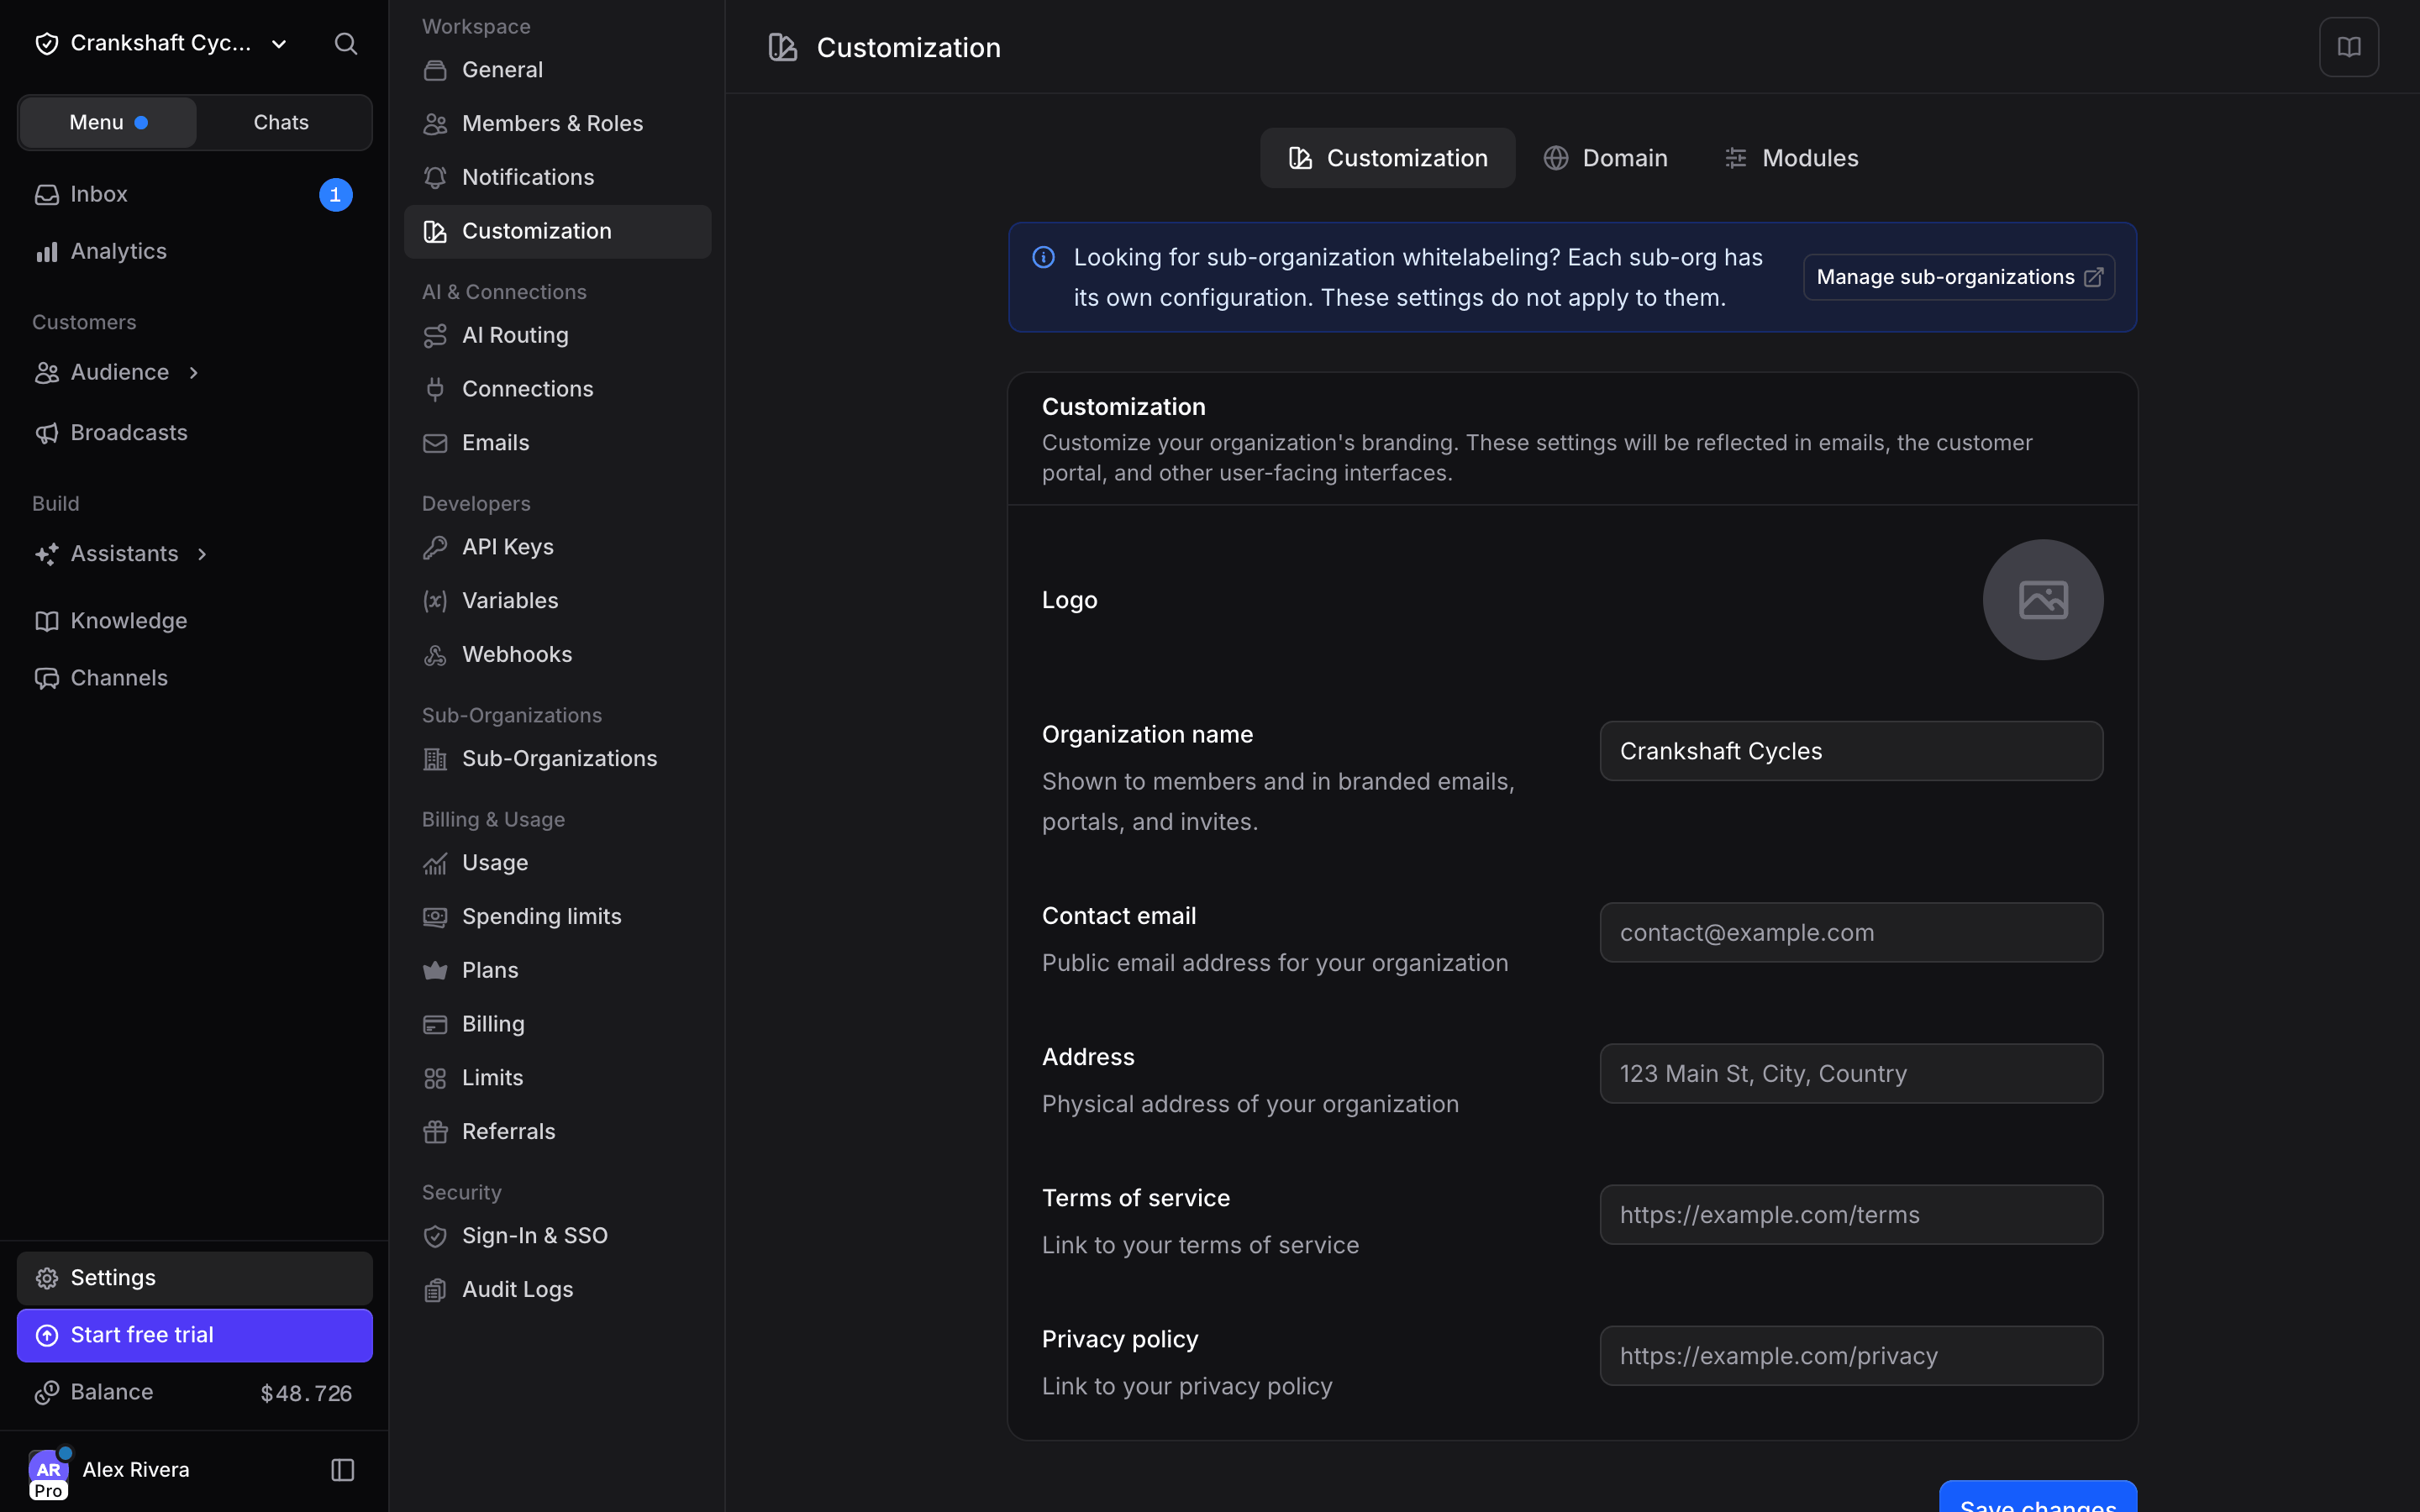
Sub-organizations have their own Whitelabel. The settings on this page apply only to the organization you’re currently in. Every sub-organization has its own Customization and Domain tabs that you configure separately. Jump to Whitelabel for sub-organizations below for the full flow.
Customization
The Customization tab holds the fields that appear wherever Invent renders your brand: the sidebar logo, invitation emails, member-facing pages, and the sign-in screen on your custom domain.
Logo recommendations: SVG for best quality, square (1:1) or landscape (2:1), under 2 MB. PNG and JPG also supported.
Click Save Changes at the bottom to apply your updates. The logo uploads immediately when selected; the text fields save when you click the button.
Domain
A custom domain is what turns an Invent organization into a branded organization. Without it, invitation links still readuseinvent.com/... and outgoing emails still fall back to Invent’s default sender. With it, both switch to your brand.
Access it at useinvent.com/o/settings/customization/domain.
Adding a Domain
1
Pick a subdomain, not your root domain
Use a subdomain like
assistants.yourcompany.com, chat.yourcompany.com, or app.yourcompany.com. Do not use the root (apex) domain itself (yourcompany.com). Most DNS providers do not allow a CNAME record on the root, so the verification fails with a “Custom hostname does not CNAME to this zone” error.2
Click Add Domain
On the Domain tab, click + Add Domain, enter the full hostname (for example 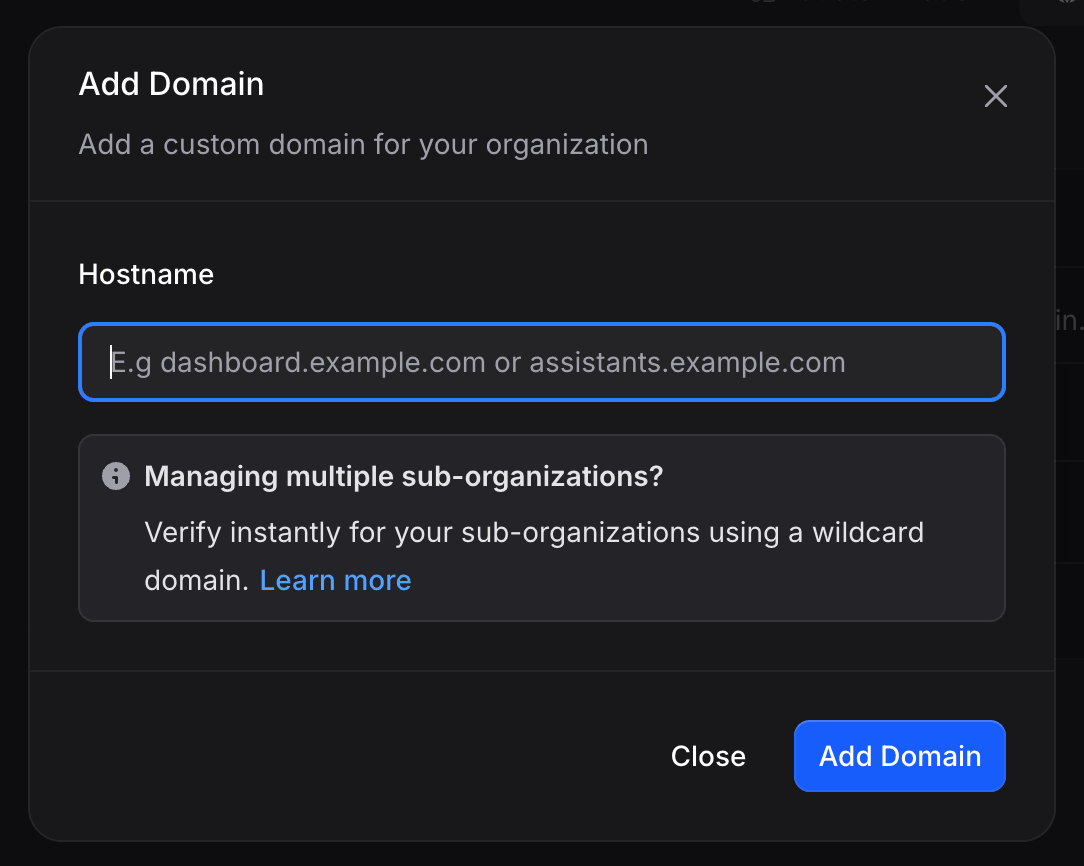
assistants.yourcompany.com), and confirm.3
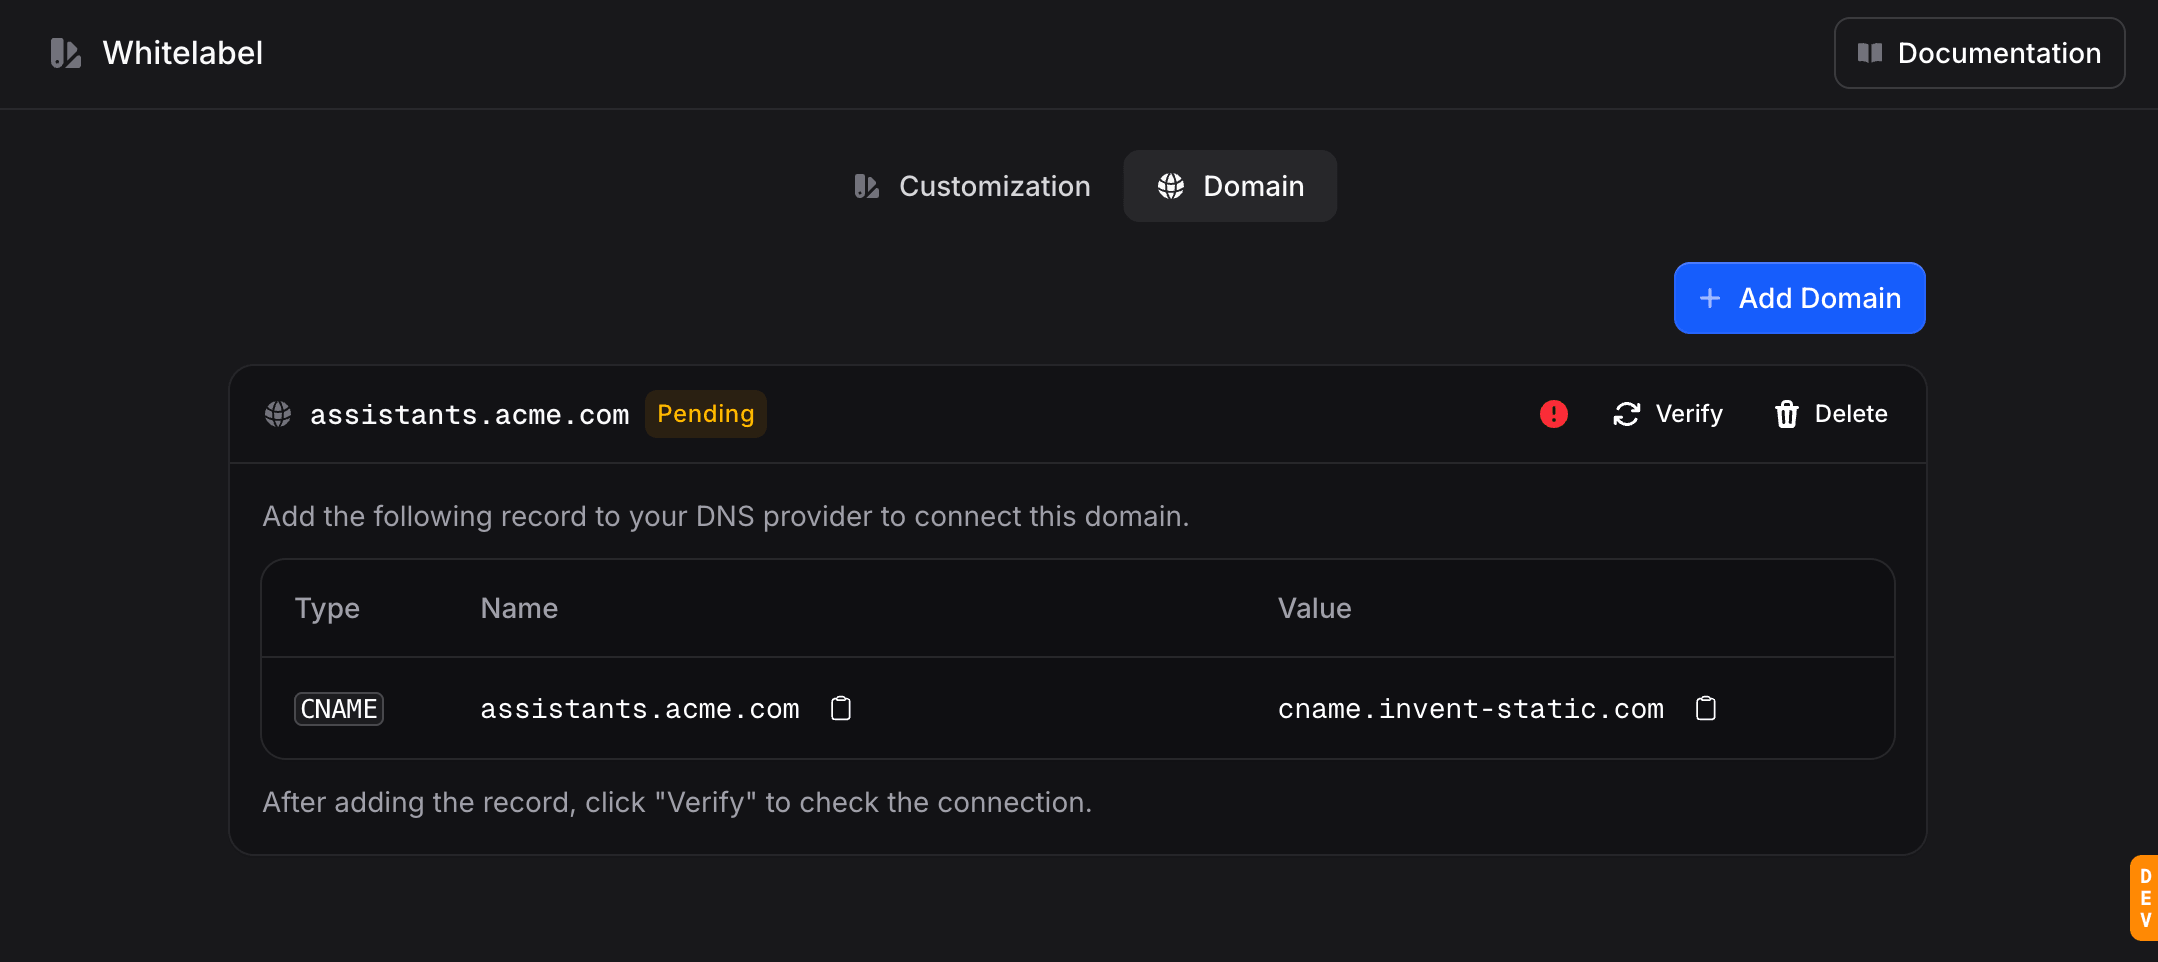
Add the CNAME to your DNS provider
The domain row shows the exact record to add:
4
Verify
Back on the Domain tab, click Verify. DNS usually propagates in a few minutes but can take up to 24 hours. While it’s propagating the domain stays in Pending; once the record resolves, the status flips to Active.
Domain Statuses
What Changes Once the Domain Is Active
- Organization URL: the organization is reachable at
https://assistants.yourcompany.comin addition to the default Invent hostname. Share that URL with your team and clients instead of theuseinvent.comone. - Invitation and notification emails: the “from” name becomes your Organization name (from Customization). The sender address switches from the default Invent sender to a brand-neutral
app-emails.comaddress. Replies route to your Contact email when it is set. - Sign-in on your domain: users signing in from your custom URL see your logo and a sign-in flow with no Invent branding.
Sending from your own address (for example
support@yourcompany.com) is set up under Settings → Emails: once the sender is verified, broadcasts and assistant emails go out from it. Invitation and notification emails on a custom domain still use the neutral app-emails.com sender with your organization name, and replies route to your contact email.Deleting a Domain
Click Delete on the domain row to remove it. The CNAME record in your DNS provider is not touched. Remove it there separately if you don’t plan to reuse the hostname. After deletion, organization links and emails revert to the default Invent branding immediately.When the Subscription Ends
Custom domains are a Business and Enterprise feature. When the subscription ends, by cancellation or downgrade, the domain keeps working for 5 more days. After that, visitors on that hostname see a “Site Unavailable” page until the organization subscribes again. Your DNS record and the domain setup are kept, so nothing has to be added again. A sub-organization’s domain follows the parent organization’s subscription.Modules
The Modules tab turns whole sections of the product on or off for this organization: Inbox, Analytics, Assistants, Knowledge, Broadcasts, Channels, Audience and the rest. A module you turn off disappears from the sidebar for everyone, Admins included, and its pages show a not-available placeholder if someone opens a direct link. Inside a module that is on, each role still sees only what its permissions allow, so Modules is the coarse switch and roles are the fine one.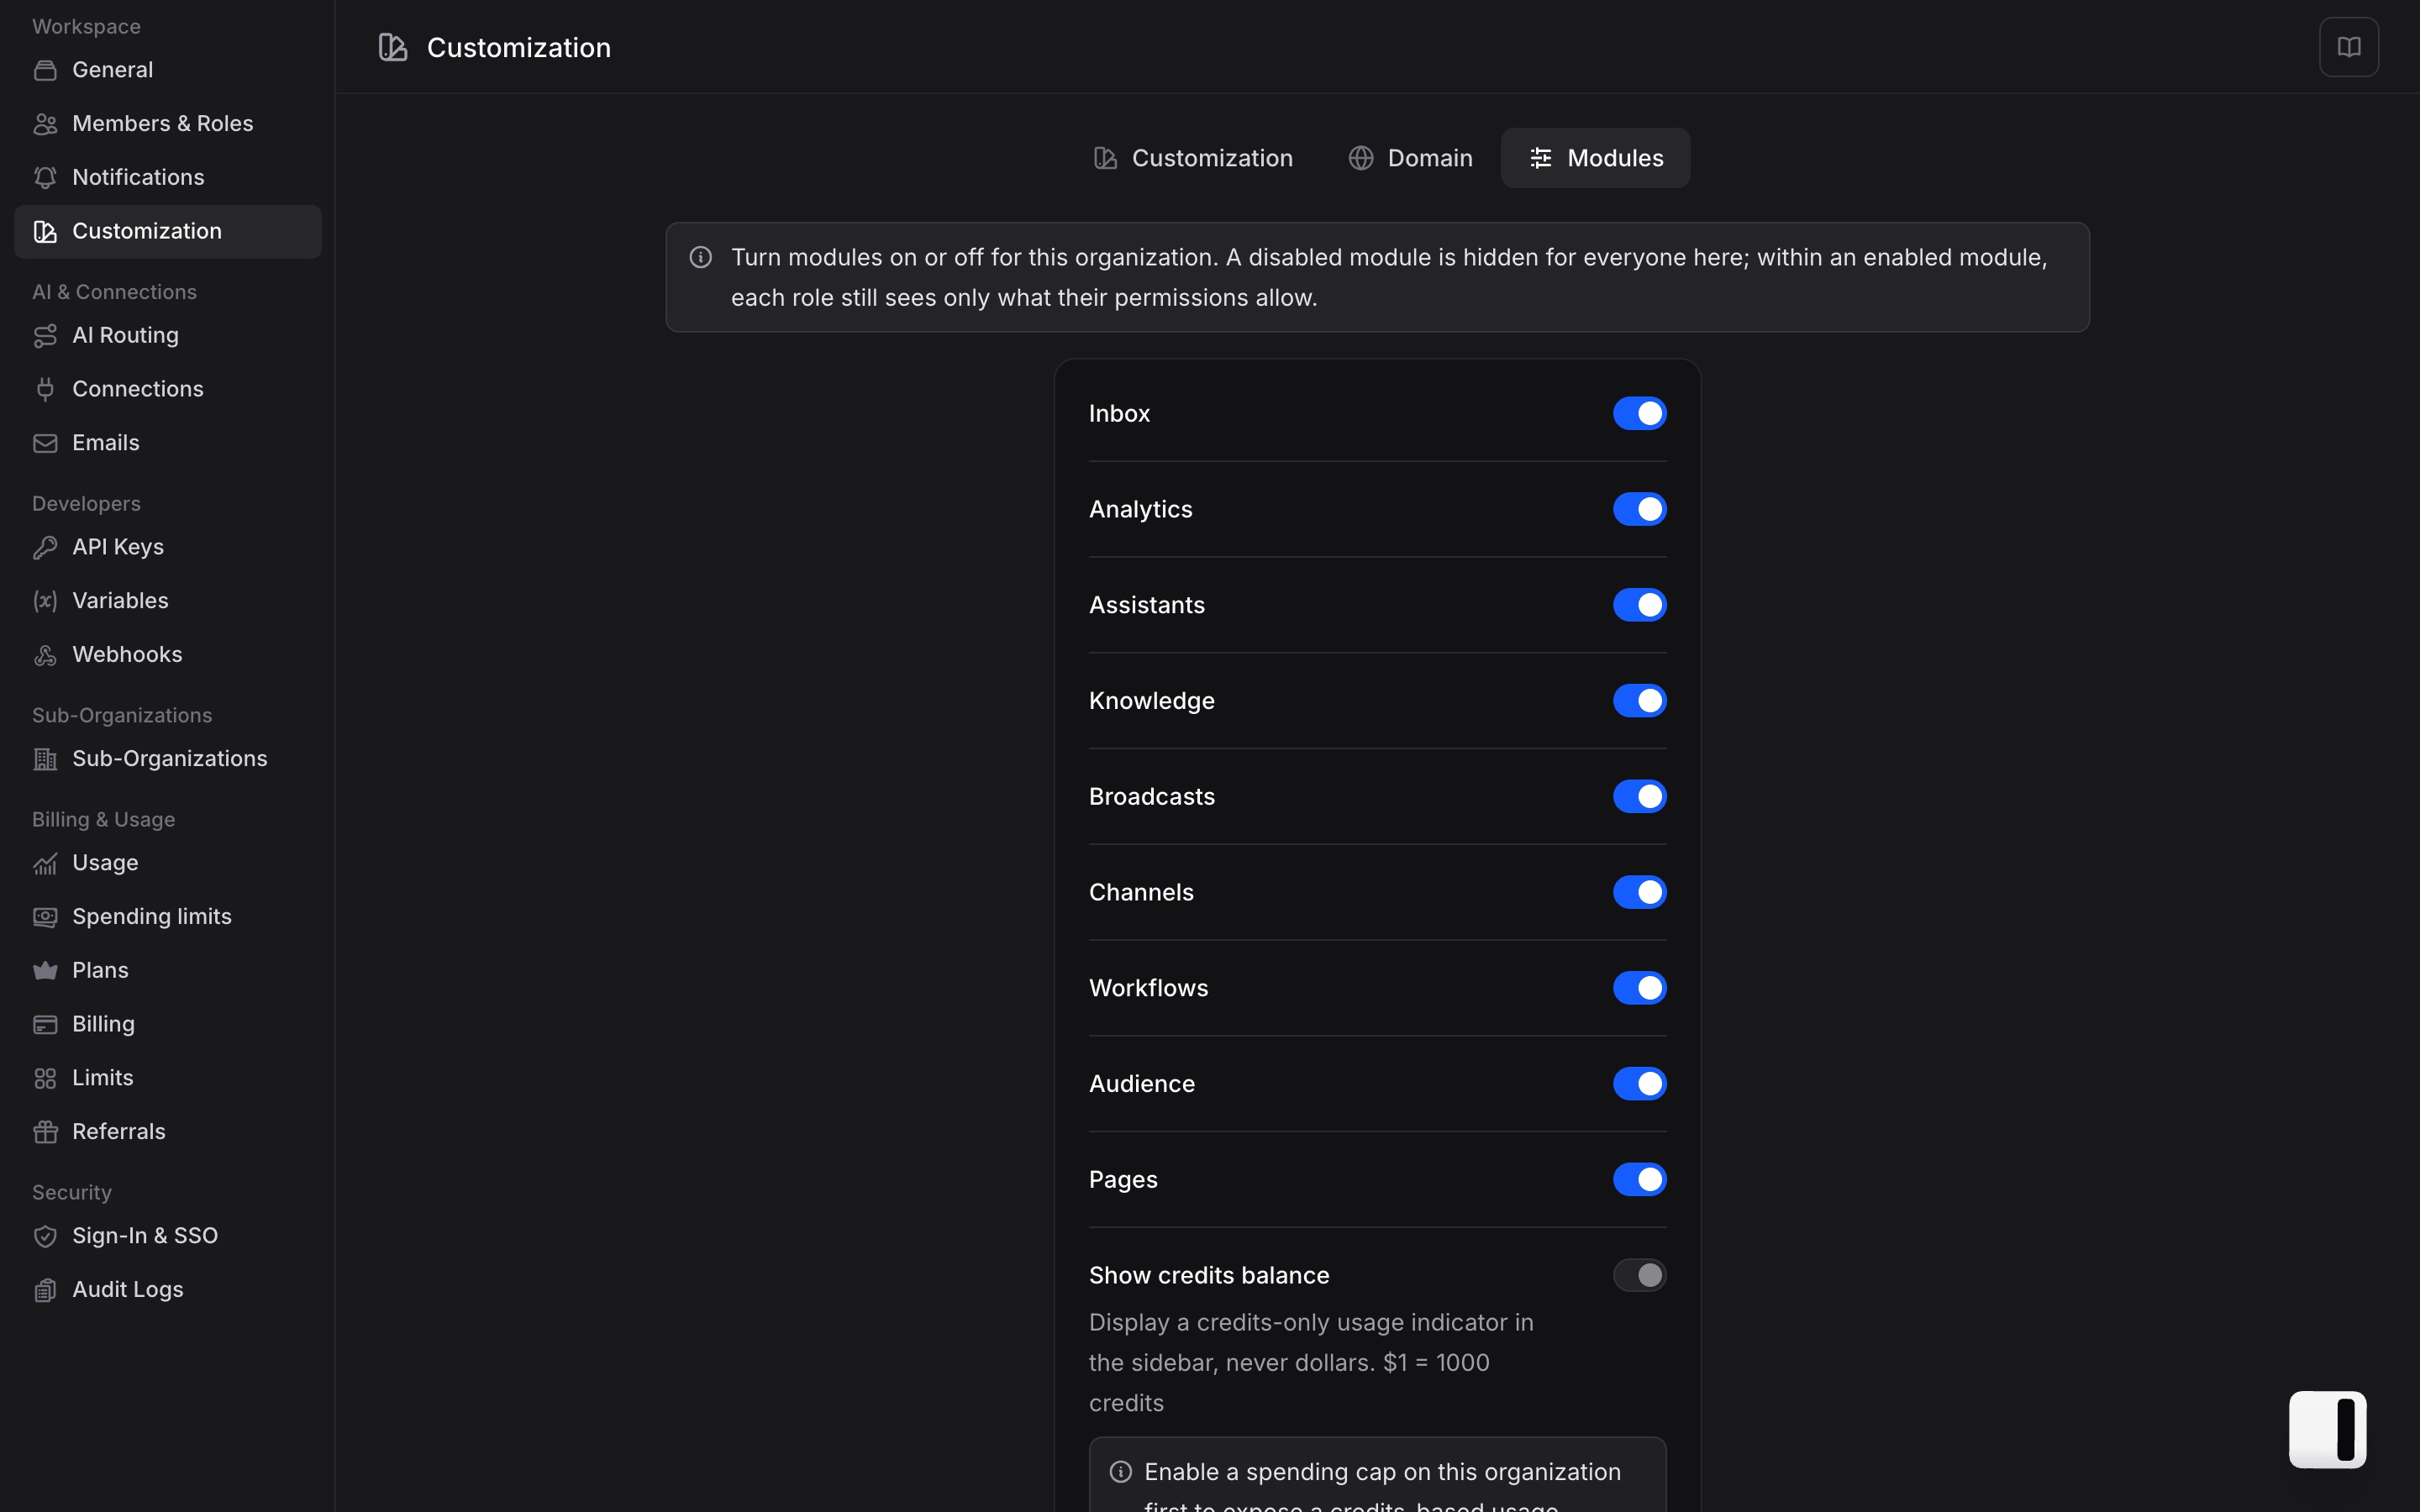
Whitelabel for Sub-Organizations
Branding does not cascade from a parent organization to its sub-organizations. A parent’s logo, name, and domain apply only to the parent. A sub-organization becomes branded once you configure its own Customization and Domain, independently of the parent. This is by design. Each sub-organization is a fully independent organization that can have its own identity, so agencies can run a separate brand per client and companies can run a separate brand per business unit.Where the Sub-Organization Whitelabel Lives
From the parent organization, go to Settings → Sub-Organizations and click the row of the sub-org you want to brand. The row opens that sub-org’s management dashboard, which has its own Customization and Domain tabs, mirroring the parent’s Whitelabel tabs.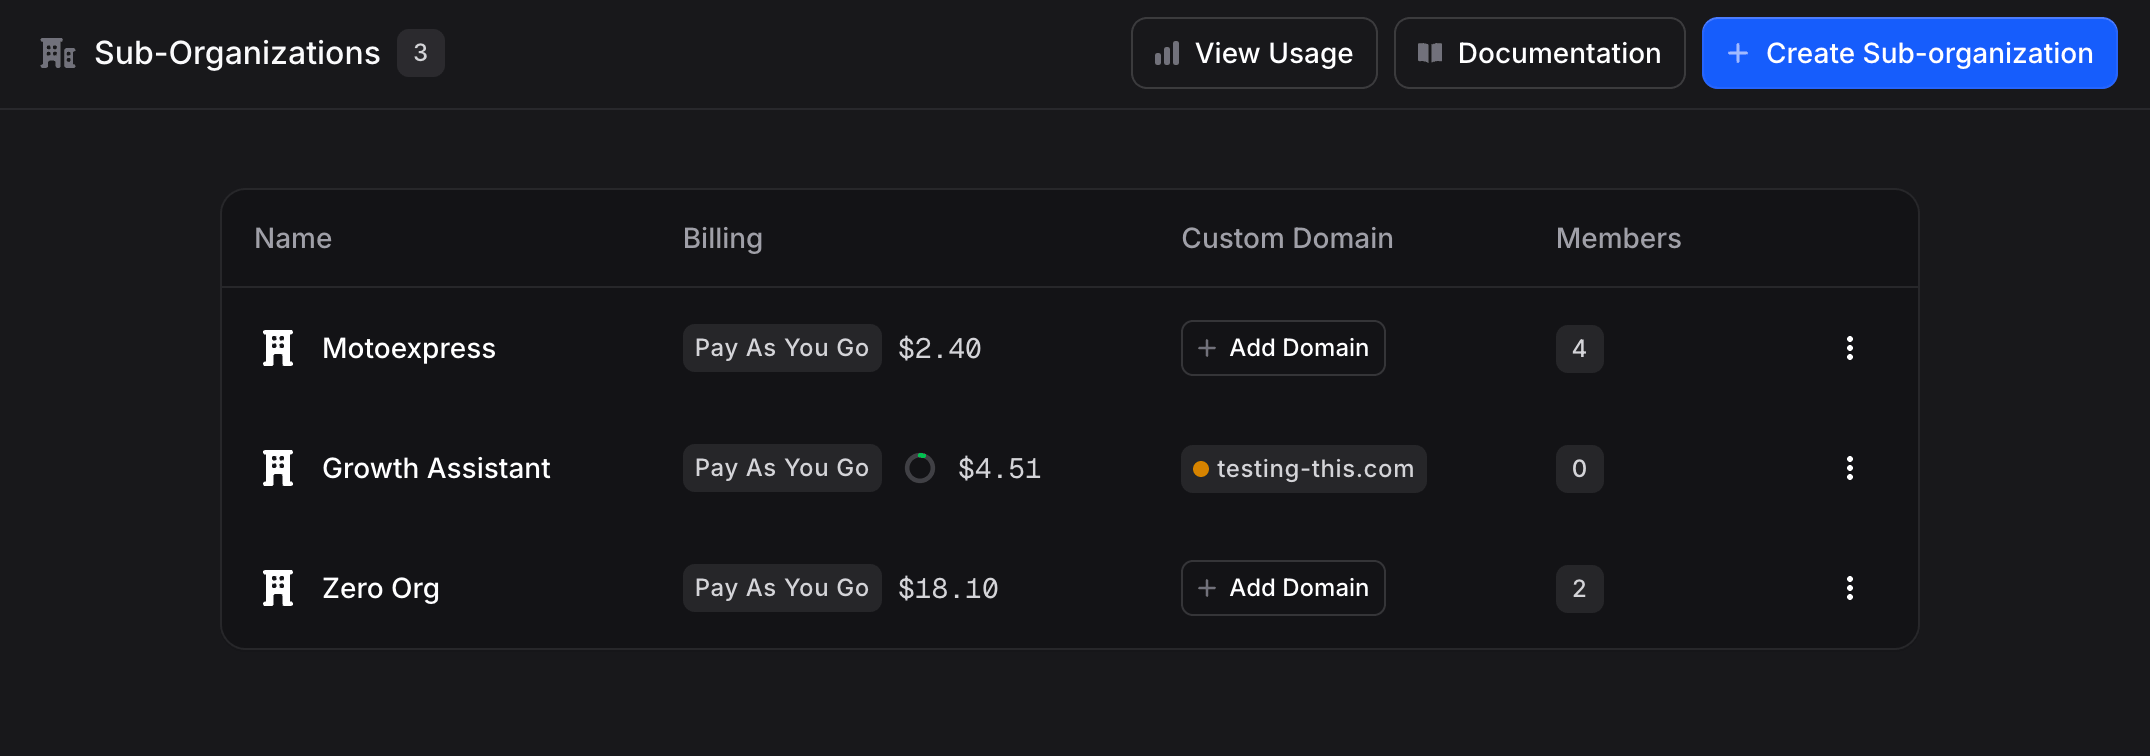
Branding a Sub-Organization End-to-End
1
Open the sub-organization
From the parent organization, go to Settings → Sub-Organizations and click the row of the sub-org you want to brand. Its management dashboard opens with Overview, Members, Roles, Customization, Domain, Modules, and Billing tabs.
2
Fill in Customization
Open the Customization tab and set the sub-org’s own Logo, Organization name, Contact email, Address, Terms of service, and Privacy policy. These are the same fields described in Customization above.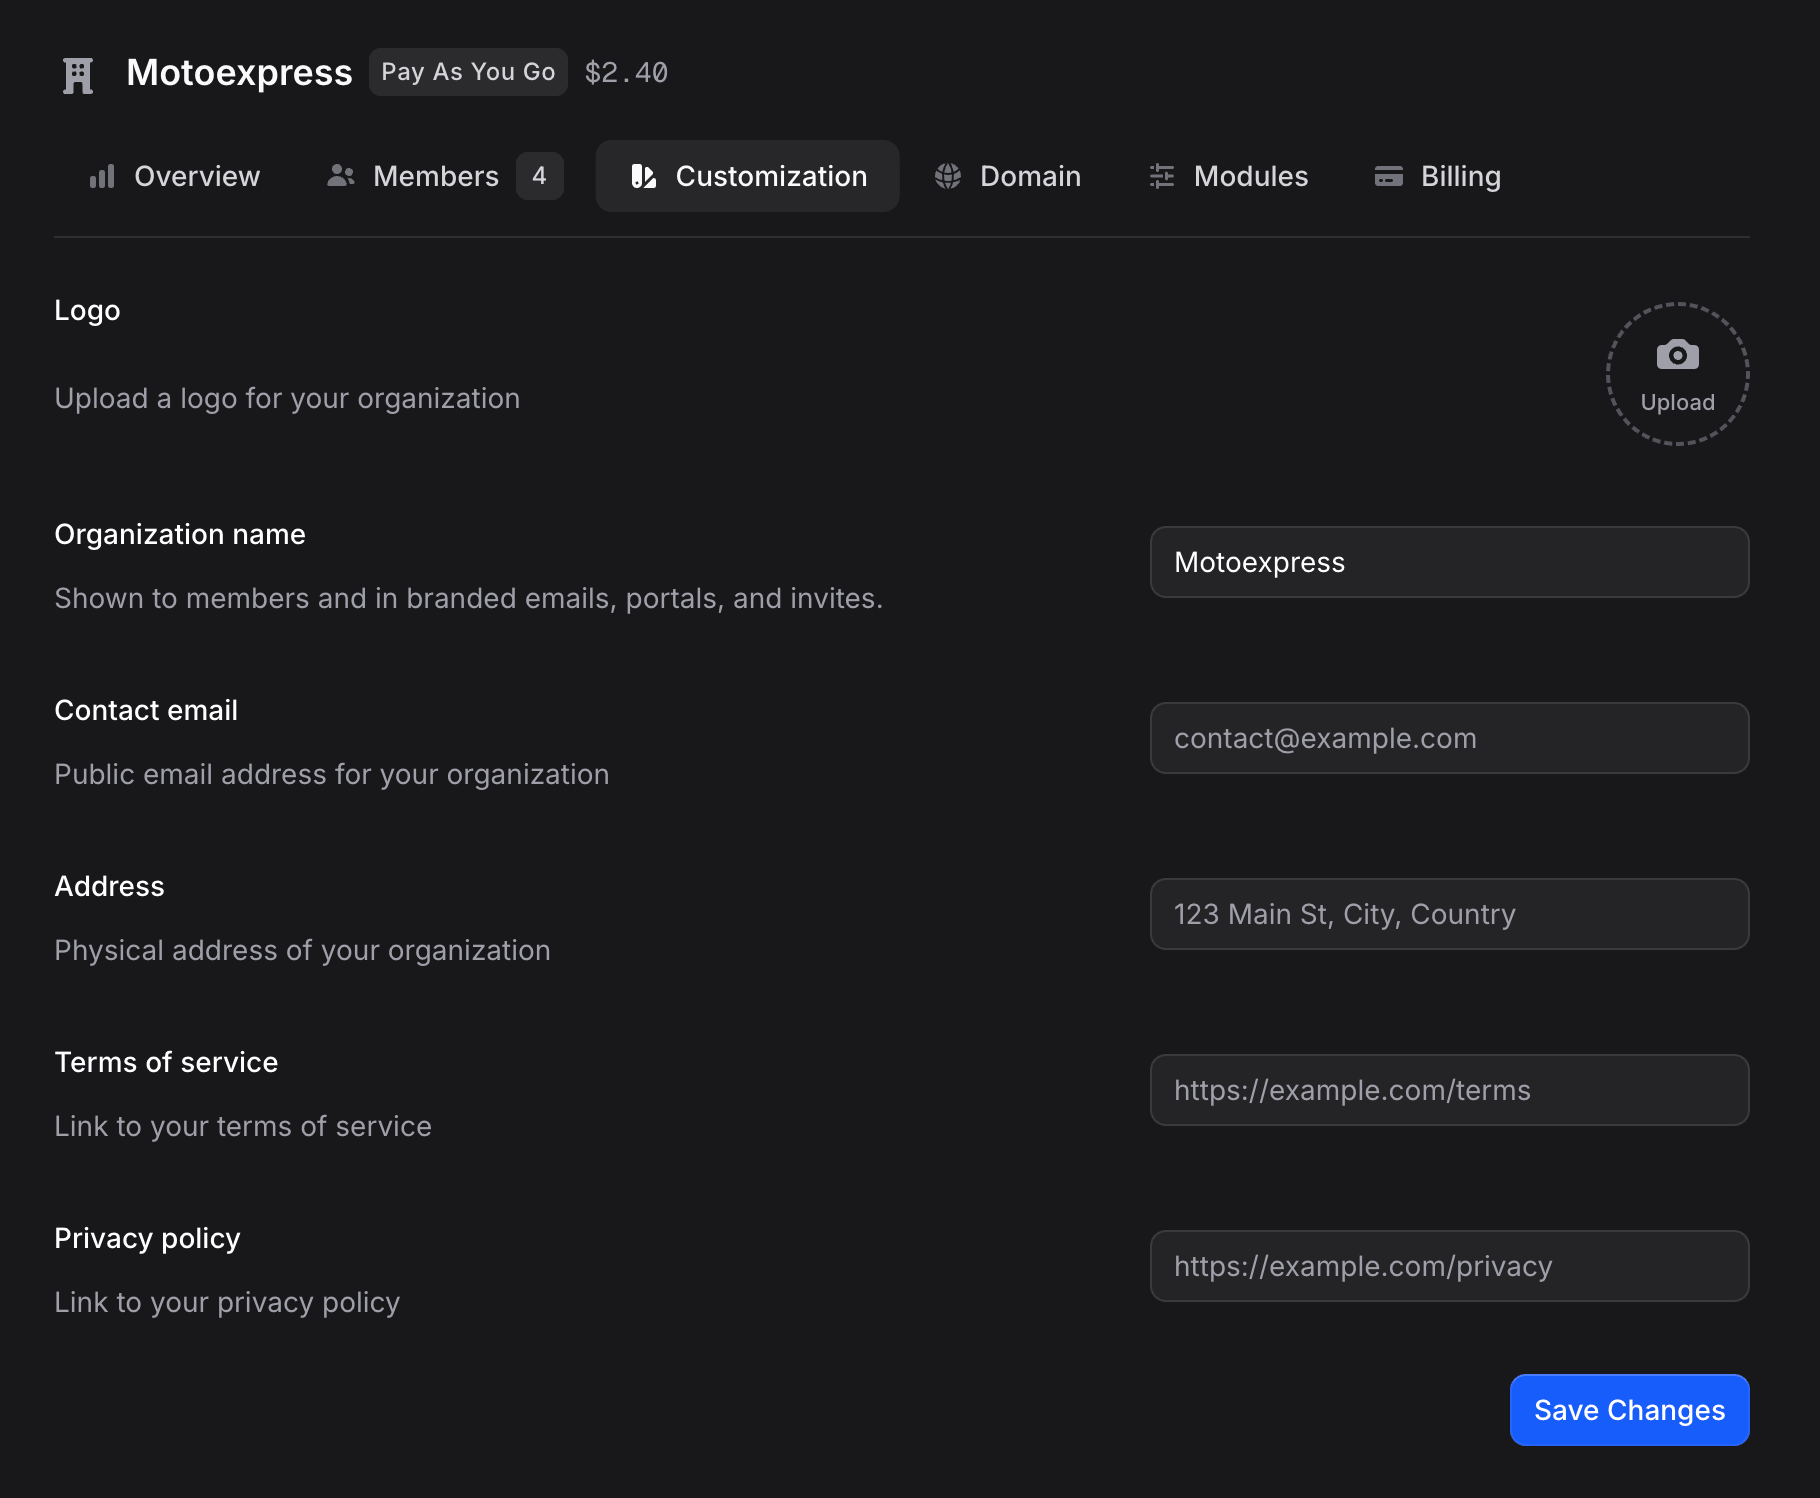
3
Add a custom domain on the Domain tab
Open the Domain tab, click + Add Domain, and enter a hostname dedicated to this sub-org, for example 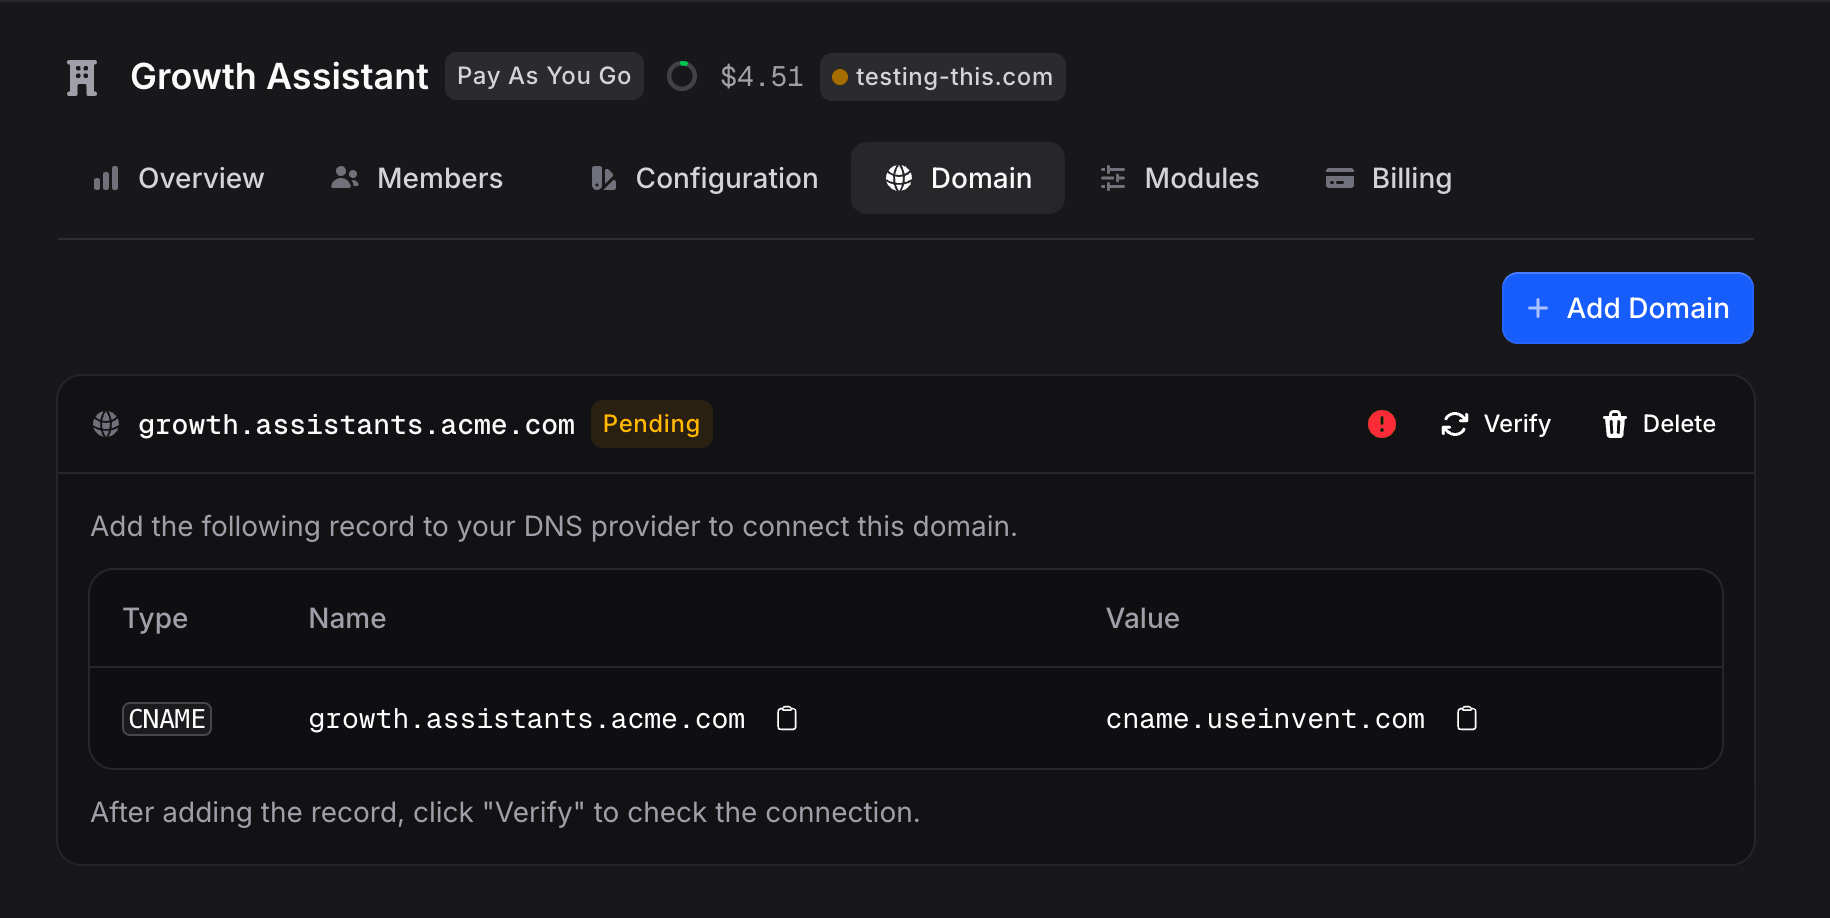
acme.assistants.yourcompany.com. Then add the CNAME record shown in the Pending row, exactly as described in Adding a Domain above.useinvent.com/... even if the parent has a custom domain.4
Invite members
Once Customization is filled and the sub-org’s domain is Active, new invitations sent from this sub-org carry its logo, its organization name as the sender, a brand-neutral
app-emails.com sender address, and a sign-in link on its custom hostname. Invite members from the sub-org’s Members tab.Wildcard for Agencies
If you plan to run many sub-organizations, each under its own hostname likeacme.assistants.yourcompany.com, brightsmile.assistants.yourcompany.com, or so-easy.assistants.yourcompany.com, add one wildcard CNAME in your DNS provider and every sub-org hostname verifies instantly with no DNS change per client.
Step 1: Add the wildcard record in your DNS provider
In your DNS provider (not in Invent), add a single wildcard CNAME on a dedicated prefix:assistants.yourcompany.com → cname.useinvent.com) alongside the wildcard.
Step 2: Add the hostname to each sub-organization
For each sub-organization:- From the parent organization, go to Settings → Sub-Organizations and click the sub-org’s row. Its management dashboard opens.
- Open the Domain tab.
- Click + Add Domain and enter a hostname under your wildcard prefix, for example
acme.assistants.yourcompany.com. - The domain verifies instantly because the wildcard CNAME is already pointing at Invent. No per-sub-org DNS change required.
Plan Availability
Troubleshooting
'Custom hostname does not CNAME to this zone'
'Custom hostname does not CNAME to this zone'
You’re trying to verify a root (apex) domain like
yourcompany.com. Most DNS providers do not allow a CNAME on the root. Use a subdomain instead (for example assistants.yourcompany.com, chat.yourcompany.com, or app.yourcompany.com) and add the CNAME under that name.Cloudflare: verification keeps failing even though the CNAME is correct
Cloudflare: verification keeps failing even though the CNAME is correct
Cloudflare proxies CNAME records by default (the orange cloud ☁️). Invent needs to terminate TLS directly, so switch the proxy status to DNS only (grey cloud ☁️) and click Verify again.
The invitation email from my sub-organization still shows 'Invent' as the sender
The invitation email from my sub-organization still shows 'Invent' as the sender
Invitation emails for a sub-organization are branded from that sub-organization’s own Whitelabel, not the parent’s. Open the sub-org, fill in its Customization tab, and add a verified domain on its Domain tab. Until the sub-org has its own domain added, its invitation emails fall back to the default Invent sender. Branding a Sub-Organization End-to-End →
'No Organizations Available' after signing in on my custom domain
'No Organizations Available' after signing in on my custom domain
A custom domain only serves the organization that owns it. If the user’s account is not a member of that organization, they see this screen. Invite them from Settings → Members & Roles in the organization that owns the domain, and have them accept the invite before signing in through the custom URL again.
Verification has been pending for a long time
Verification has been pending for a long time
DNS normally propagates in minutes but can take up to 24 hours. Run
dig CNAME assistants.yourcompany.com (or any DNS lookup tool) to confirm the record resolves to cname.useinvent.com globally before clicking Verify again.'Powered by Invent' badge still shows in the preview
'Powered by Invent' badge still shows in the preview
The preview inside the dashboard always shows the badge. It is removed on the live widget on any website where your users actually embed it, and on any assistant accessed through your custom domain. Check a live embed or the custom-domain URL in an incognito window to confirm.
Next Steps
Sub-Organizations
Run independent sub-organizations for each client or team, each with its own branding
Members
Invite teammates so they land on your branded organization on first sign-in