
The Broadcasts Dashboard
The Broadcasts page shows all your broadcasts in a clean table:| Column | Description |
|---|---|
| Name | The name you gave your broadcast |
| Status | Current state: Draft, Scheduled, or Sent |
| Recipients | Number of contacts who will receive (or have received) this broadcast |
| Channels | Icons showing which channels are configured (WhatsApp, etc.) |
| Sent At | When the broadcast was sent (or - if not yet sent) |
| Created At | When the broadcast was created |
Creating a Broadcast
Click + Create Broadcast
Click the + Create Broadcast button in the top-right corner. A new broadcast is created in Draft status, and you’re taken to the broadcast editor.
Name your broadcast
Give your broadcast a descriptive name at the top of the page (e.g., “Product Launch Announcement”, “Black Friday Sale”, “Monthly Newsletter”).
Audience
The Audience section determines who receives your broadcast.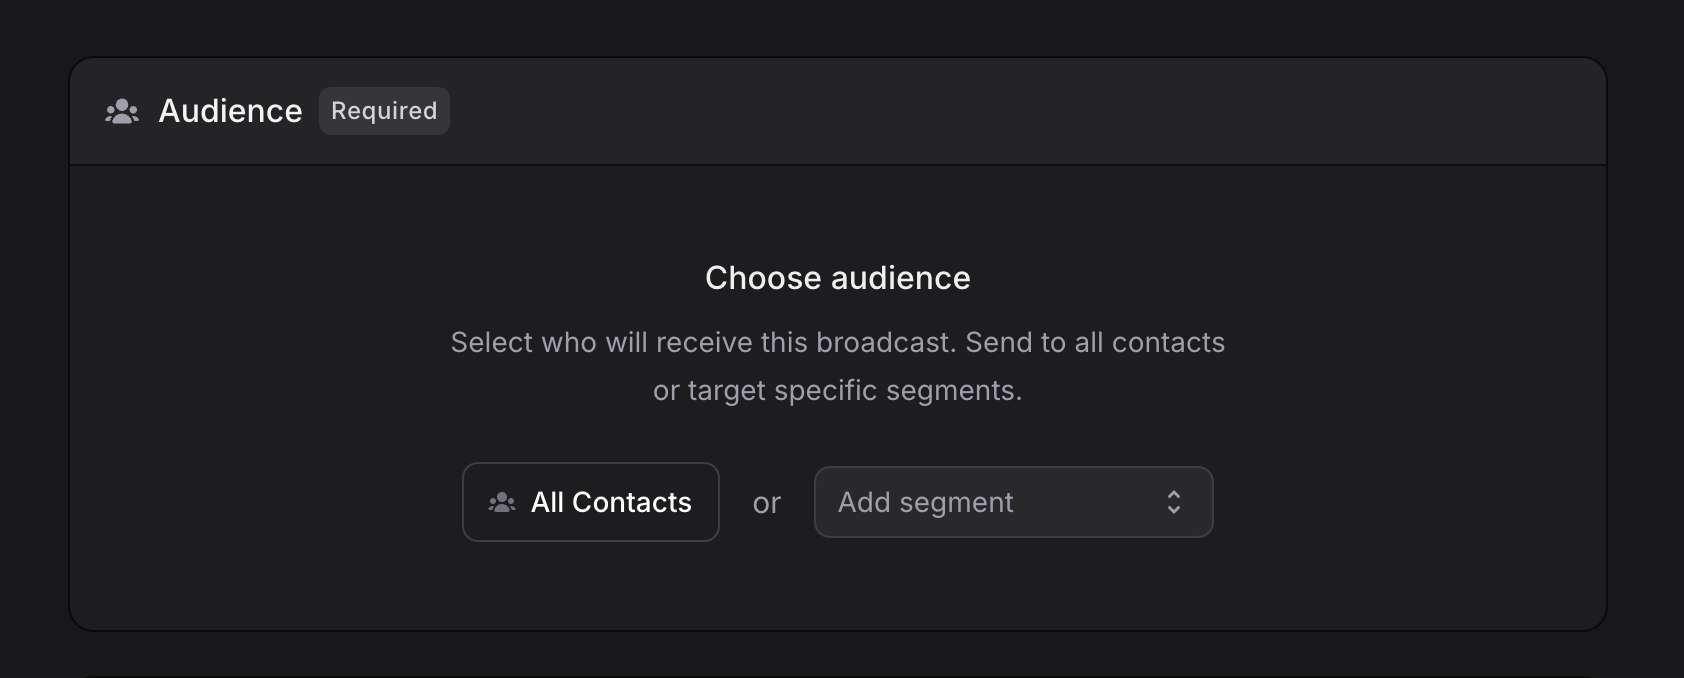
Audience Guide
Learn more about managing your contacts and segments in the Audience guide.
All Contacts
Click All Contacts to send the broadcast to every contact in your audience. Once selected, you’ll see “All Contacts” displayed with a Change button to modify your selection later.Specific Segments
Click the Add segment dropdown to target specific groups. You can:- Search for a segment by name using the search field
- Select one or more segments from the dropdown list
- Add multiple segments to broaden your reach
- The segment name
- The number of contacts in that segment
- A View button to preview the contacts
- An x button to remove the segment
Channels
Channels determine how your broadcast message is delivered. You must configure at least one channel, and you can add multiple channels to reach your audience across different platforms in a single broadcast.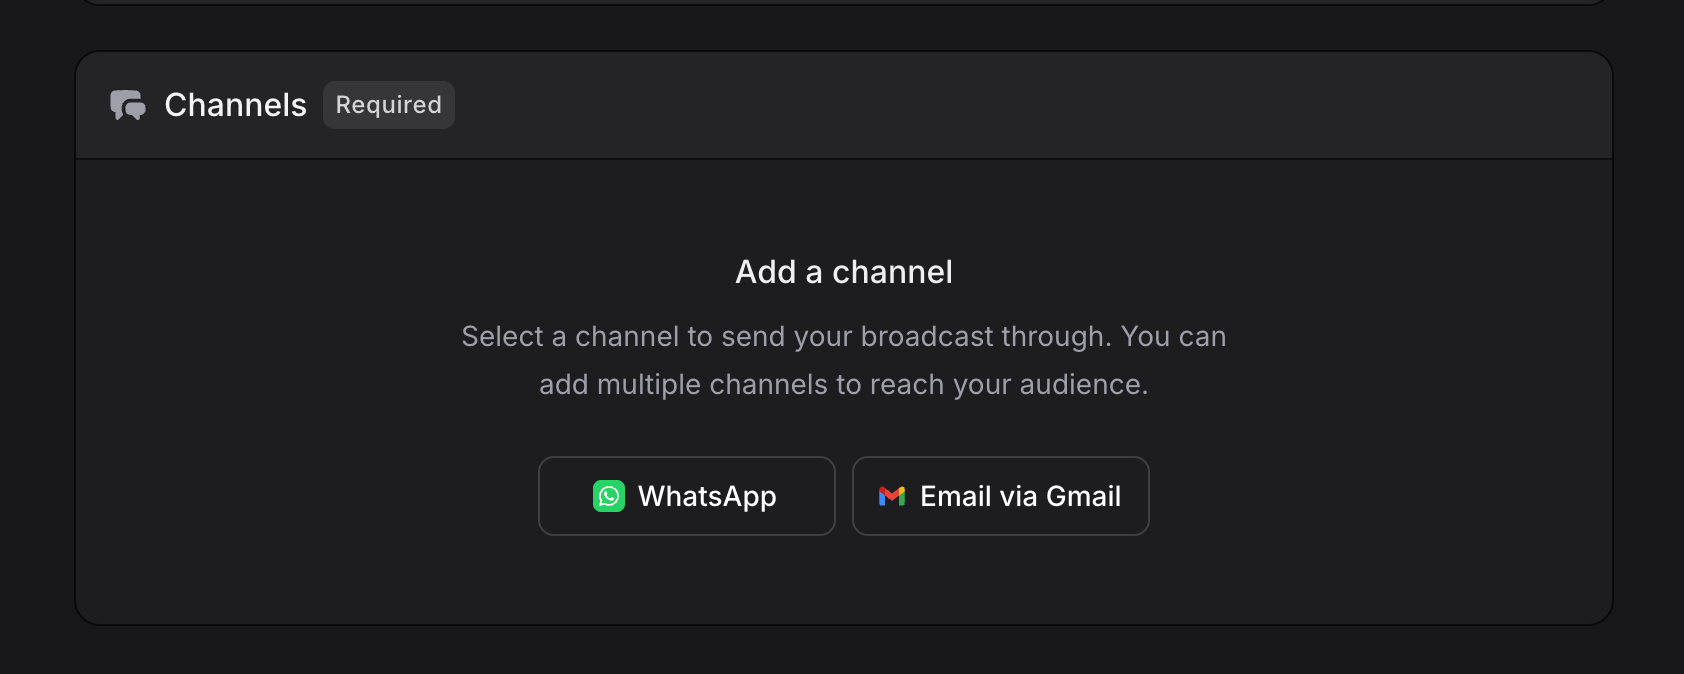
Available Channels
Currently supported broadcast channels:| Channel | Description |
|---|---|
| Send messages via approved WhatsApp Templates |
More broadcast channels are coming soon. Stay tuned for additional ways to reach your audience.
Adding Multiple Channels
You can send a single broadcast through multiple channels at once. After adding your first channel, click + Add Channel to add another one. Each channel is configured independently with its own template and settings. This means you can reach your audience across different platforms simultaneously, all from one broadcast.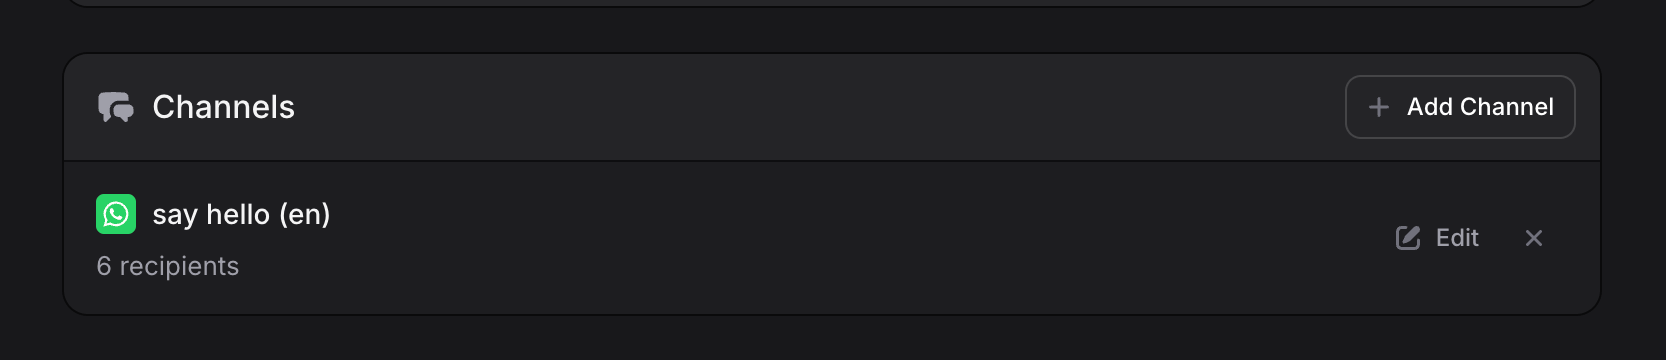
Editing a Channel
After a channel is added, you can:- Click Edit to modify the template, variables, or settings
- Click x to remove the channel from this broadcast
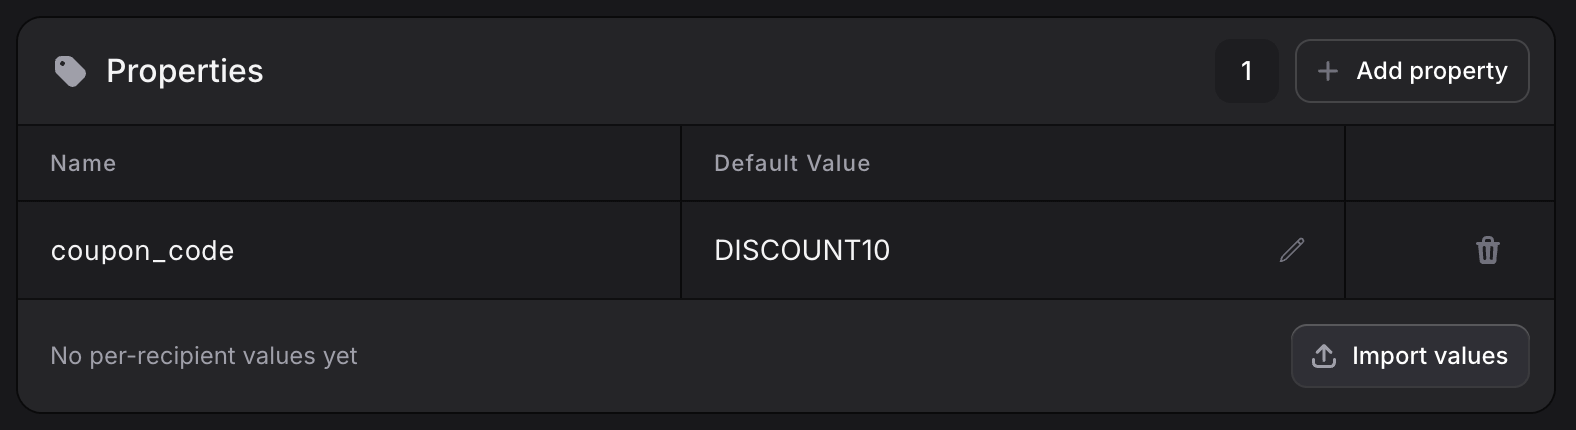
Properties
Properties let you personalize each message with per-recipient values. Think of properties as custom variables that can be different for every contact, like a unique coupon code, a personalized product link, or an account balance.Add properties like
coupon_code or product_url to personalize each message with per-recipient values.Adding a Property
Enter the property name
Type a name for your property (e.g.,
coupon_code, product_url, account_balance).Set a default value
Enter a default value that will be used for any recipient who doesn’t have a specific value assigned.
Importing Property Values
Instead of setting values one by one, you can bulk import per-recipient property values from a spreadsheet:Upload your file
Drag and drop a .csv, .xlsx, or .xls file. Your file should contain a column to identify recipients (email or phone) and columns for each property value.
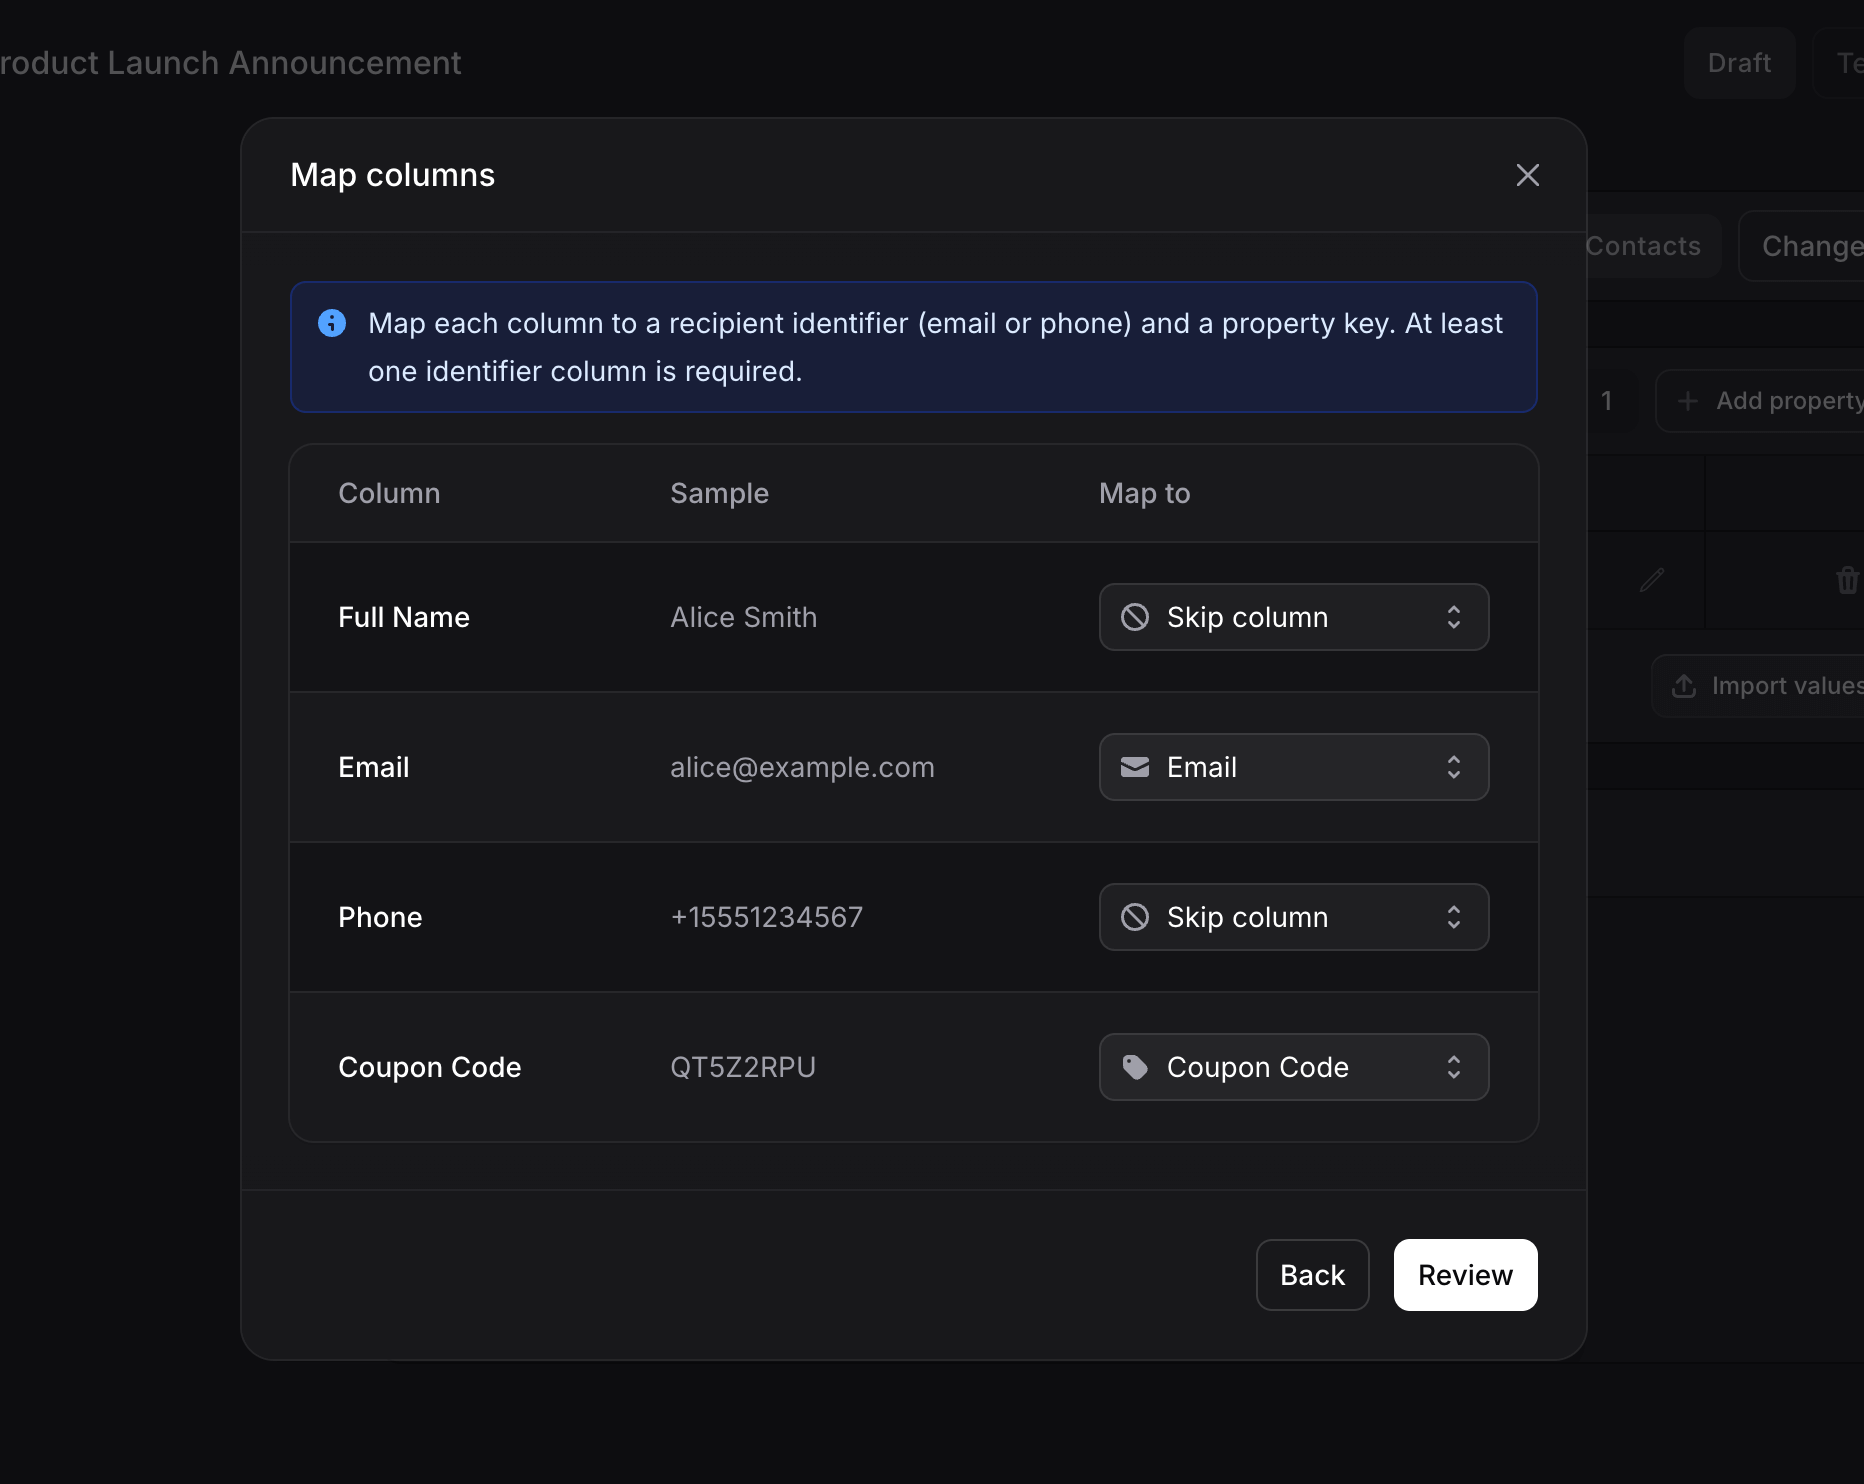
Map your columns
A mapping dialog appears where you map each column from your file:
- Recipient identifier: Map at least one column to Email or Phone so Invent knows which contact each row belongs to
- Property values: Map columns to your broadcast properties (e.g., map a “Coupon Code” column to your
coupon_codeproperty) - Skip column: Choose “Skip column” for any columns you don’t need
At least one identifier column (Email or Phone) is required so Invent can match each row to the correct recipient.
- View Uploaded Values button with a count badge showing how many values were uploaded
- Clear button to remove all uploaded values
- Replace values button to upload a new file that replaces the existing values
Using Properties in Templates
Once you’ve added properties to your broadcast, they become available as template variables when configuring your channel messages. For example, if you add acoupon_code property, you can insert it into your WhatsApp template variables alongside built-in variables like Contact Name and Phone.
Testing Your Broadcast
Before sending to your entire audience, you can test your broadcast to make sure everything looks right.Click the Test button
Click Test in the top-right corner of the broadcast editor (next to Draft and Schedule Broadcast).
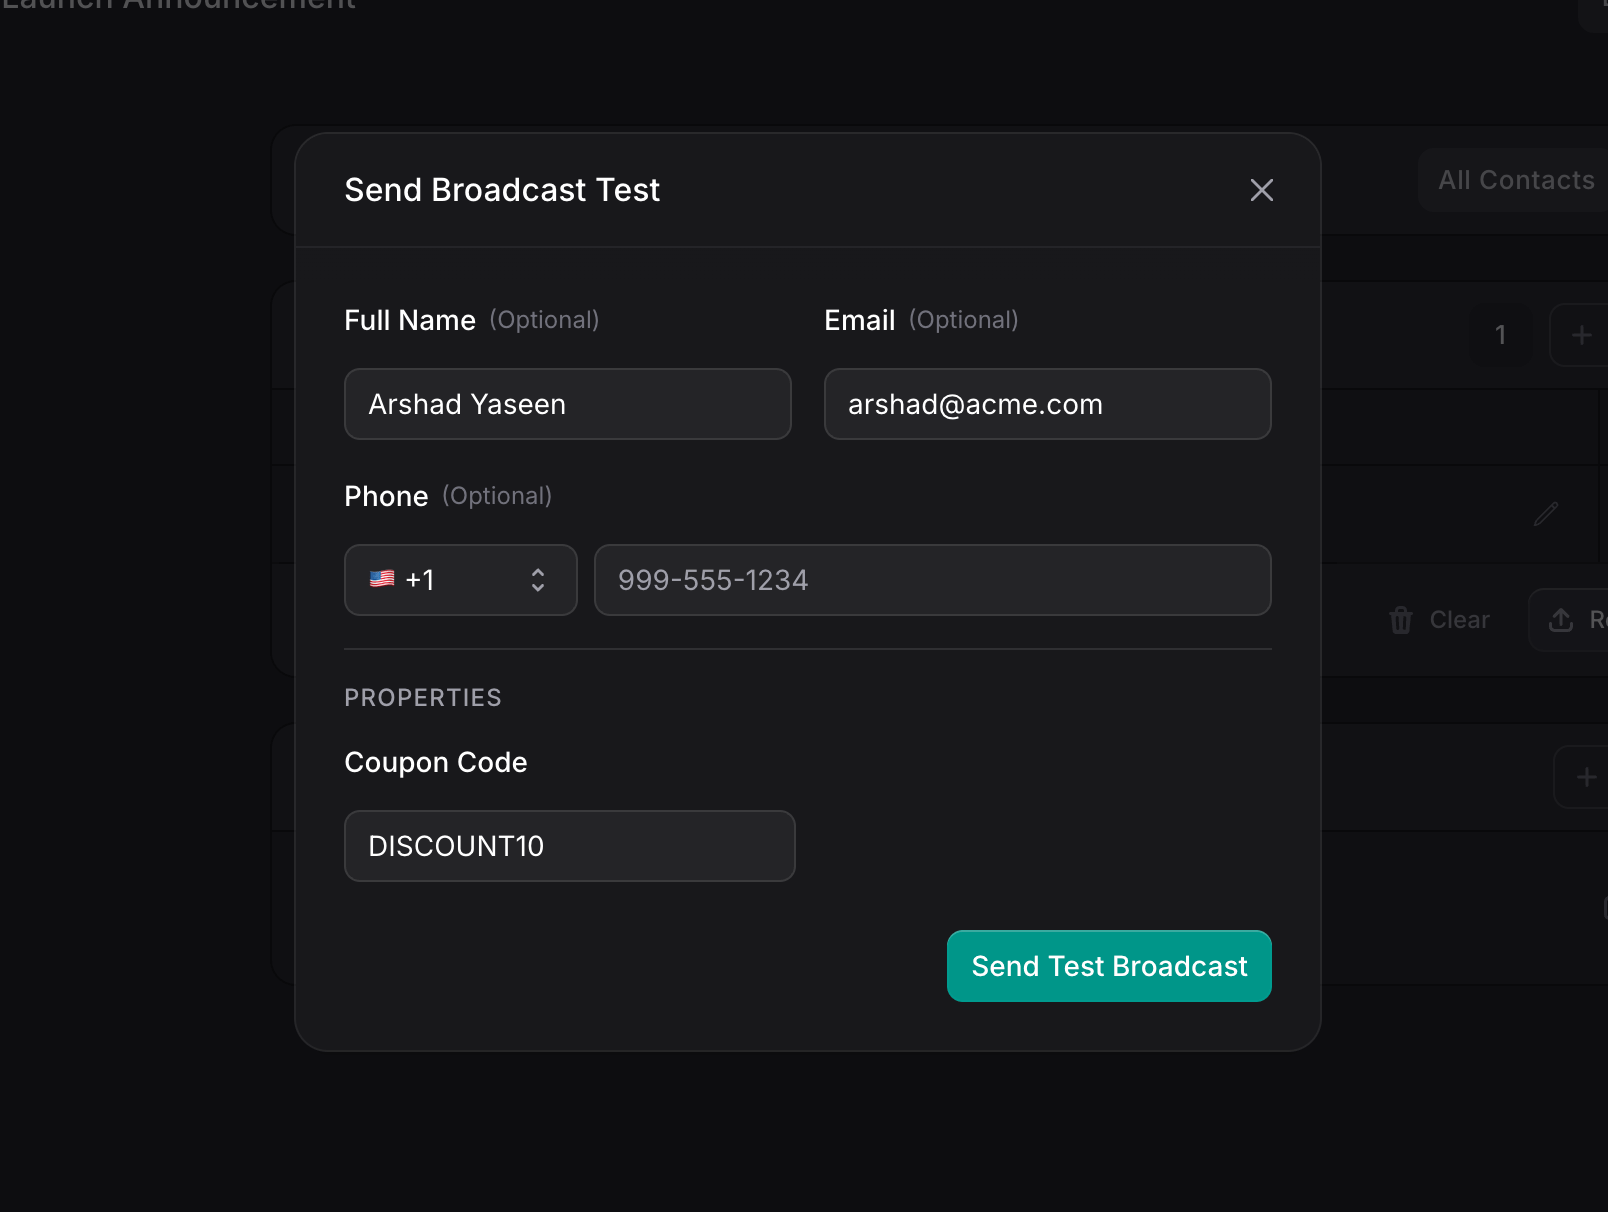
Enter test recipient details
A dialog opens with fields for:
- Full Name (Optional): A test name for the recipient
- Phone (Optional): The phone number to receive the test (with country code selector)
Sending or Scheduling Your Broadcast
Once your audience, properties, and channels are configured, it’s time to send. Click Schedule Broadcast in the top-right corner to open the send dialog.
Timing Options
Choose when your broadcast should be sent: Quick options:- Immediately: Send right now
- In 5 minutes: A short delay
- In 30 minutes: Send in half an hour
- In 1 hour: Send in an hour
- Tomorrow 9:00 AM: Schedule for the next morning
- Tomorrow 12:00 PM: Schedule for noon tomorrow
- Tomorrow 3:00 PM: Schedule for the afternoon
- Tomorrow 6:00 PM: Schedule for the evening
mm/dd/yyyy, --:-- --.
Send Confirmation
Before sending, the dialog shows a clear summary:- A status message: “Broadcast will be sent immediately” or “Scheduled for Mar 3, 26 08:58 PM”
- A recipient summary: “Sending to X recipient via WhatsApp” (showing the channel and count)
Scheduled Broadcasts
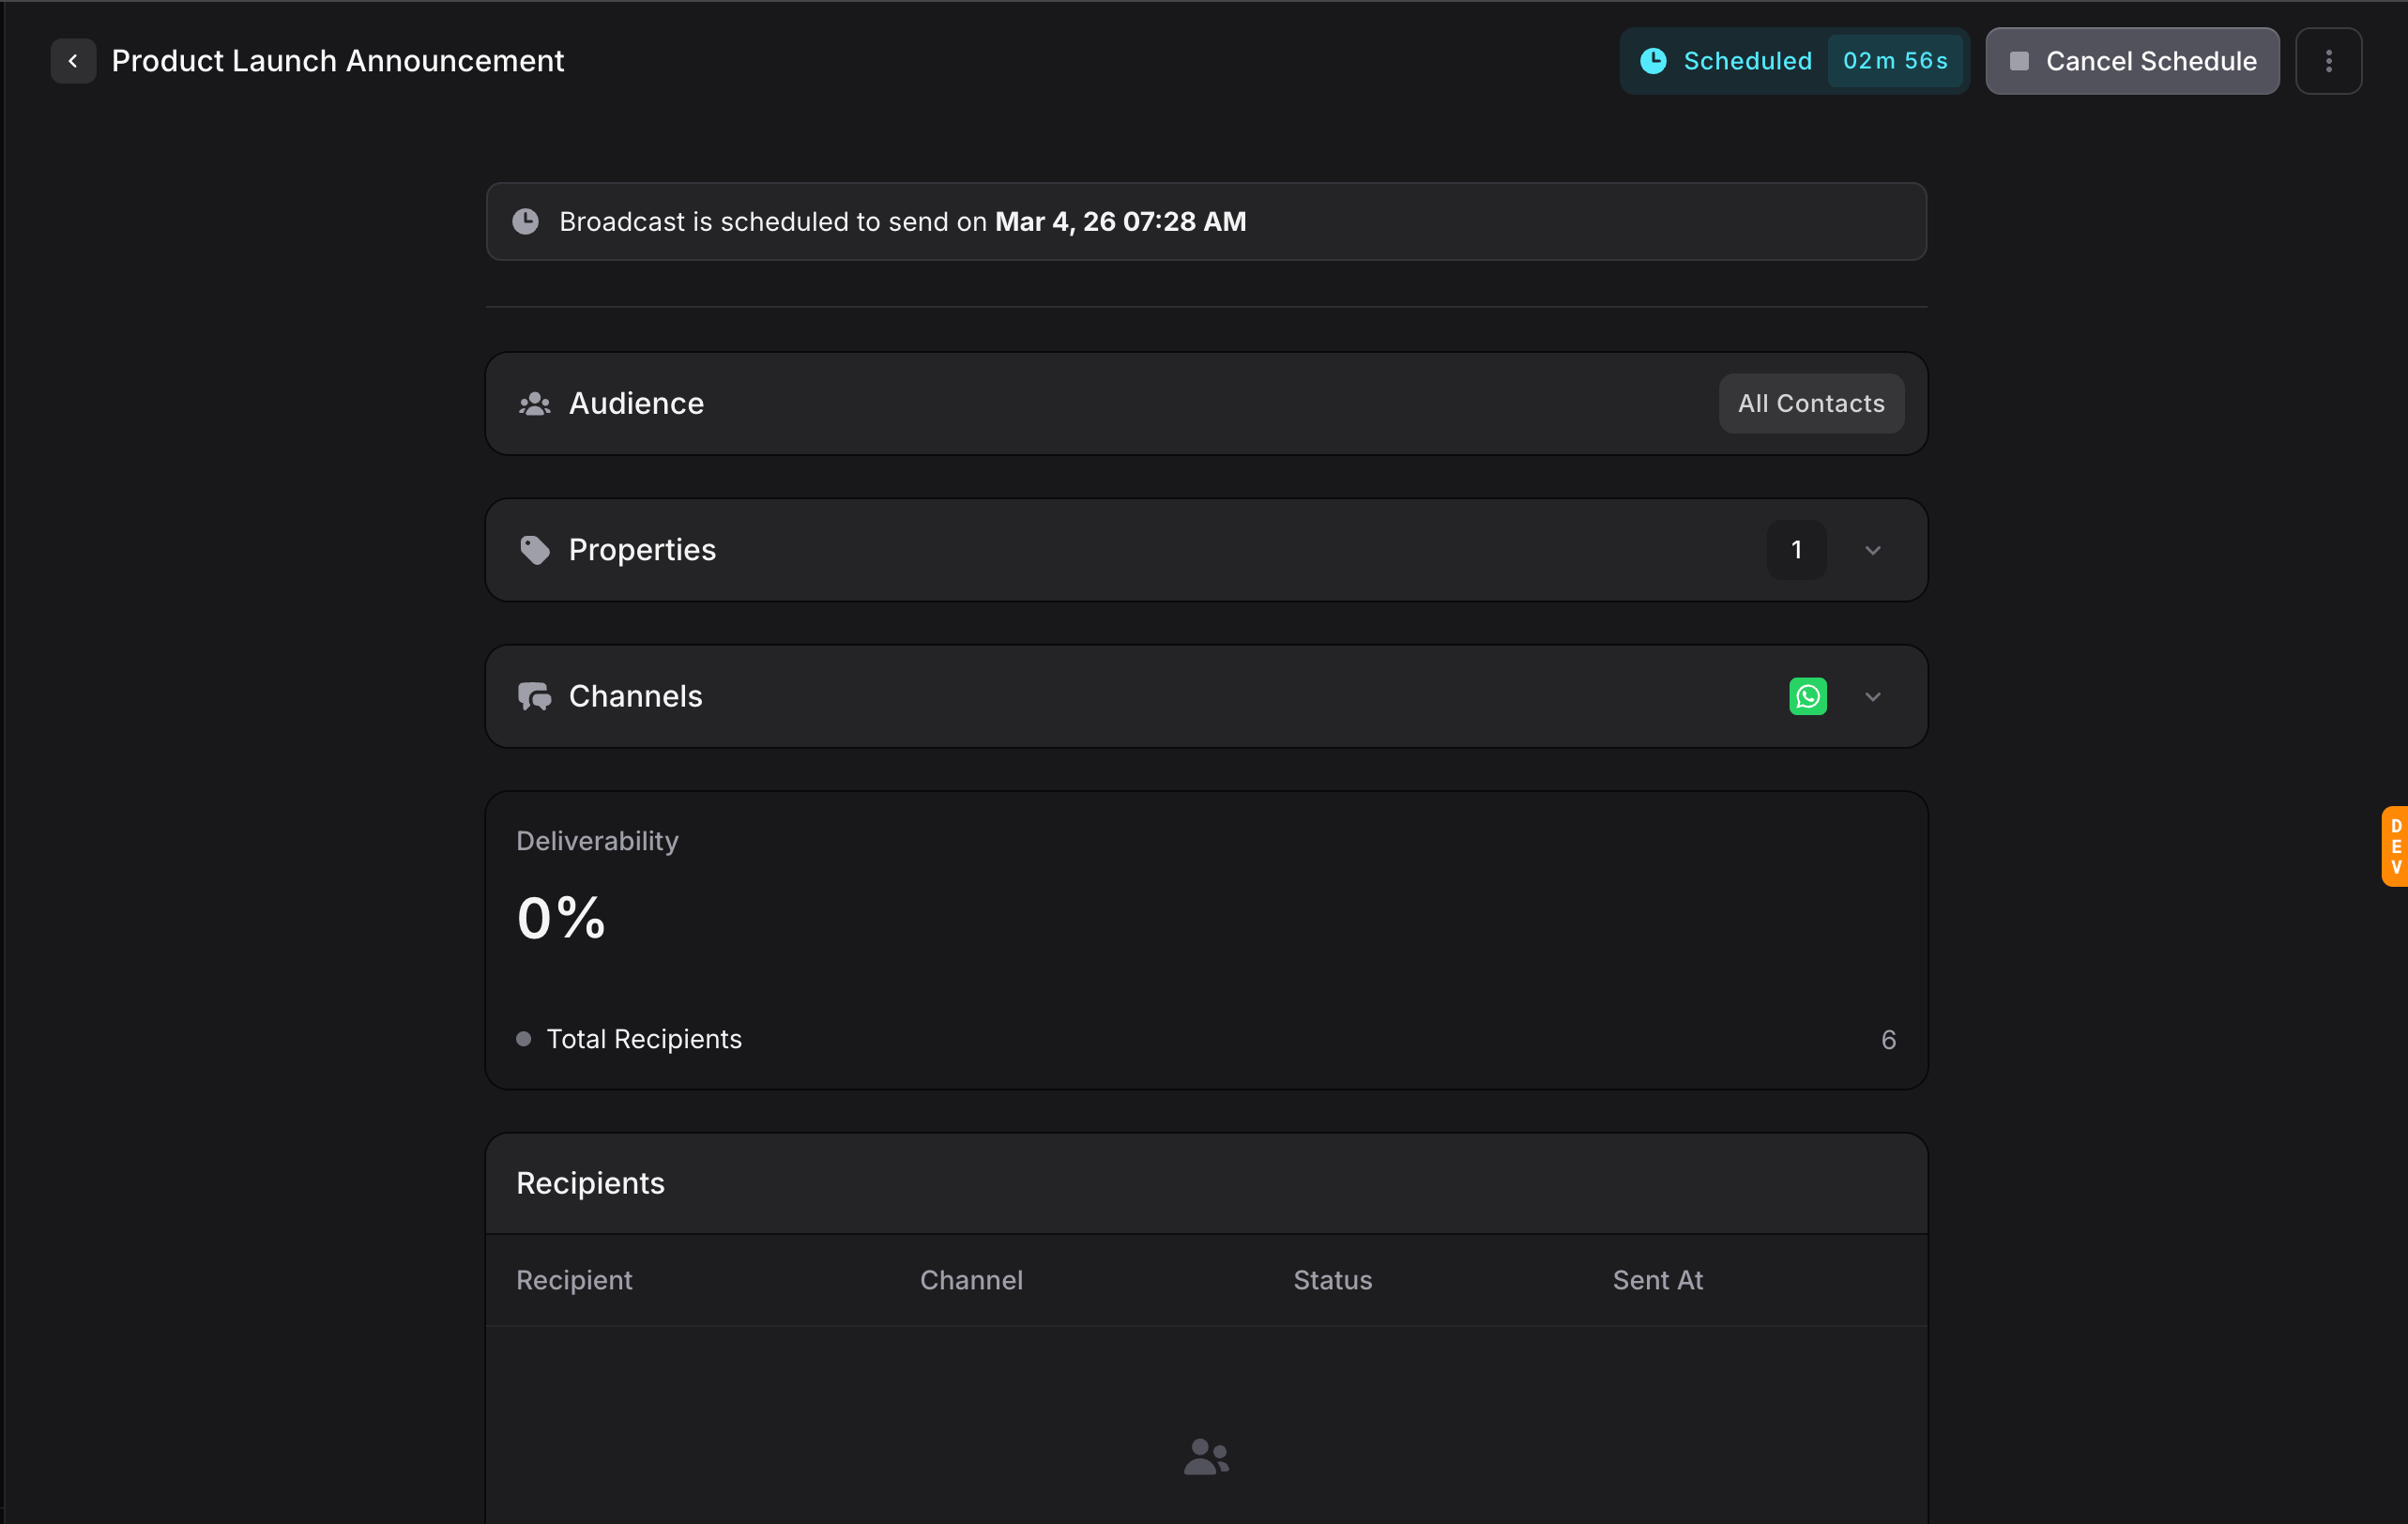
When a broadcast is scheduled, the page updates to show:- A banner at the top: “Broadcast is scheduled to send on [date and time]”
- The top-right corner shows Scheduled with a live countdown timer (e.g., “04m 14s”)
- A Cancel Schedule button to stop the scheduled broadcast and return it to Draft
Broadcast Analytics
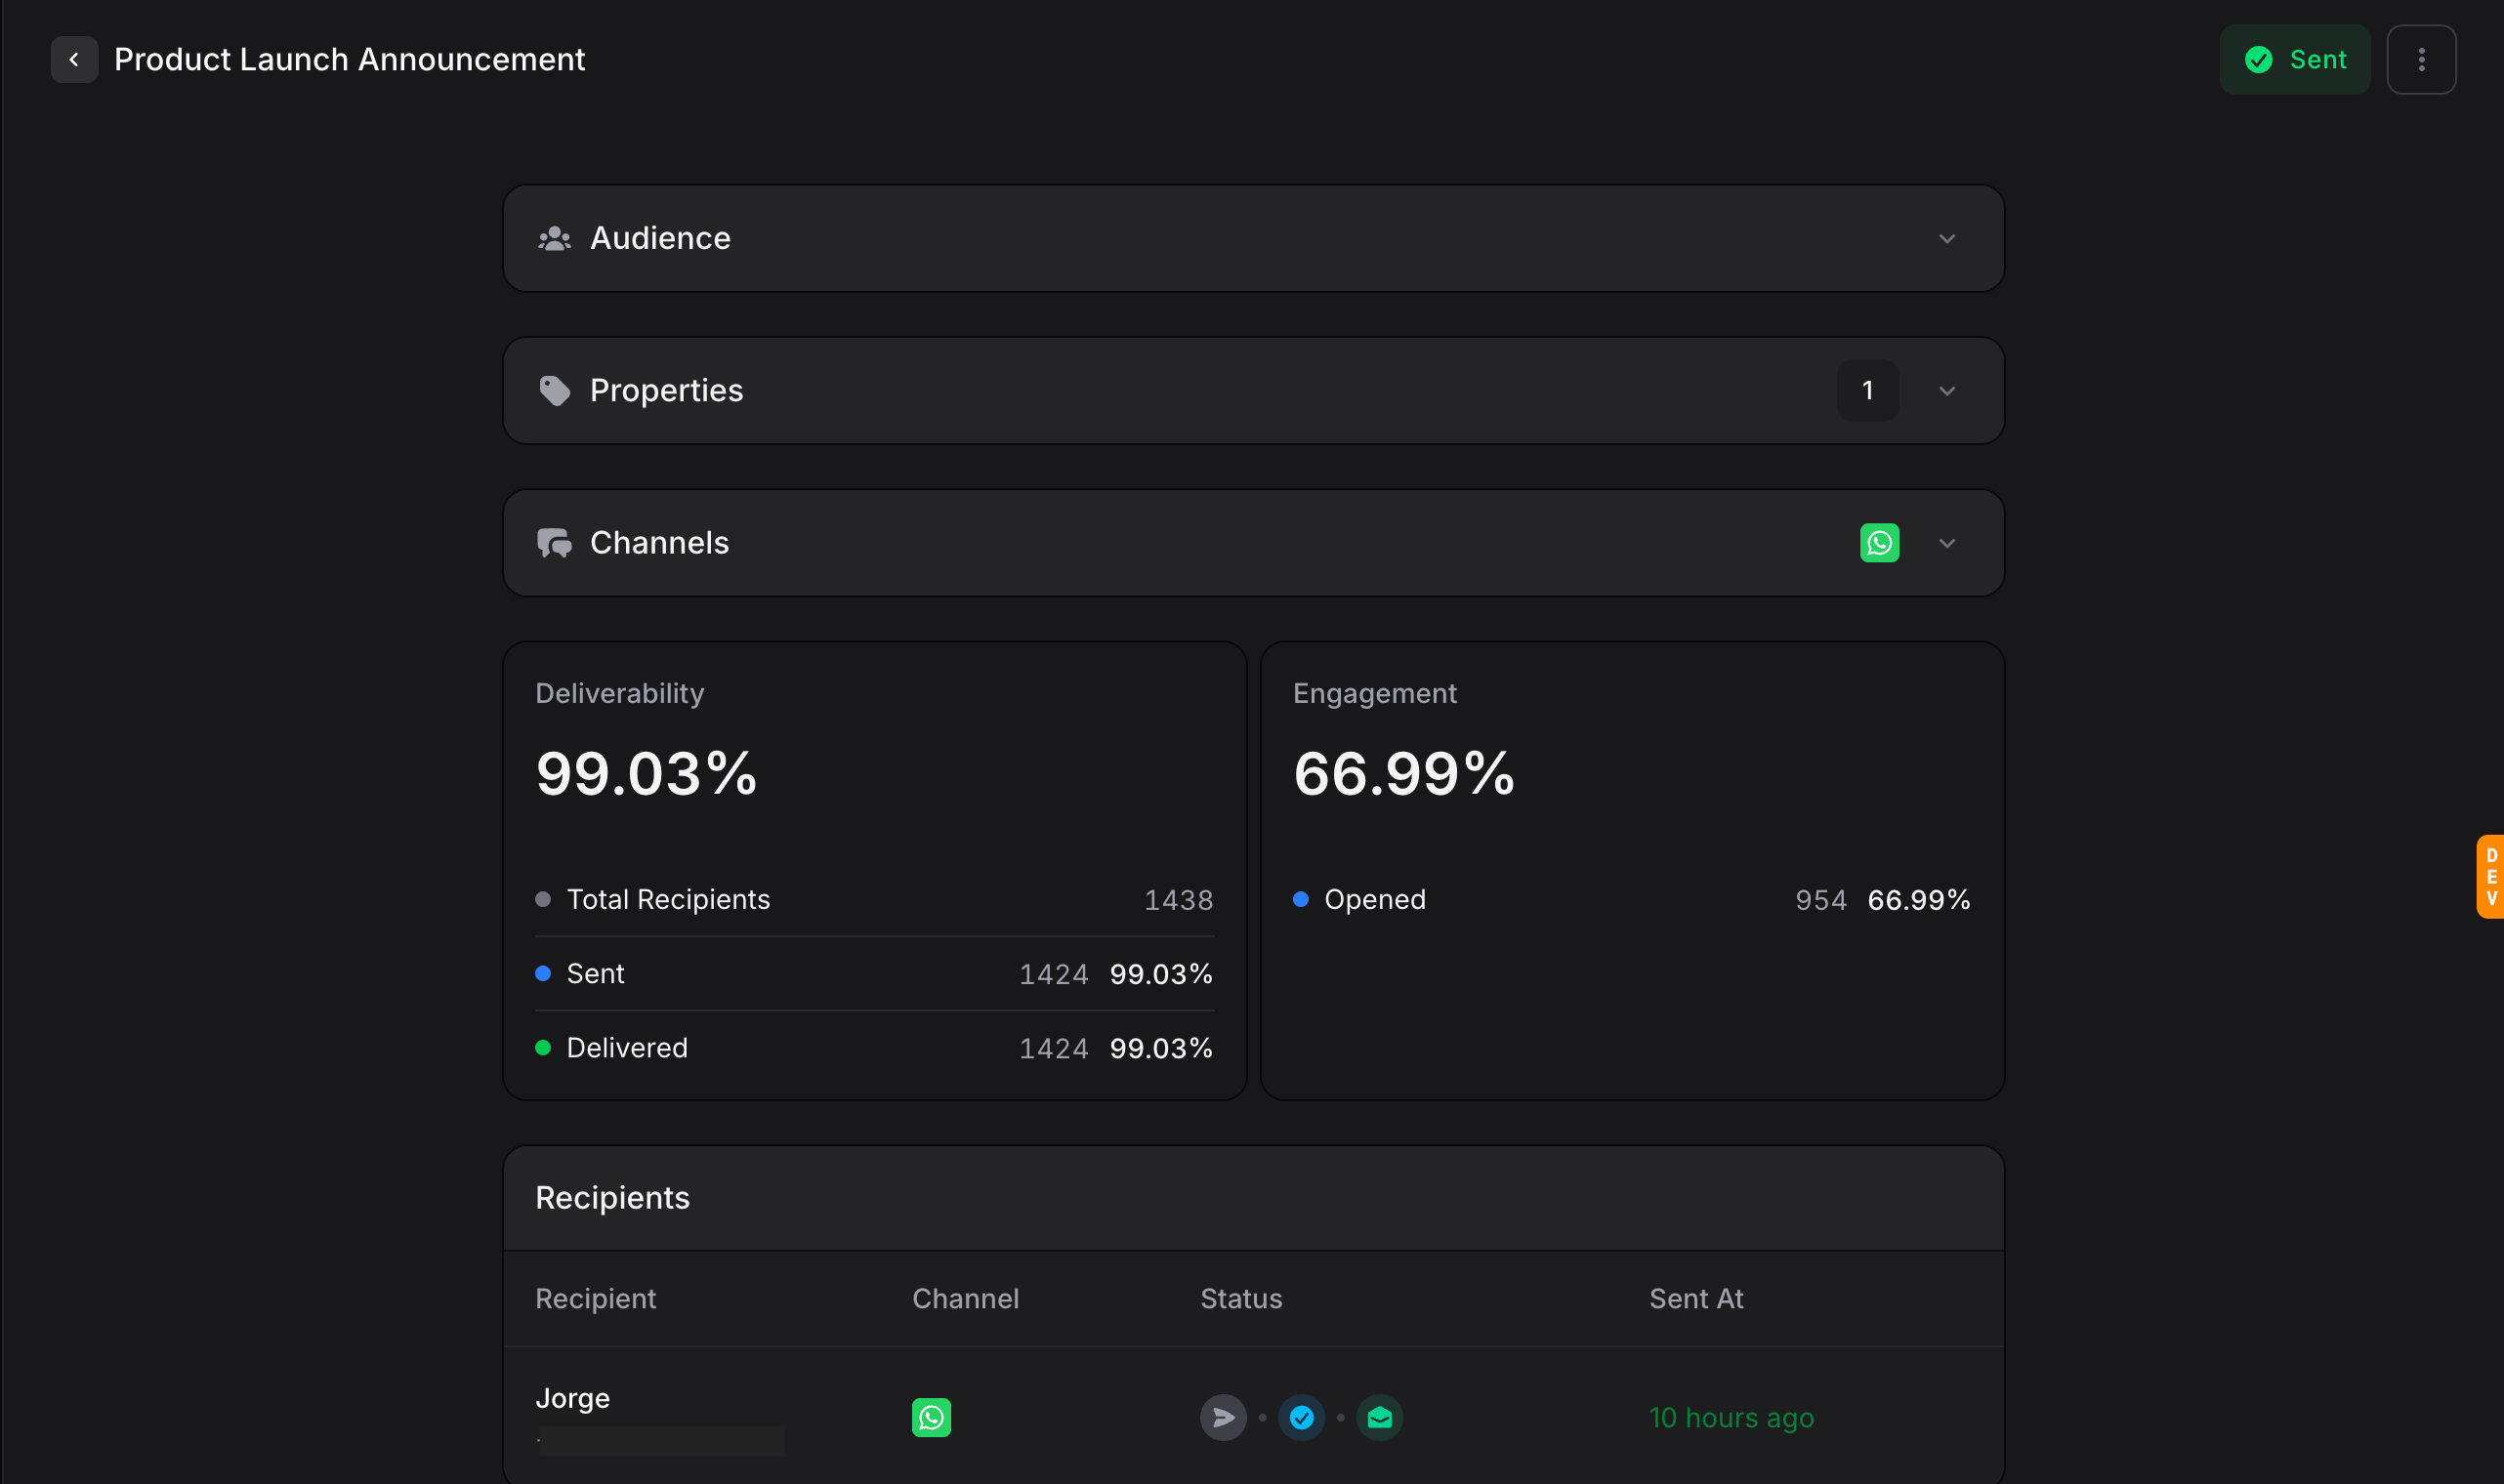
After a broadcast is sent, the page transforms into an analytics dashboard. The three sections (Audience, Properties, Channels) become collapsible summaries with badges showing the configuration.Deliverability
The Deliverability card shows how successfully your messages were delivered:- Total Recipients: The total number of contacts targeted
- Sent: How many messages were sent and the percentage
- Delivered: How many messages were confirmed delivered and the percentage
Engagement
The Engagement card shows how recipients interacted with your broadcast:- Opened: How many recipients opened or read the message, with the percentage
Recipients Table
Below the analytics cards, a detailed table lists every recipient:| Column | Description |
|---|---|
| Recipient | Contact name and identifier (e.g., phone number) |
| Channel | Which channel the message was sent through (e.g., WhatsApp) |
| Status | Delivery status icons showing the message journey (sent, delivered, read, etc.) |
| Sent At | When the message was sent to this specific recipient |
Duplicating a Broadcast
Want to create a similar broadcast without starting from scratch? Use the three-dot menu on any broadcast in the list and select Duplicate. This creates a copy with “(Copy)” appended to the name, preserving all your audience, properties, and channel settings.Broadcast Statuses
| Status | Description |
|---|---|
| Draft | The broadcast is being configured and hasn’t been sent yet. You can freely edit all sections |
| Scheduled | The broadcast is queued to send at a specific future time. Shows a live countdown timer |
| Sending | The broadcast is currently being delivered to recipients. You cannot edit it while sending |
| Sent | The broadcast has been fully sent. Analytics and tracking data are available |
| Cancelled | The broadcast was cancelled before it finished sending. You can re-send a cancelled broadcast |
| Failed | Something went wrong during delivery. Check the error details and re-send after fixing the issue |
Best Practices
- Always test first: Use the Test button to send yourself a preview before broadcasting to your entire audience. Verify the template looks correct and variables are populated properly
- Segment your audience: Don’t blast everyone with every message. Use segments to target the right people with relevant content
- Use properties for personalization: A message with the recipient’s name and a unique coupon code feels personal and drives higher engagement
- Schedule strategically: Use the scheduling options to send messages when your audience is most likely to engage. Avoid sending late at night or during weekends
- Monitor analytics: After sending, check your deliverability and engagement metrics. Low deliverability might indicate issues with phone numbers in your contacts
- Comply with regulations: Always ensure you have appropriate consent to message your contacts. WhatsApp has strict policies about template messages, so use approved templates
- Start small: If you’re new to broadcasting, start with a small segment to test your approach before scaling to your full audience