wa.me link, scans a QR code on your storefront, or just messages your number directly lands in a conversation that your assistant answers instantly, 24/7. Everything appears in the same Inbox as your other channels, with the same assistant, the same Knowledge, and the same Memory.
How a WhatsApp connection is structured
Before you click anywhere, four Meta concepts you will see throughout the flow:- Meta Business Portfolio (formerly Business Manager). The top-level container for your company on Meta. It owns Pages, ad accounts, and WhatsApp accounts. Think of it as your company’s main folder.
- WhatsApp Business Account (WABA). The cloud container that holds one or more phone numbers connected to the WhatsApp Cloud API. This is the “engine” that lets your assistant send and receive on a number. One Business Portfolio can hold multiple WABAs.
- Phone Number. The actual line customers message. One WABA can hold multiple phone numbers, each with its own display name and profile.
- WhatsApp Business app. Meta’s mobile app for small businesses, separate from the personal WhatsApp app. Coexistence requires a number that is already active on this app, not the personal app.
Pick your connection path
There are two ways to connect a number, chosen on a single screen during Meta’s Embedded Signup. Pick now, before you start:Coexistence: Connect a WhatsApp Business app
Recommended for most businesses
Keep using the WhatsApp Business app on your phone alongside Invent. Your team can still reply manually from the app, and your assistant answers automatically through the API. Up to 6 months of past chat history syncs to Invent so the assistant has context from day one.
Pick this when:
- The number is already in active use on the WhatsApp Business app and you want to keep that workflow.
- You want manual replies (from the app) and automated replies (from the assistant) on the same number.
- You want existing chat history available to the assistant immediately.
API-only: Create a WhatsApp Business account
A dedicated, “bot-only” line that lives entirely on the WhatsApp Cloud API. No mobile app, no manual replies through the app. All conversations happen in the Invent Inbox. Pick this when:- You are setting up a brand-new number purely for automation.
- You do not need the WhatsApp Business app at all.
- You want a high-volume support or sales line with no per-device dependency.
What if my number is already on another tool?
If the number is already registered somewhere else, on a personal WhatsApp account, on the WhatsApp Business app, or with another BSP / Cloud API instance, Meta will block both Coexistence and API-only with a “this phone number is already registered” error. The release flow lives outside Invent and depends on where the number currently lives. Skip to If Meta says “this phone number is already registered” below, run the release flow that matches your situation, and then come back to Coexistence or API-only.At a glance
Before You Start
You need:- A Facebook account that is an admin on (or can create) the Business Portfolio you want to use. The signup flow uses Facebook for authentication; your password is only entered on
facebook.com. - A phone number, in one of these states depending on your path:
- Coexistence: the number must already be registered on the WhatsApp Business app on a phone you have access to. Personal-WhatsApp numbers will not work.
- API-only: the number must not be in active use on any WhatsApp account, and it must be able to receive an SMS or a phone call for verification. Landline or toll-free numbers must use the phone-call option.
- For coexistence only: physical access to the phone with the WhatsApp Business app installed, so you can scan the QR code or enter the access code Meta shows during setup.
- (If reusing a number that is registered somewhere else): admin access wherever the number currently lives. For another BSP or Cloud API instance, that means admin access on the Meta Business Portfolio that owns the WABA. For a number on the WhatsApp Business app or personal WhatsApp, that means physical access to the phone. Covered in If Meta says “this phone number is already registered”.
Step 1: Open the WhatsApp Connect Dialog
From your assistant’s Channels tab, find WhatsApp Business in the list and click Connect. The WhatsApp connect dialog opens.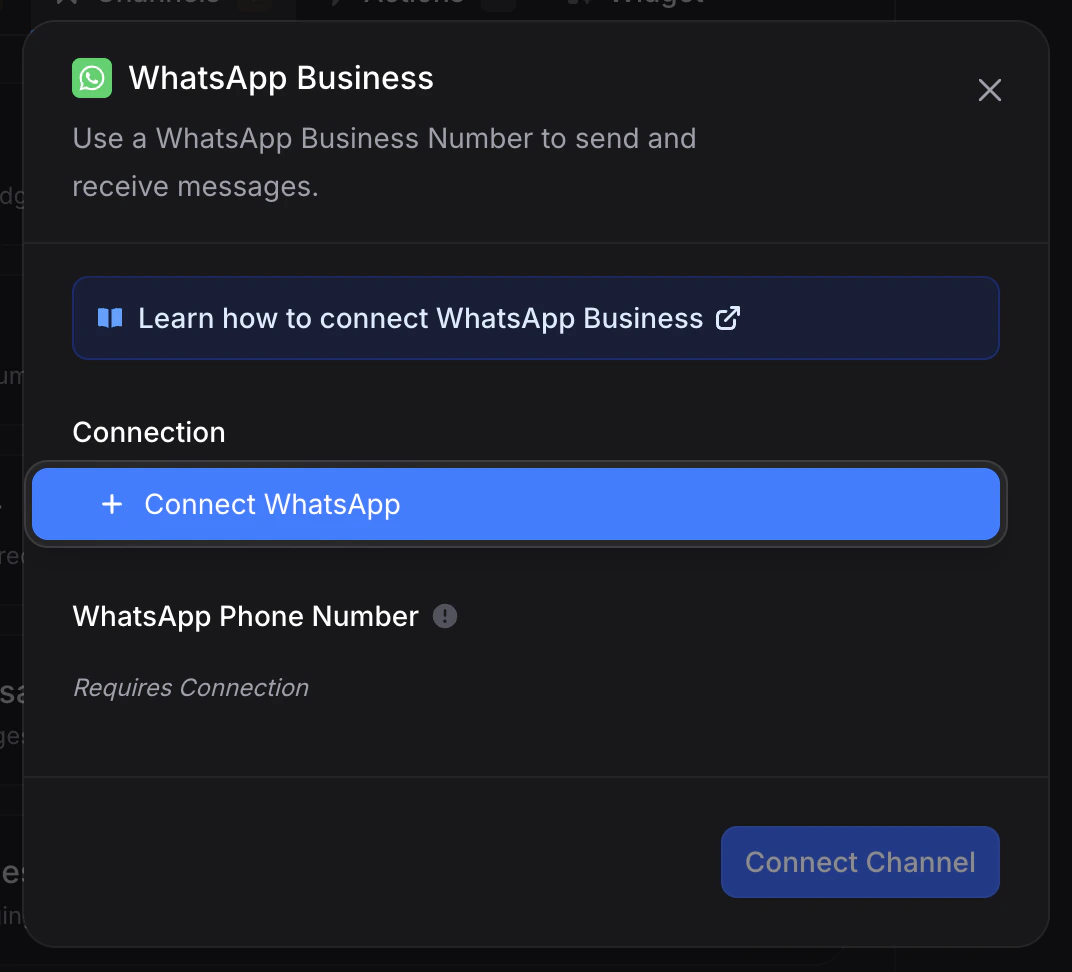
- Connection: the authenticated link to your Meta Business Portfolio and WhatsApp Business Account. If this is your first WhatsApp connection, the dropdown is empty apart from a blue + Connect WhatsApp button you use to start the embedded signup (covered in the next steps). If you have already connected WhatsApp for another assistant, your existing connections are listed here and you can reuse any of them, in which case you can skip to Step 4.
- WhatsApp Phone Number: the specific number on that connection that this assistant should send and receive on. Disabled with Requires Connection until a connection is selected, then populated automatically with every number Invent has access to under that connection.
Step 2: Start the Embedded Signup
Open the Connection dropdown and click + Connect WhatsApp. Meta’s Embedded Signup popup opens, beginning with Facebook’s standard login.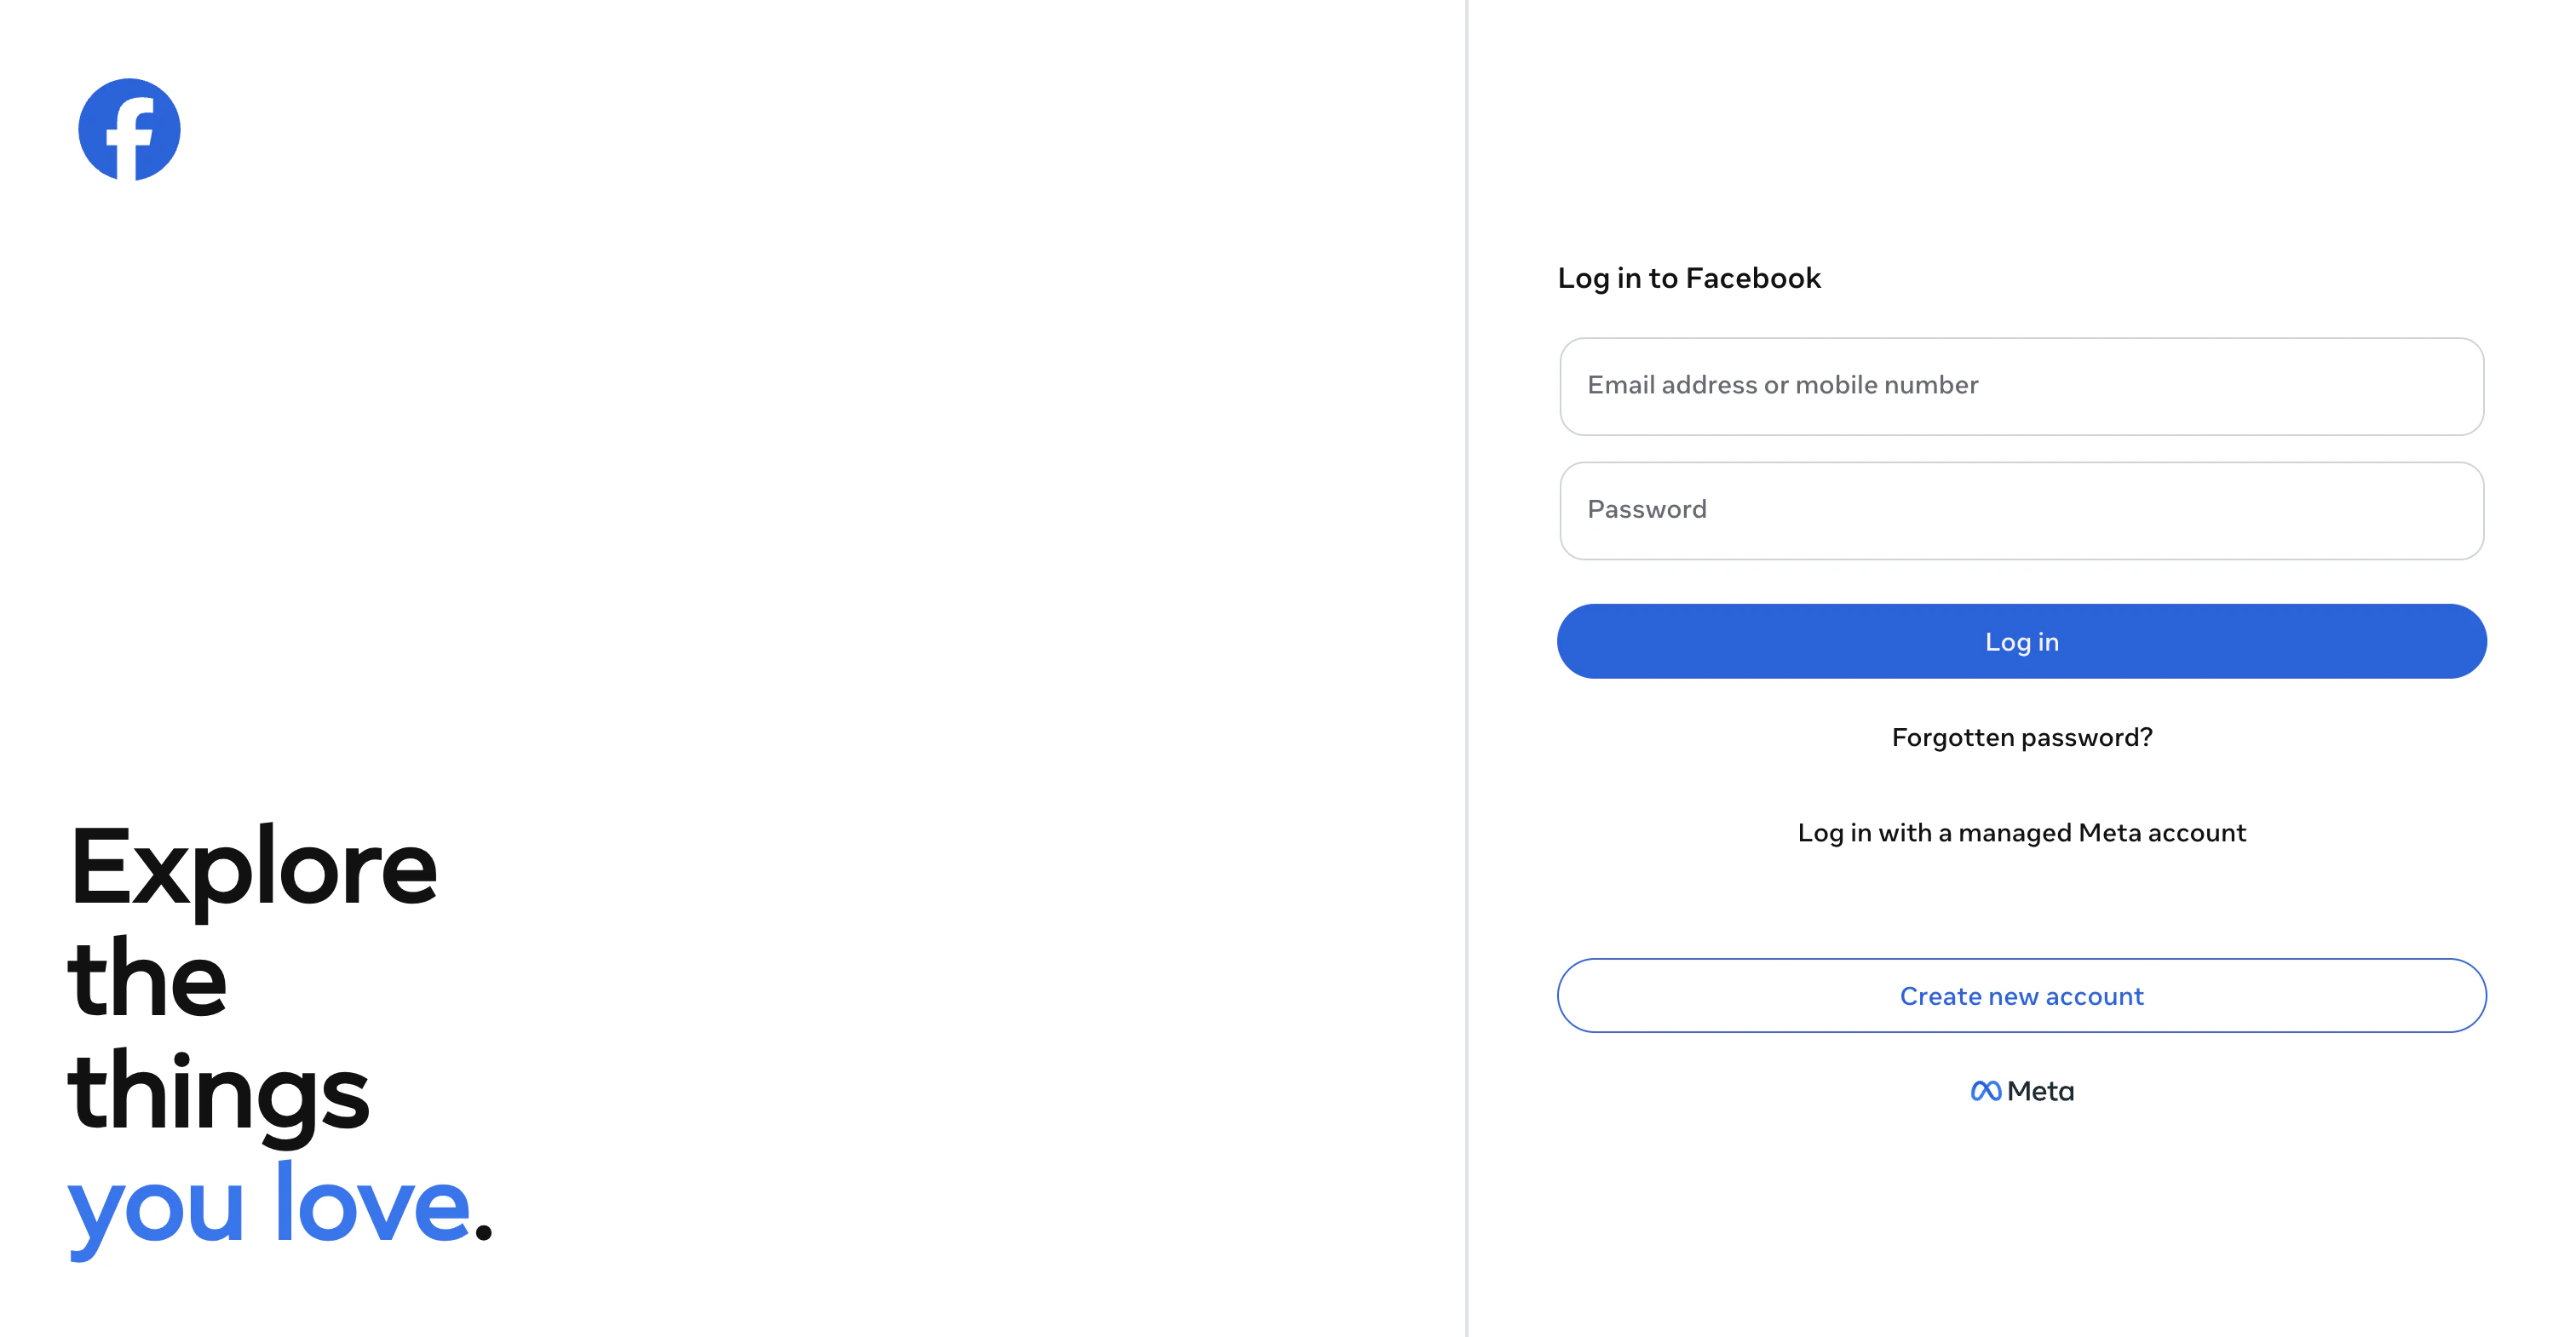
facebook.com. Sign in with the Facebook account that is an admin on the Business Portfolio you want to use.
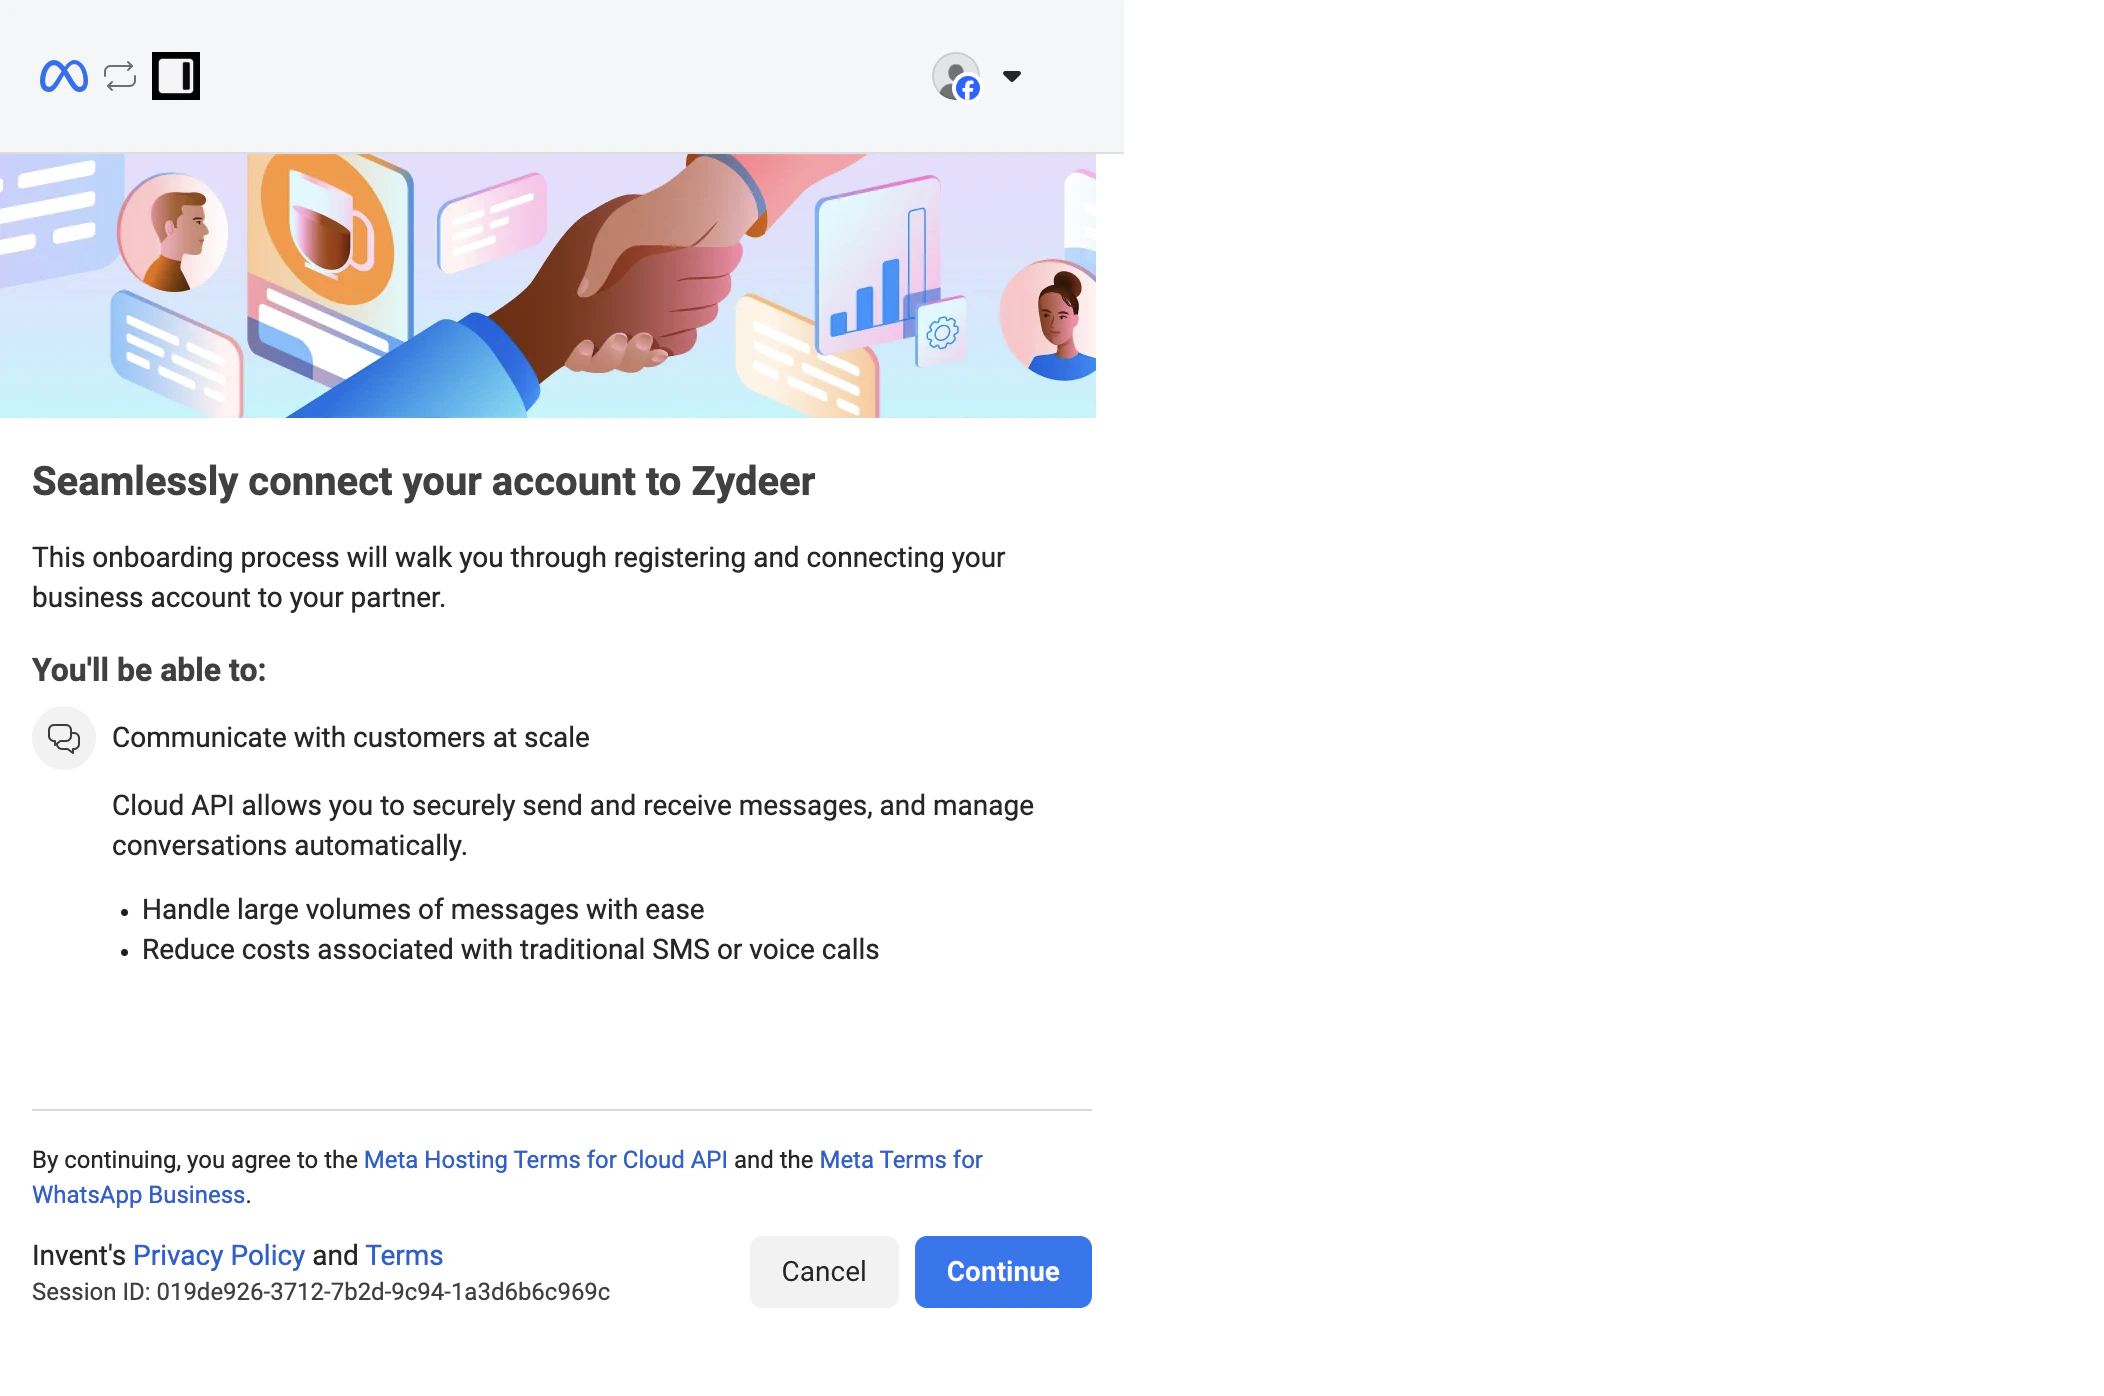
After login, Meta shows a one-screen onboarding intro that explains what the integration will do.
Step 3: Choose Your Path
This is the most important screen in the entire WhatsApp setup. Meta asks you to pick a Business portfolio and a WhatsApp Business account.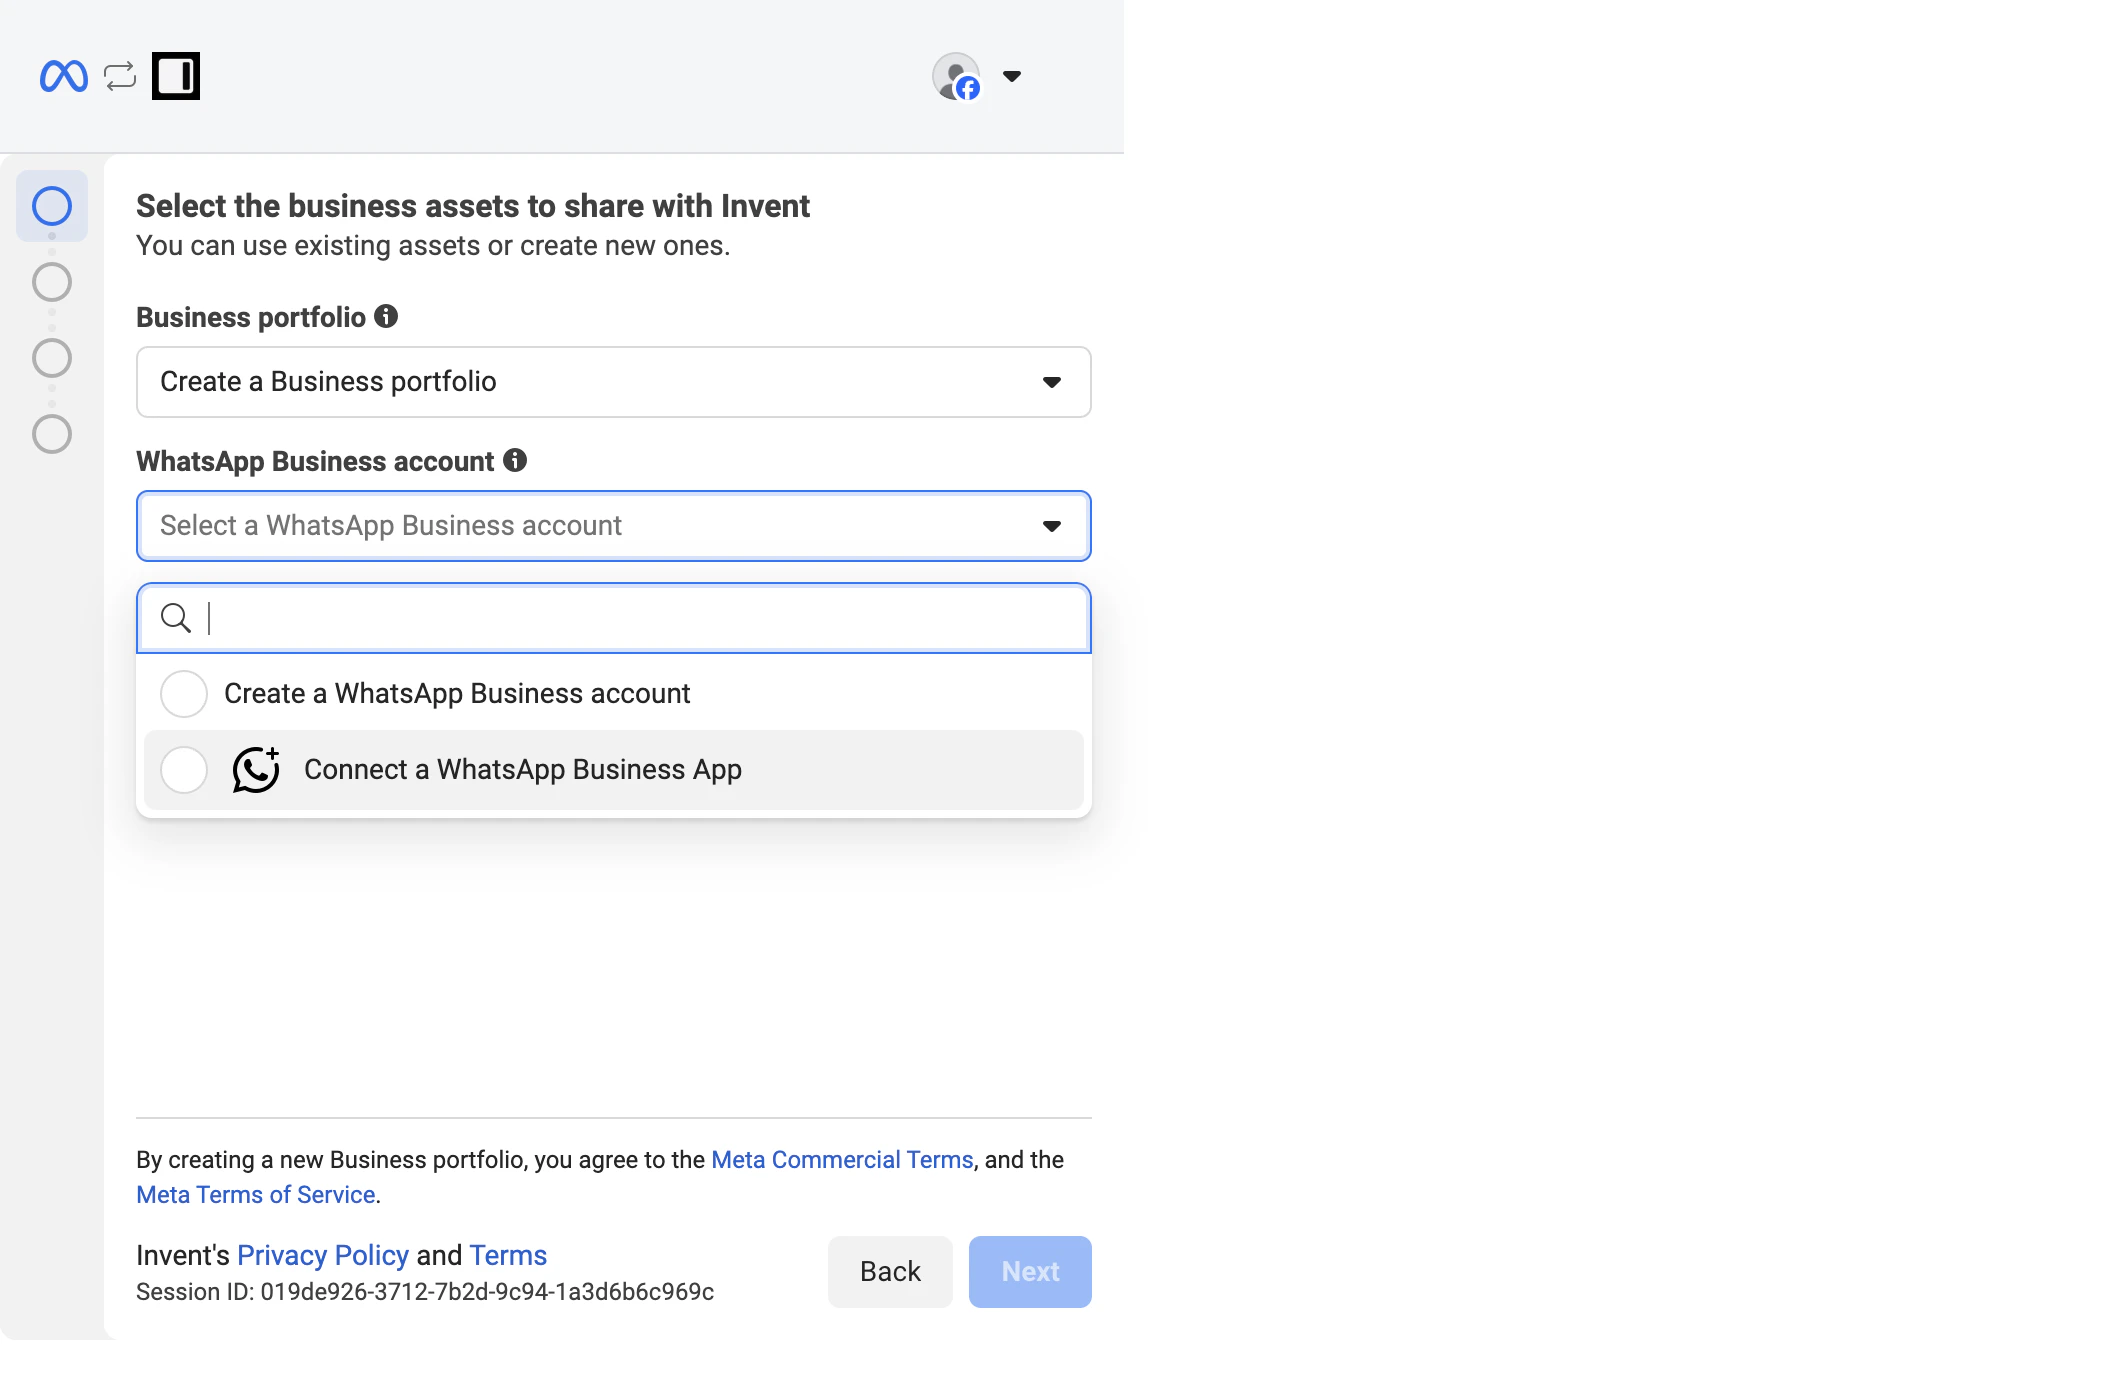
- Connect a WhatsApp Business App → this is the Coexistence path. Pick this to keep your existing mobile-app number and add API access on top of it. Continue with Path A below.
- Create a WhatsApp Business account → this is the API-only path. Pick this to set up a fresh, bot-only number. Continue with Path B below.
Path A: Coexistence (Connect Your WhatsApp Business App)
Use this path if you picked Connect a WhatsApp Business App in the previous step. Skip ahead to Path B if you picked the other option.Step A1: Confirm or fill in business information
Meta asks for the basic business information that will be attached to your assets. If your Business Portfolio already has these fields filled in, they are pre-populated; otherwise enter them now.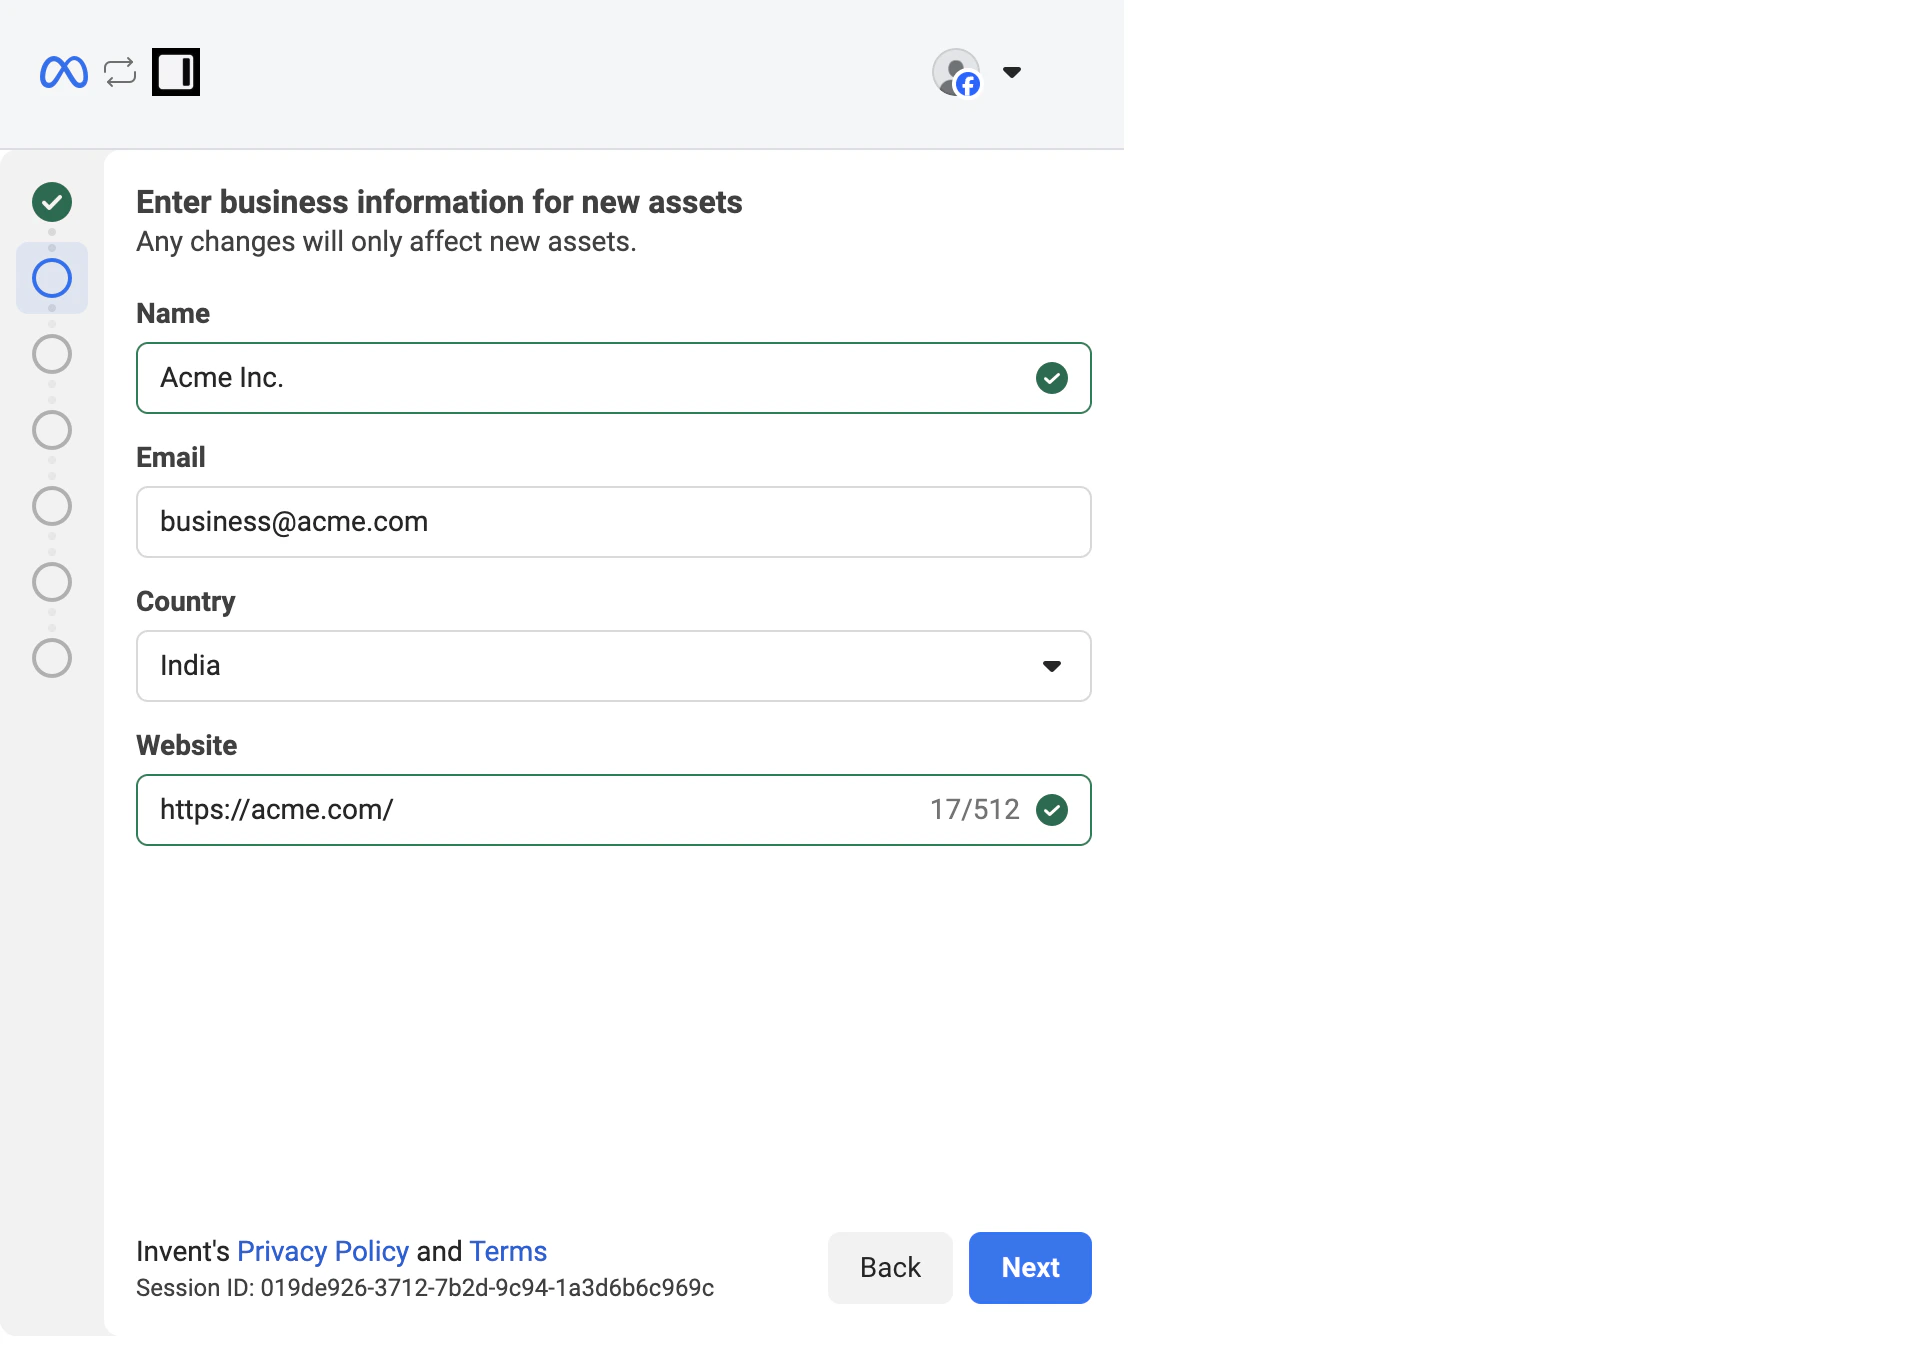
Step A2: Enter your WhatsApp Business app number
Pick your country code, then enter the phone number that is currently active on your WhatsApp Business app.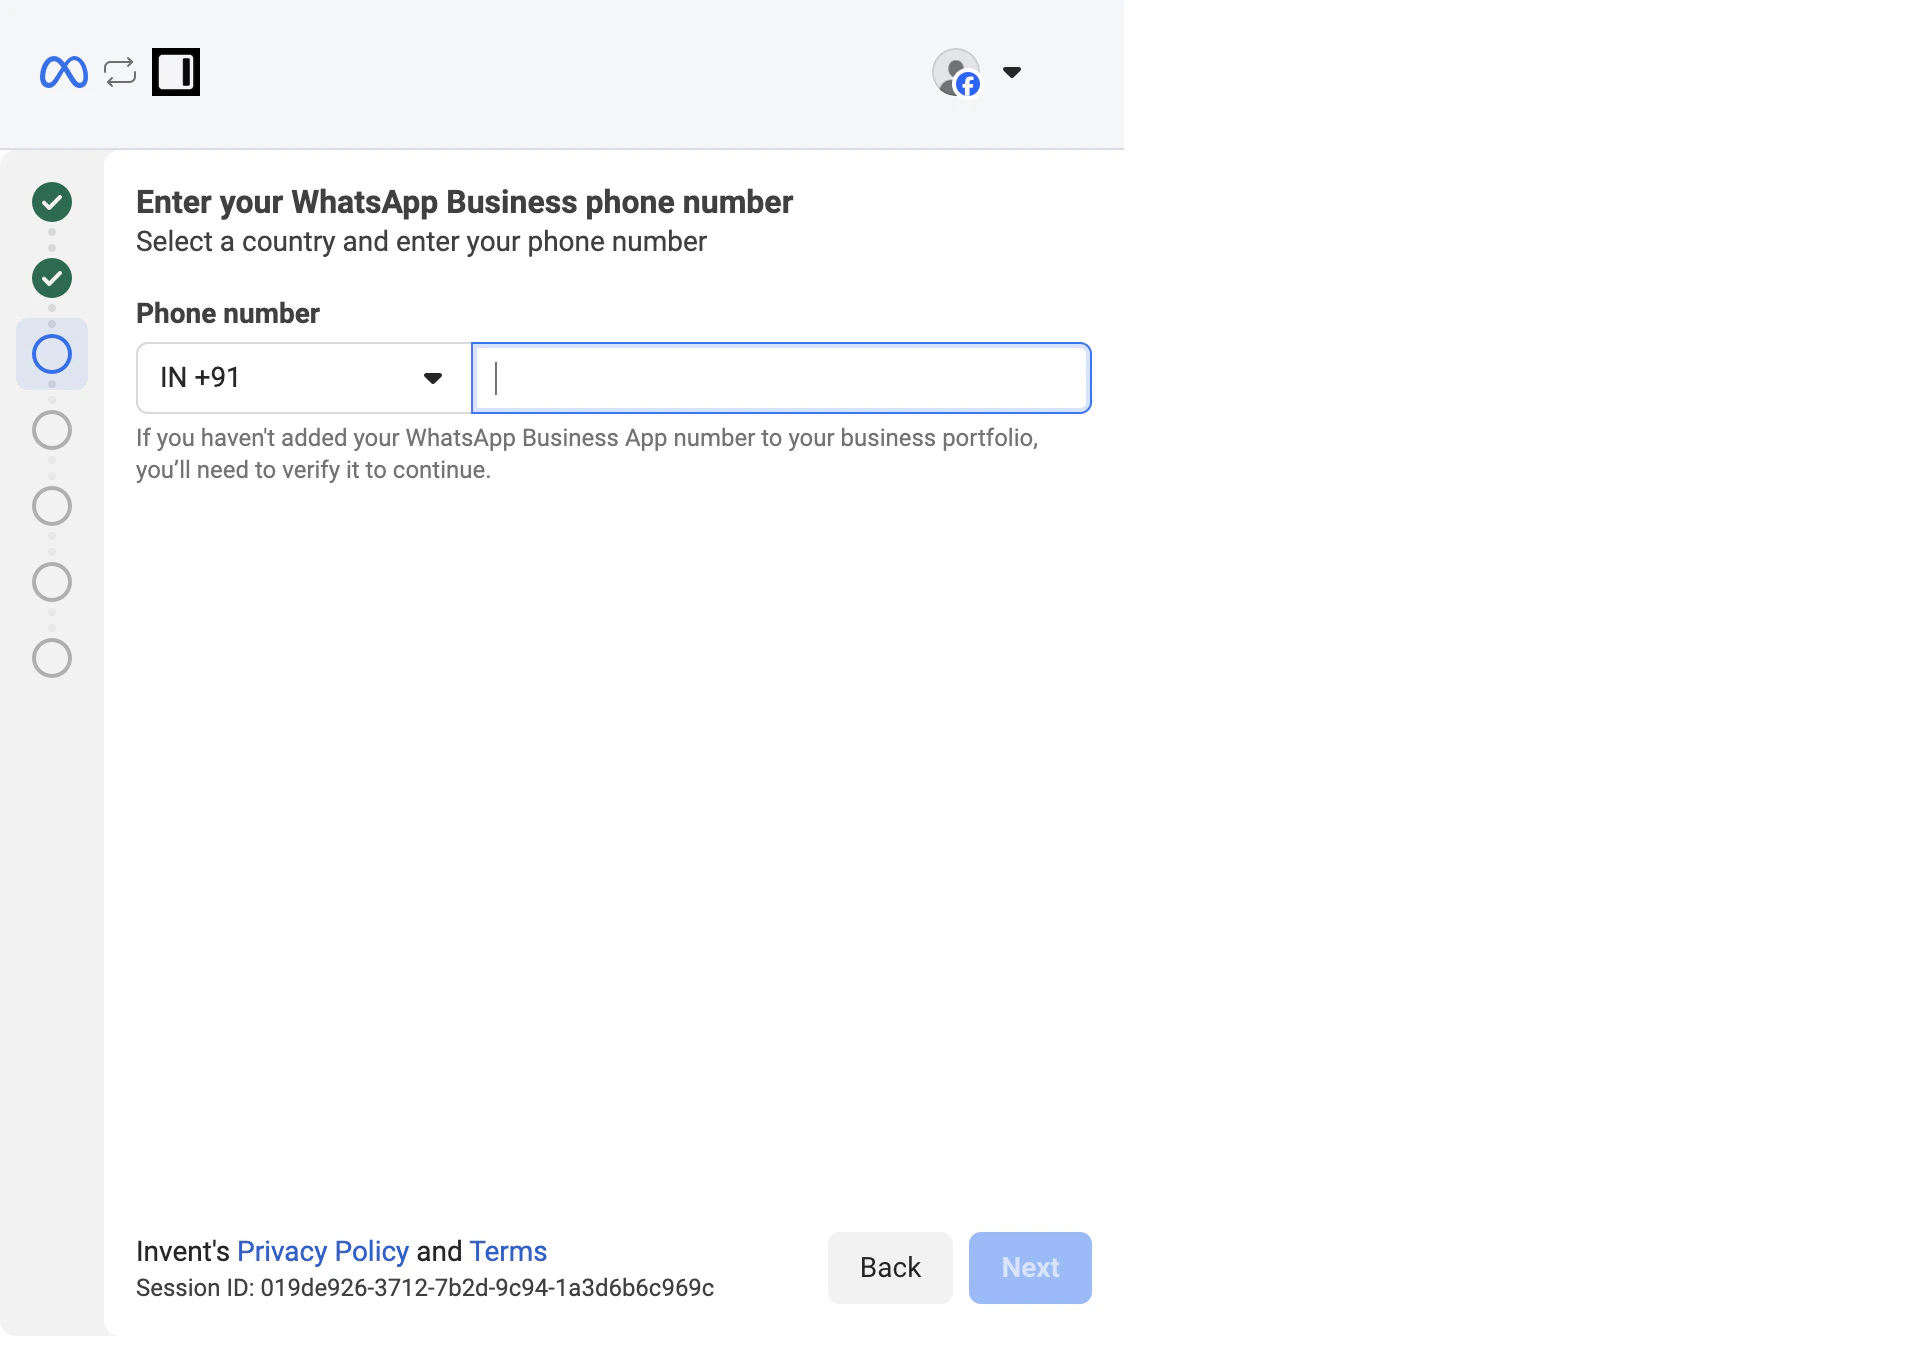
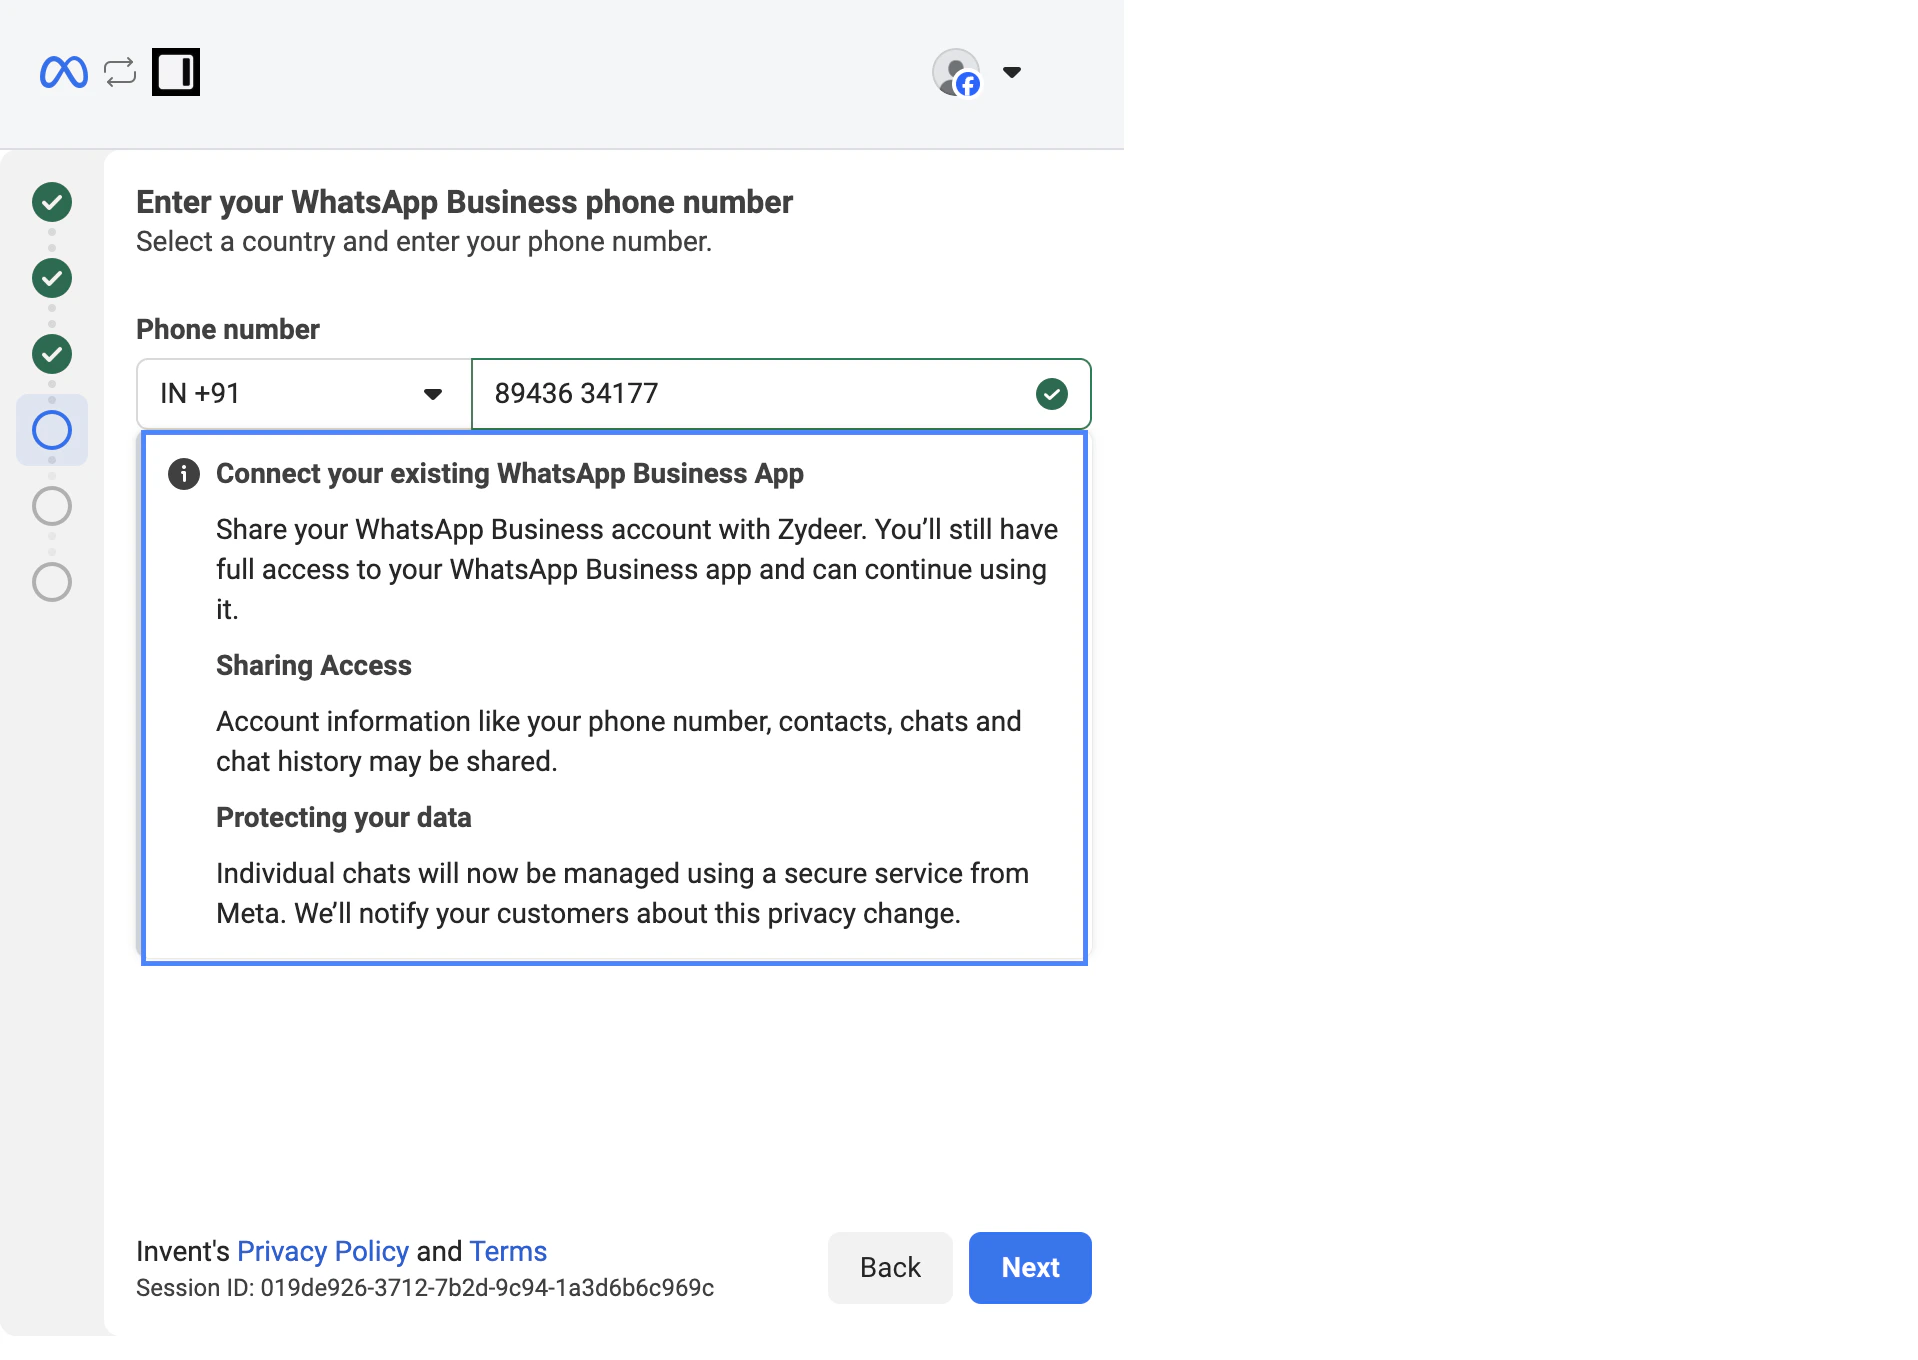
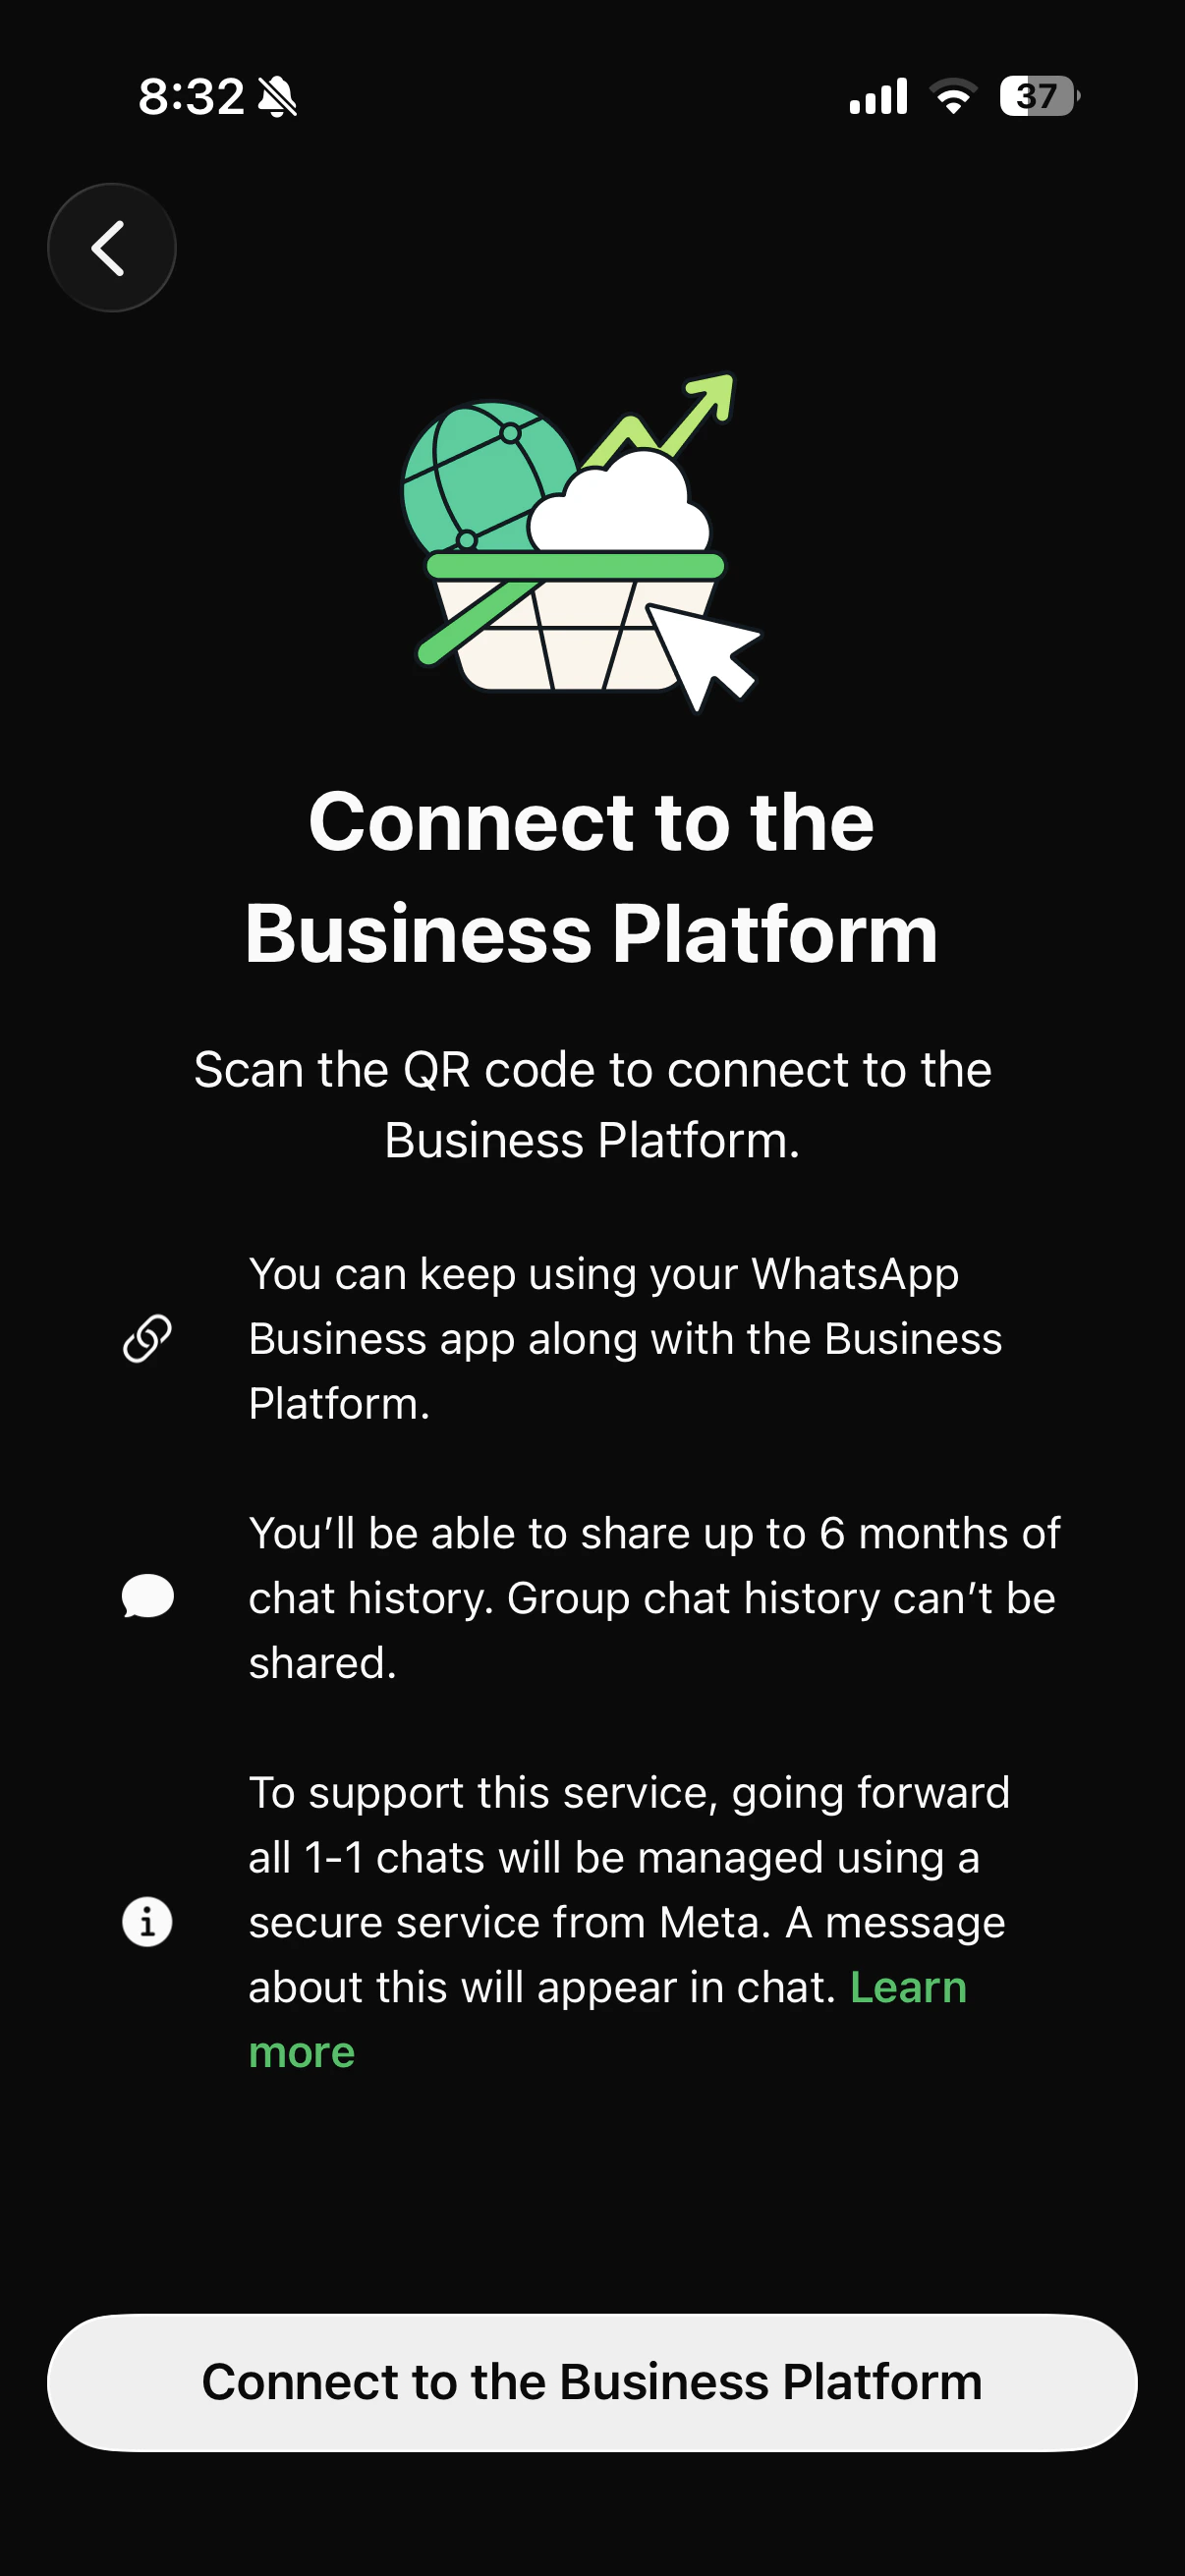
- Connect your existing WhatsApp Business App: you keep full access to the app and can continue using it as before.
- Sharing Access: phone number, contacts, chats, and chat history may be shared with Invent.
- Protecting your data: 1:1 chats are managed using a secure service from Meta. A short notice is sent to your customers explaining the privacy change the first time they message you.
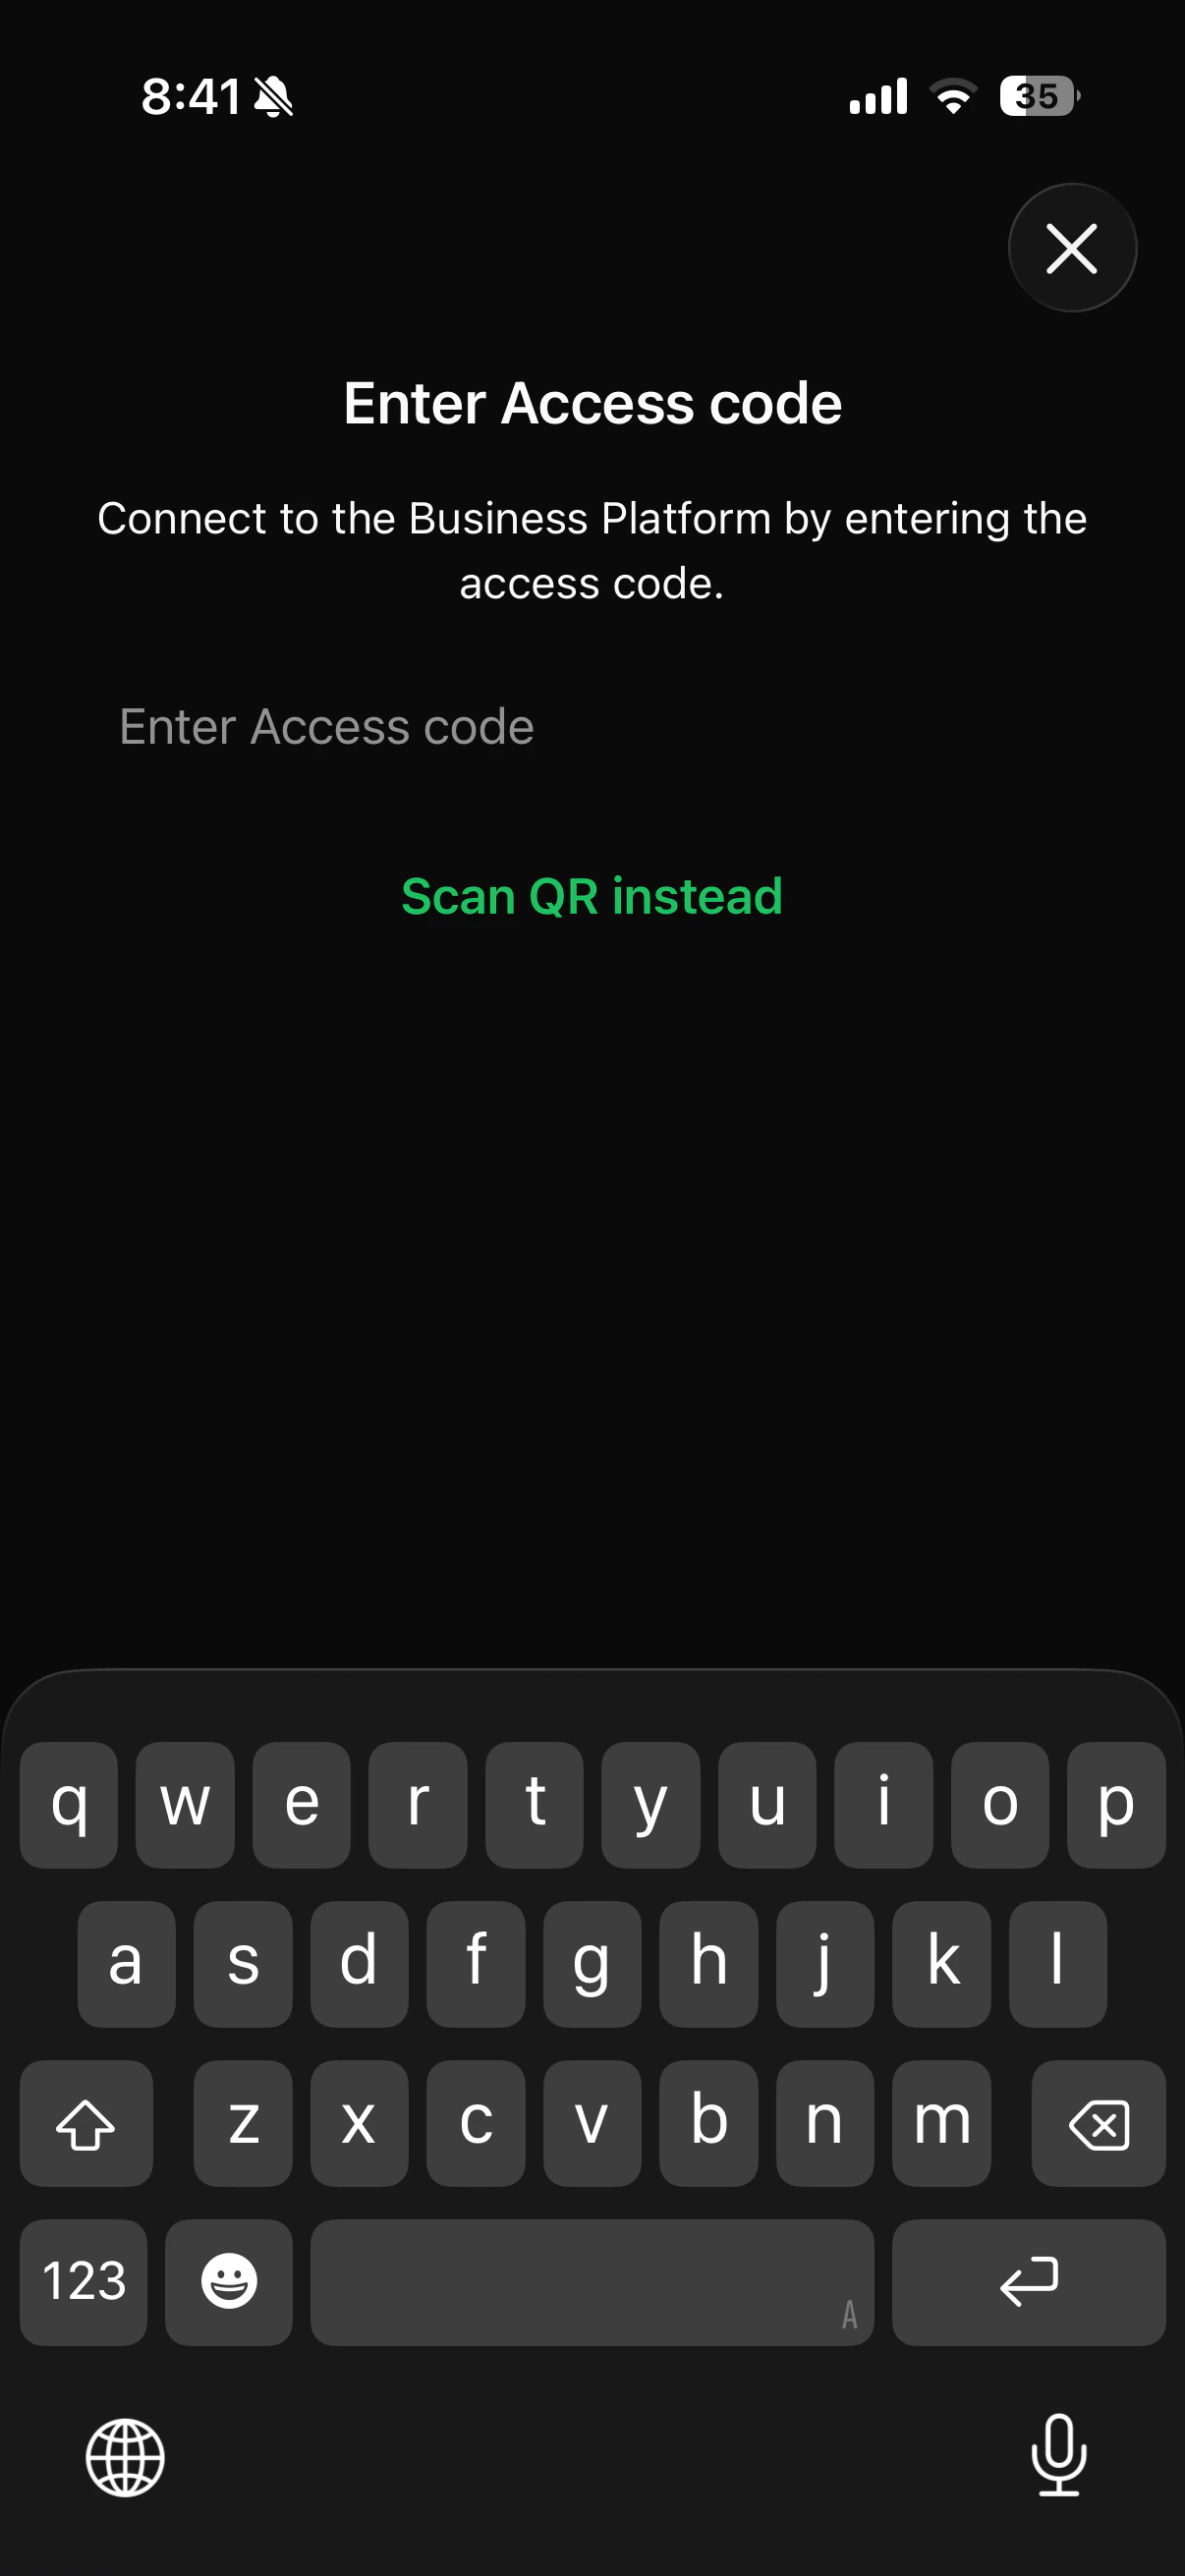
Step A3: Get the QR code or access code
Meta now generates a one-time QR code that you will scan from inside the WhatsApp Business app on your phone.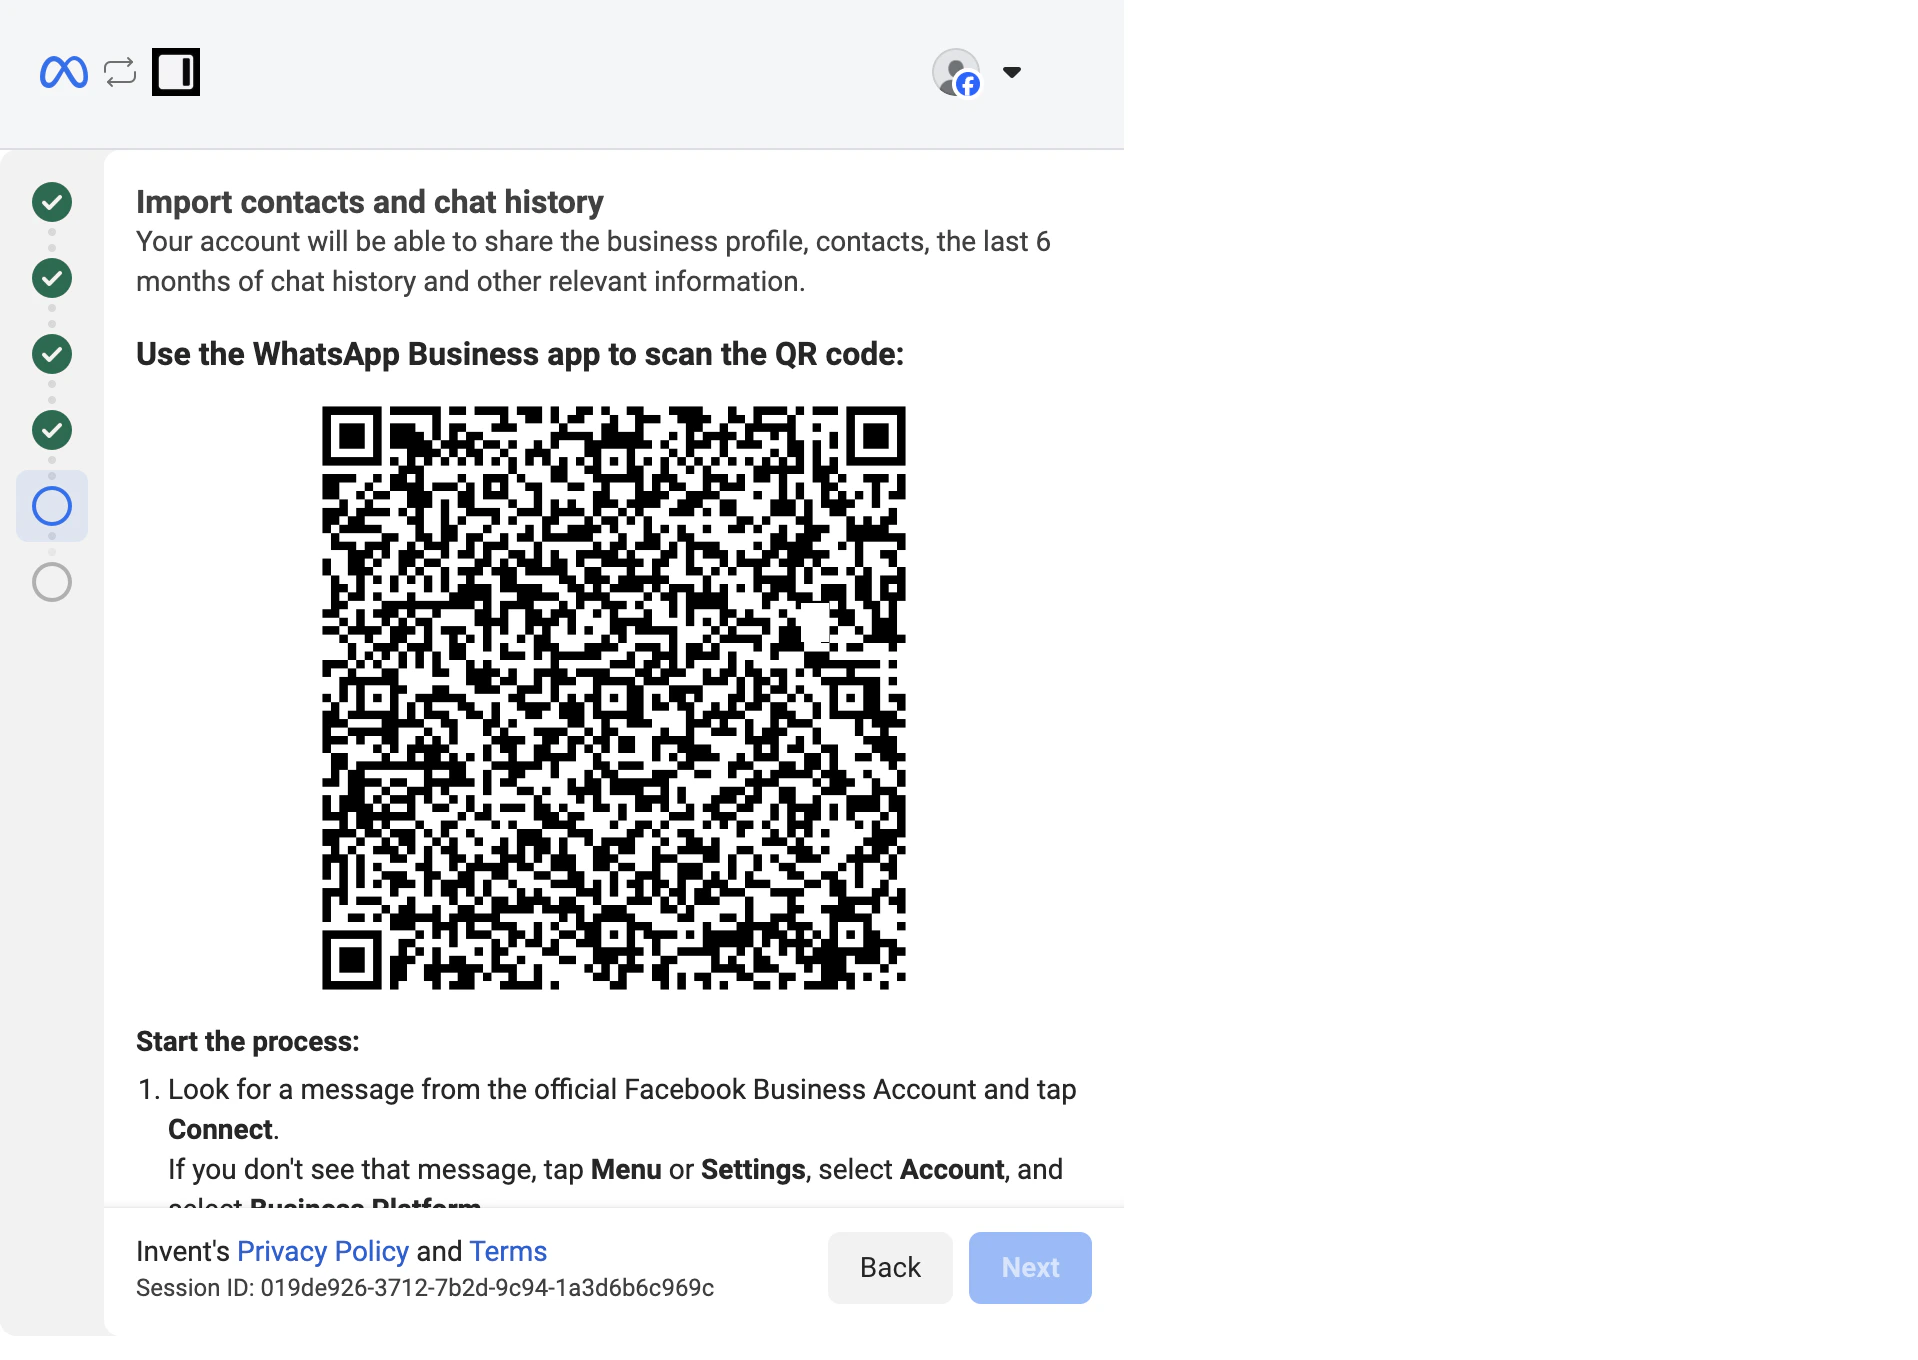
Step A4: On your phone, open the Business Platform connection
You have two ways into the connect screen on the WhatsApp Business app side: Option 1 (recommended): tap the system message from Facebook Business. When you reach the QR-code step on your computer, the WhatsApp Business app on your phone receives a chat from the verified Facebook Business account. Open it and you will see a Manage messages card with a Connect button.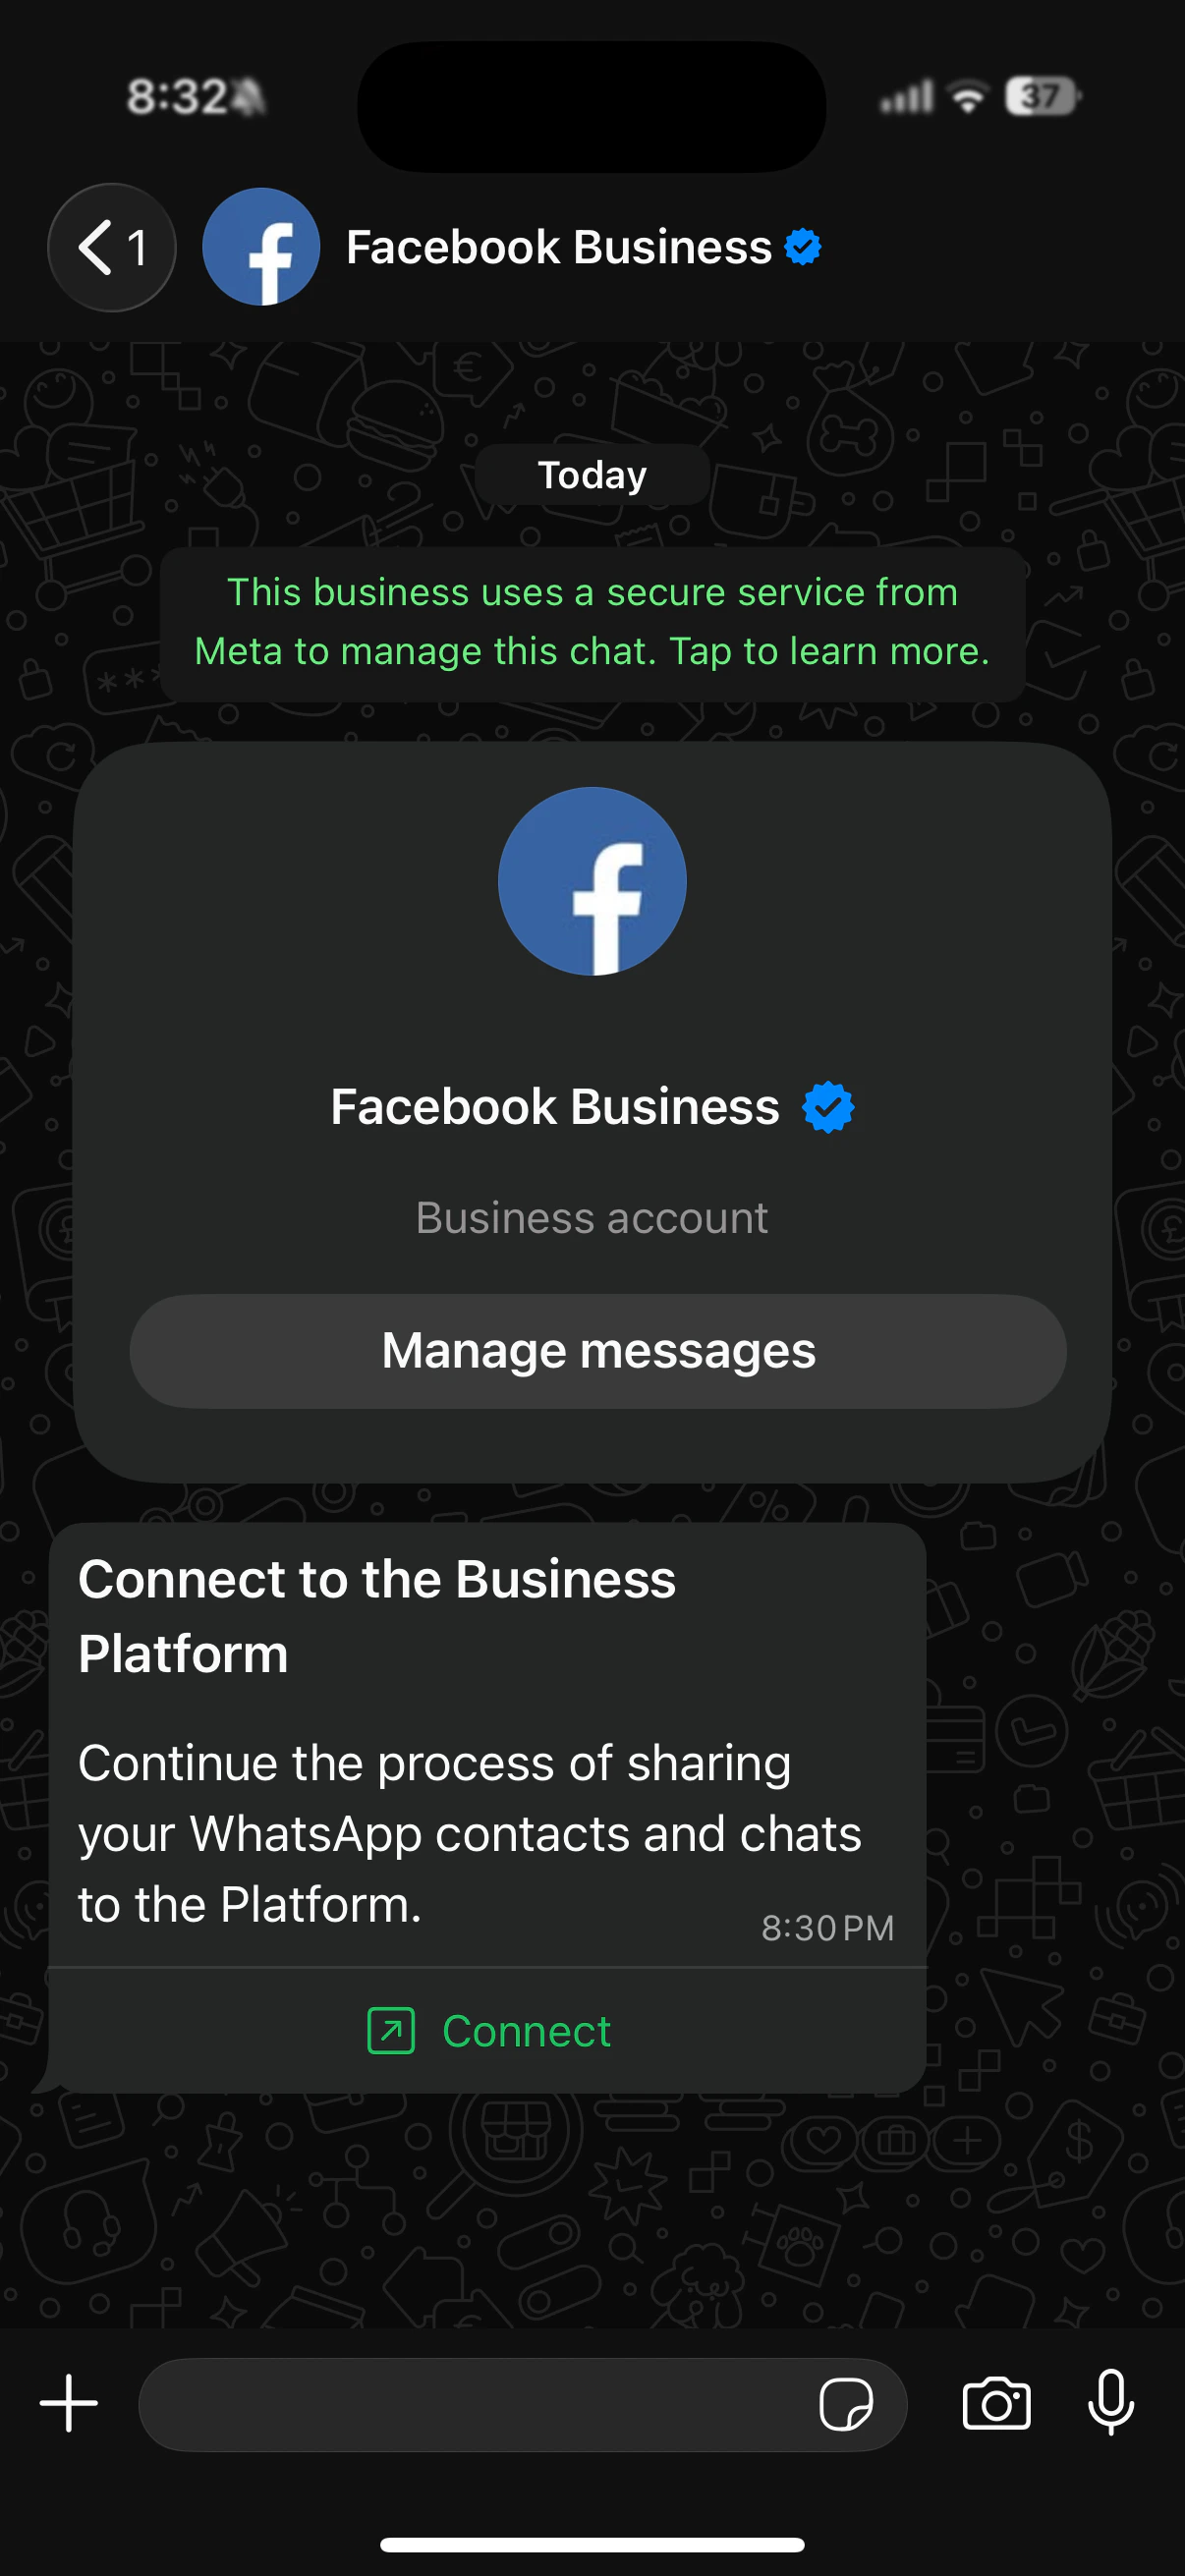
Step A5: Choose what chat history to share
The app asks whether to share existing chat history with the assistant.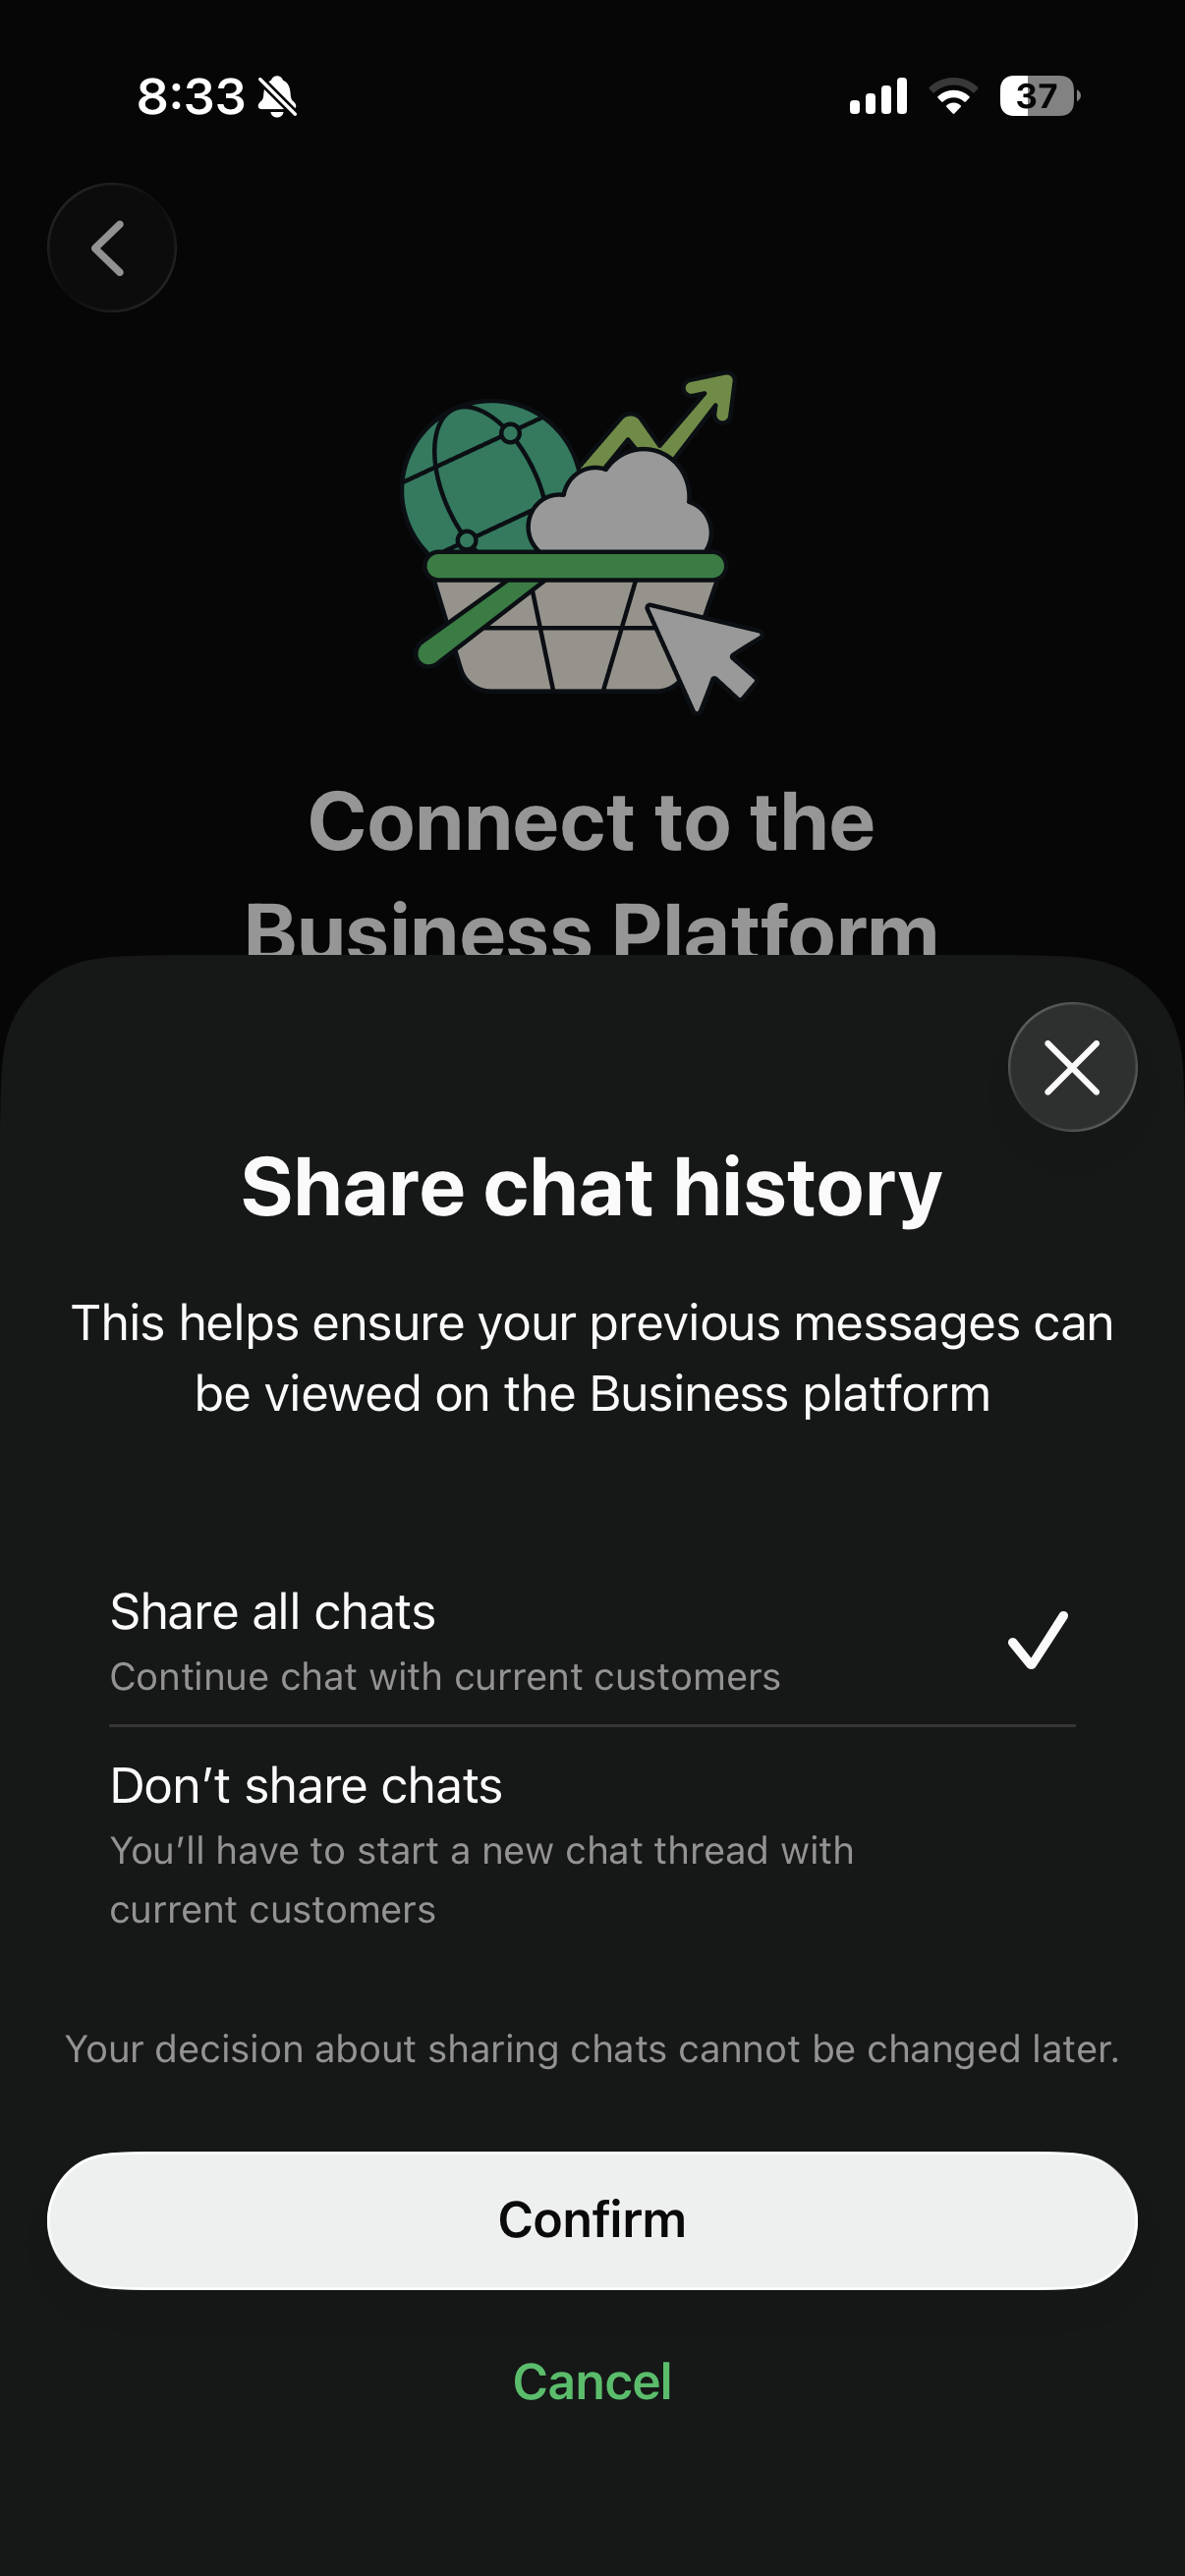
Step A6: Scan the QR code (or paste the access code)
The phone now opens its scanner. Hold the phone up to your computer screen and scan the QR code from Step A3.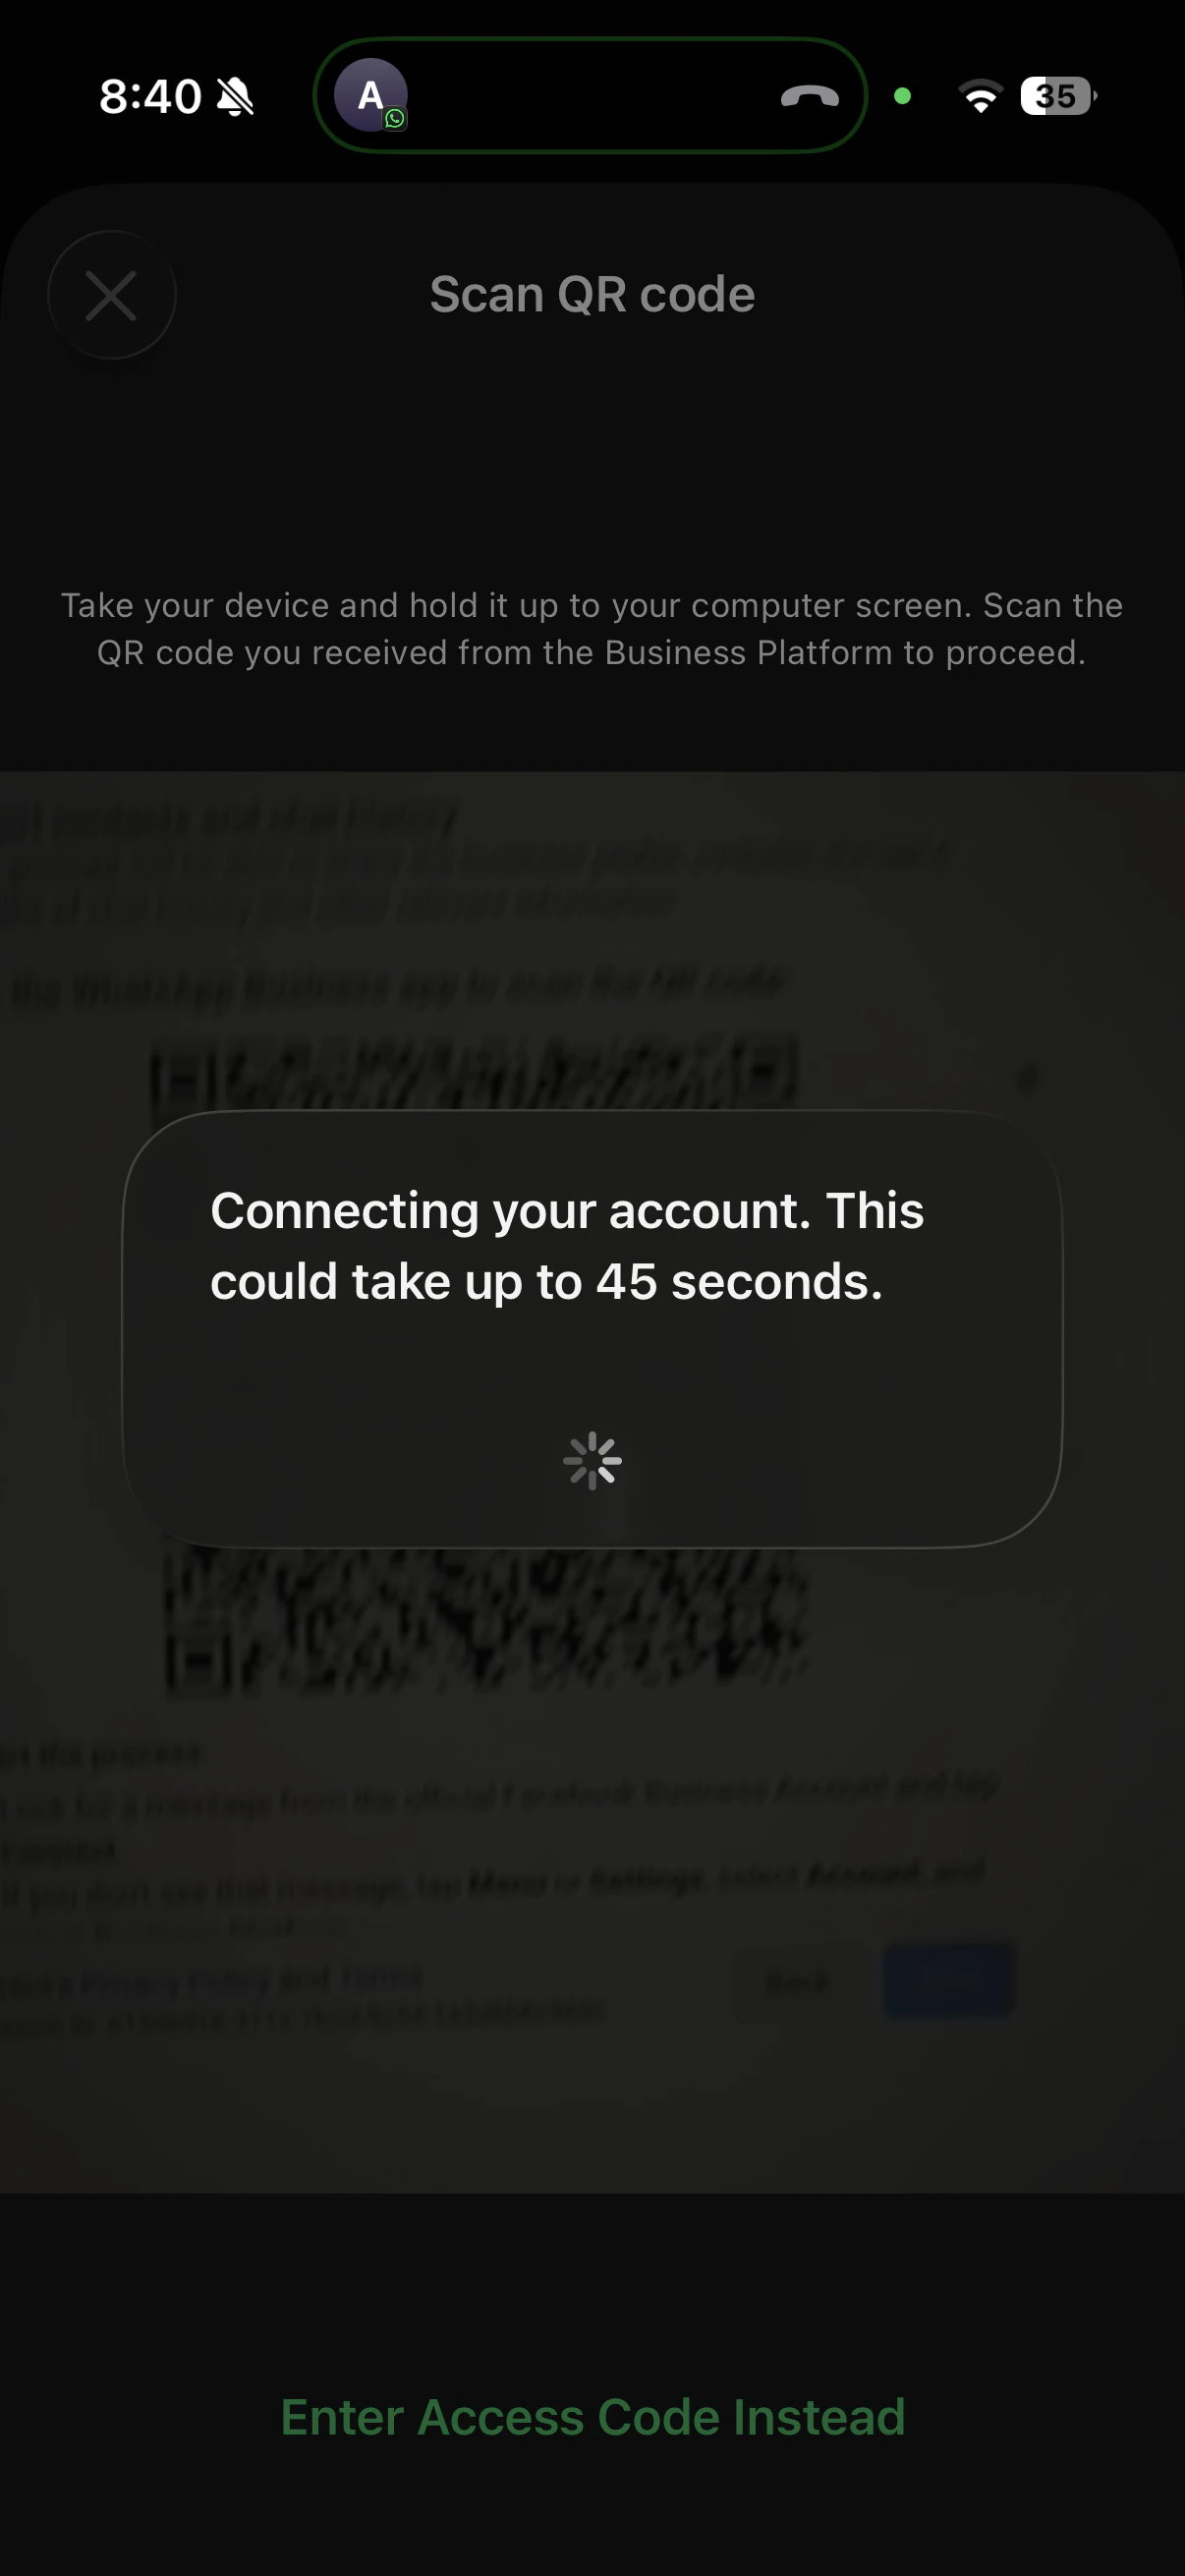
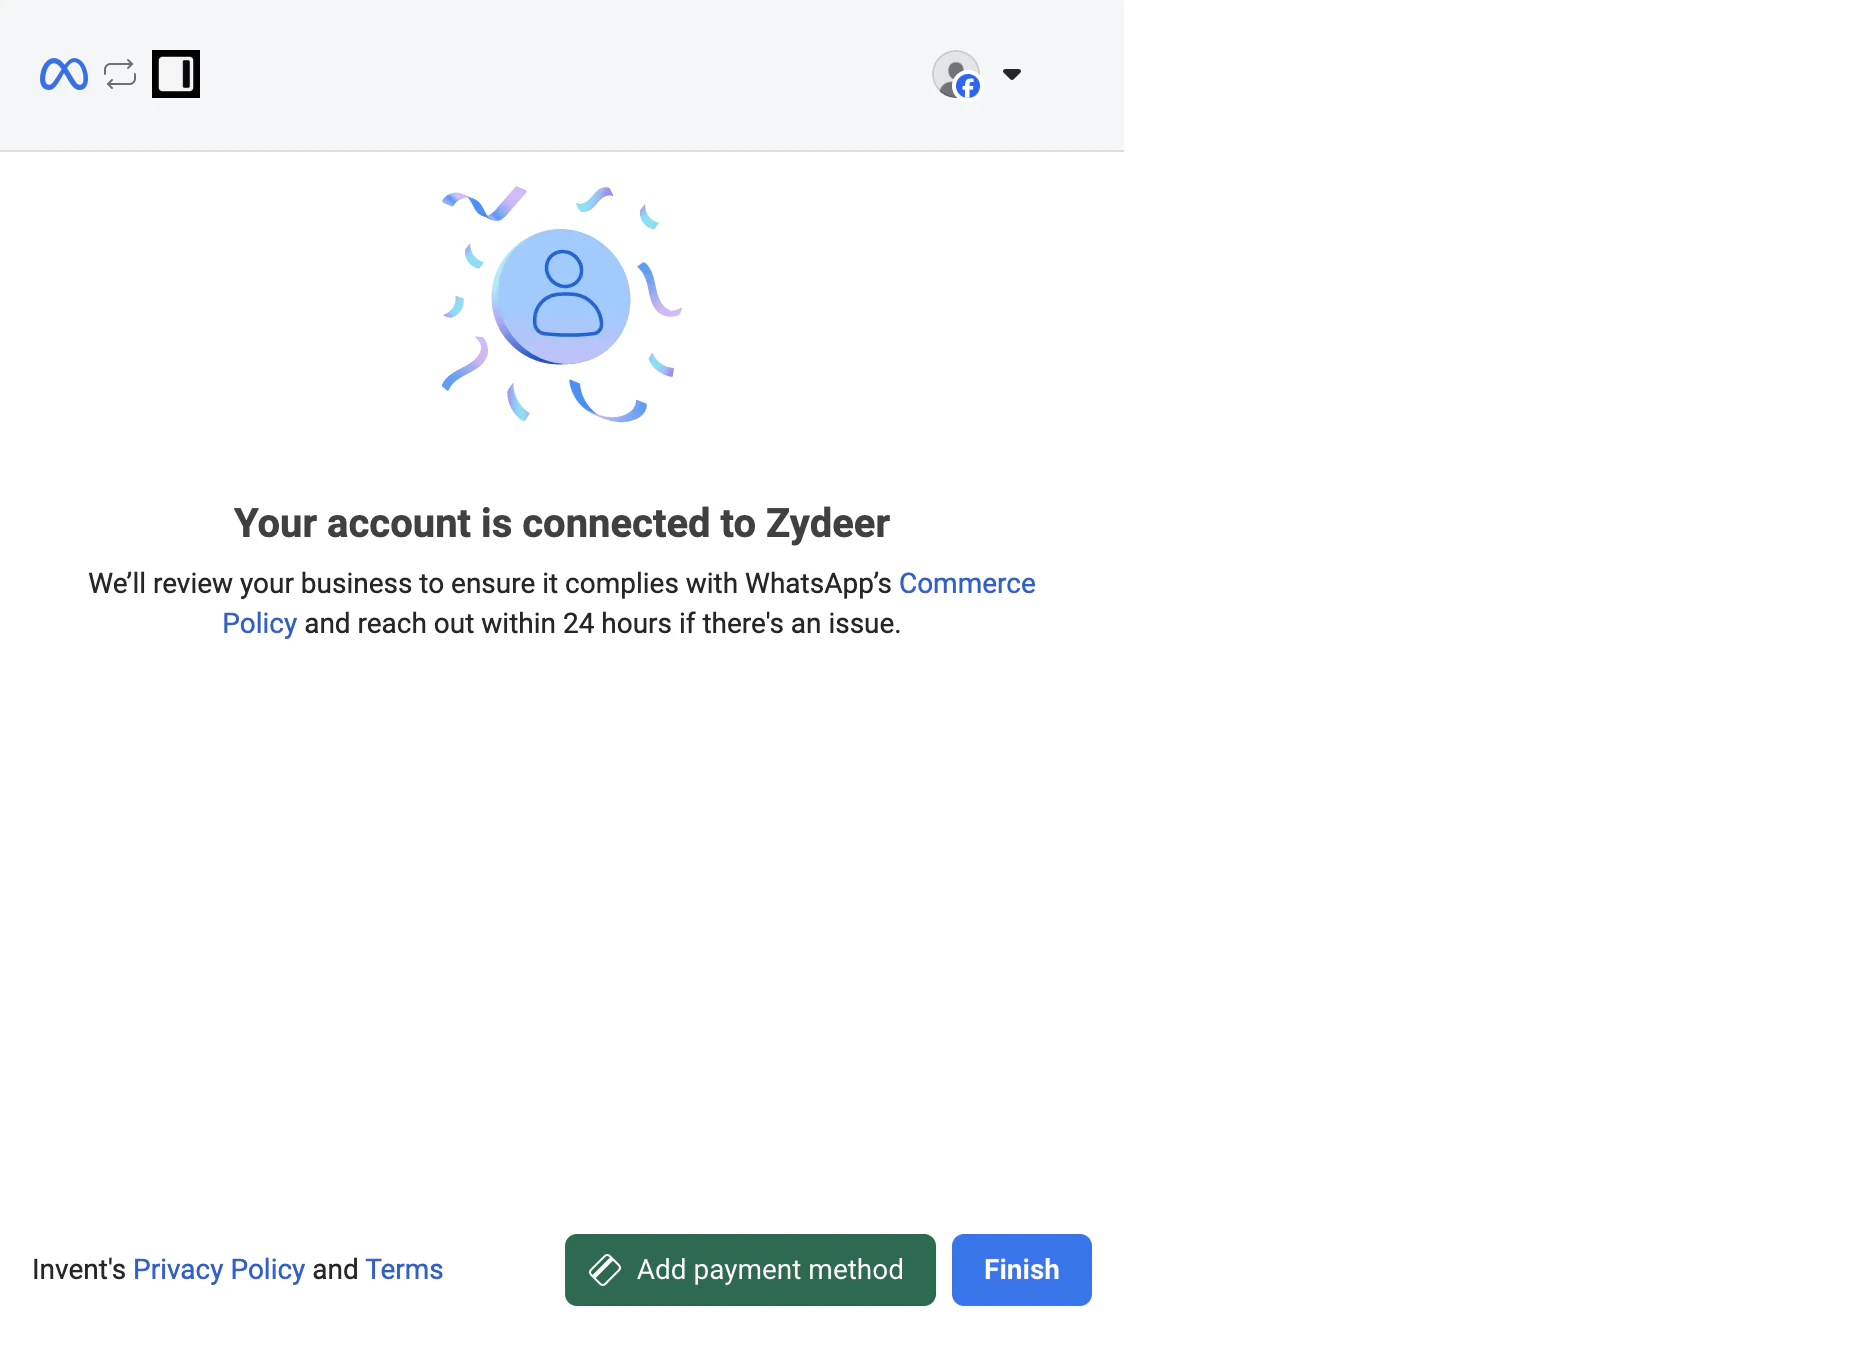
Step A7: Confirm the WhatsApp Business account name and timezone
Back on the computer, Meta confirms the WhatsApp Business Account it just created or linked, and asks for a timezone.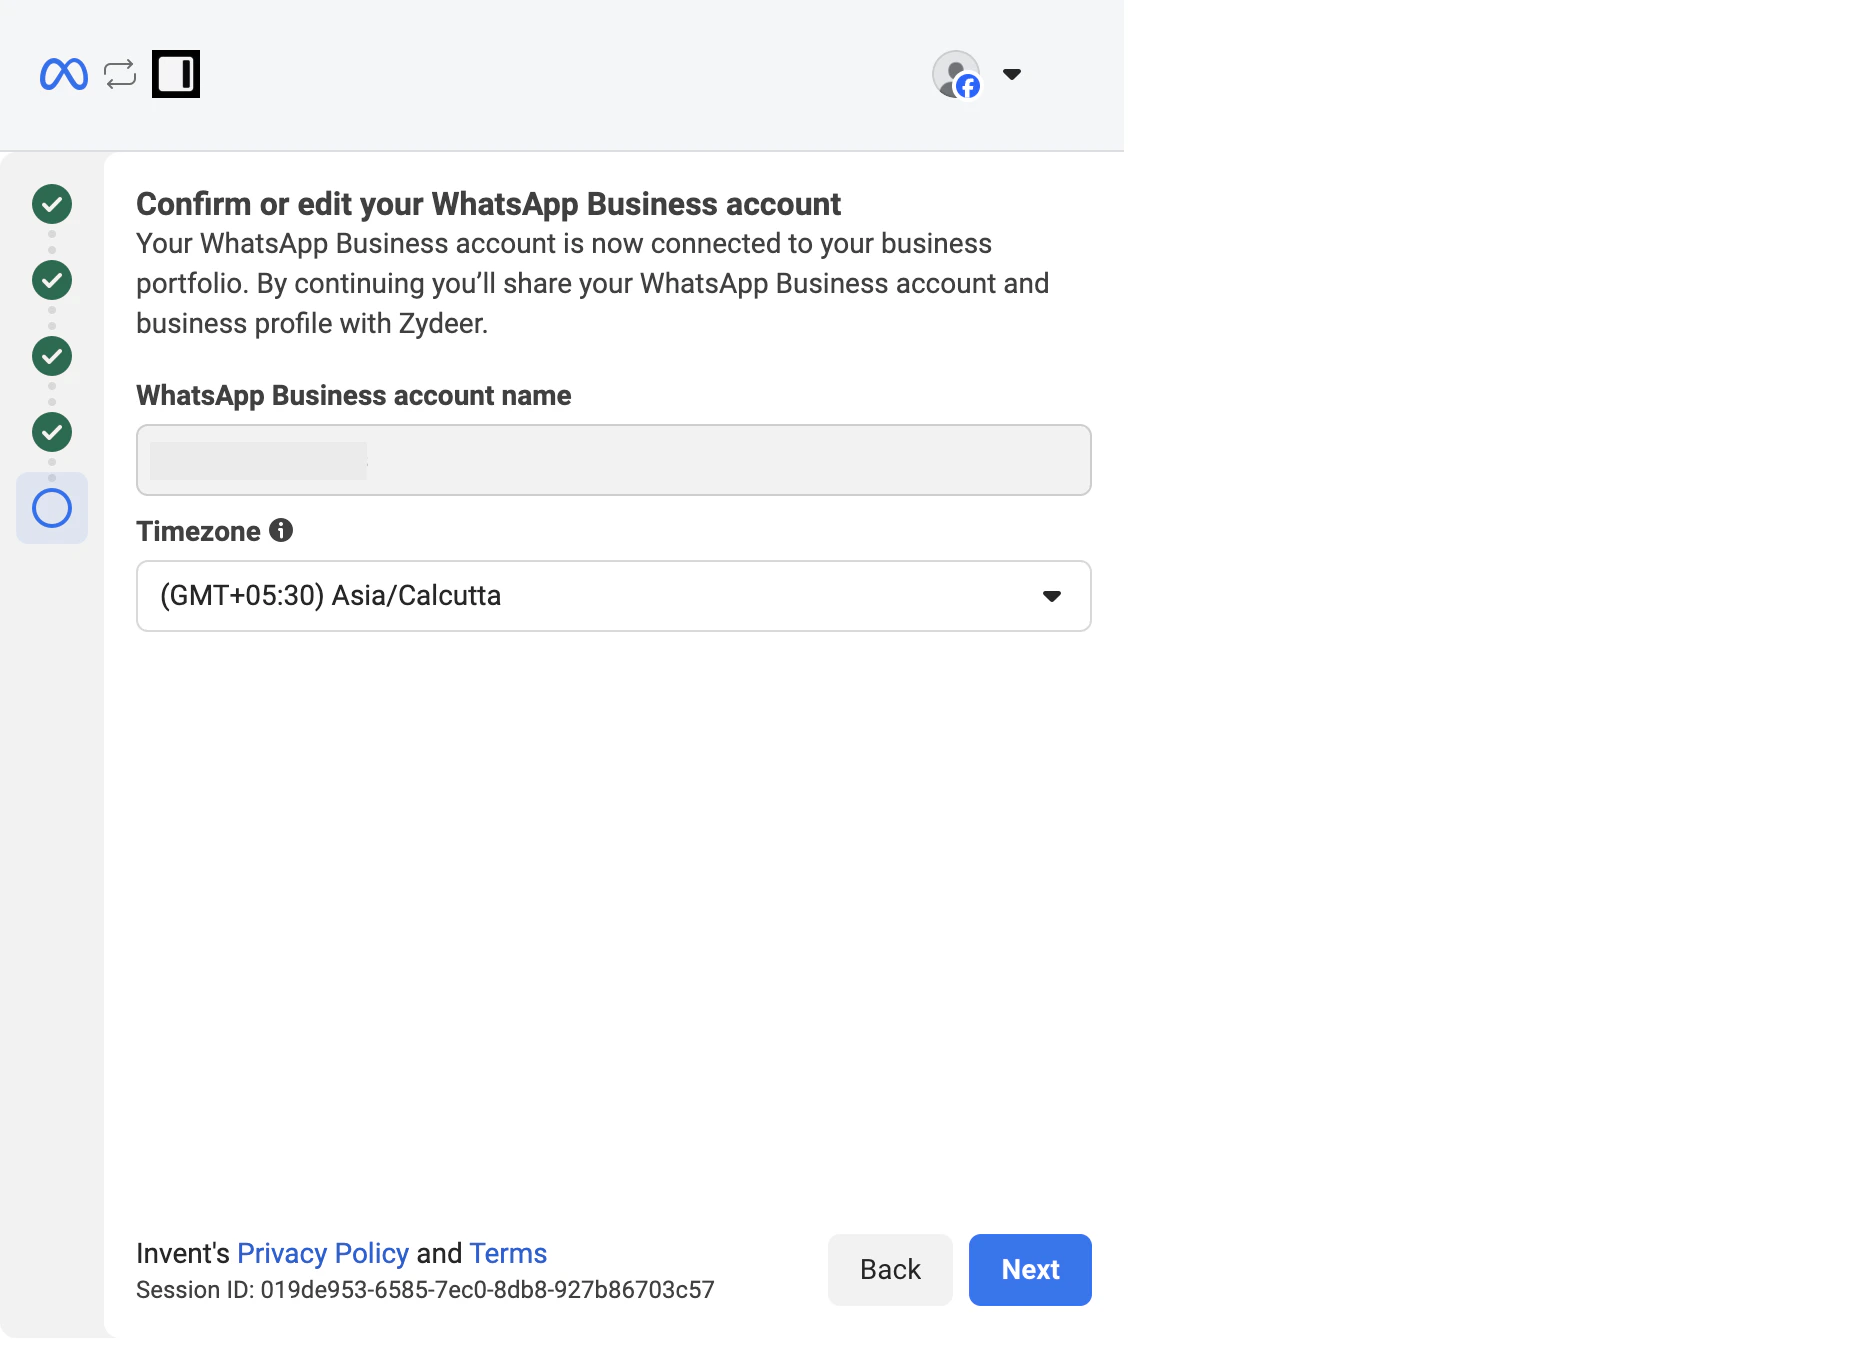
Step A8: Review permissions and confirm
Meta lists what Invent will be able to do on the WABA.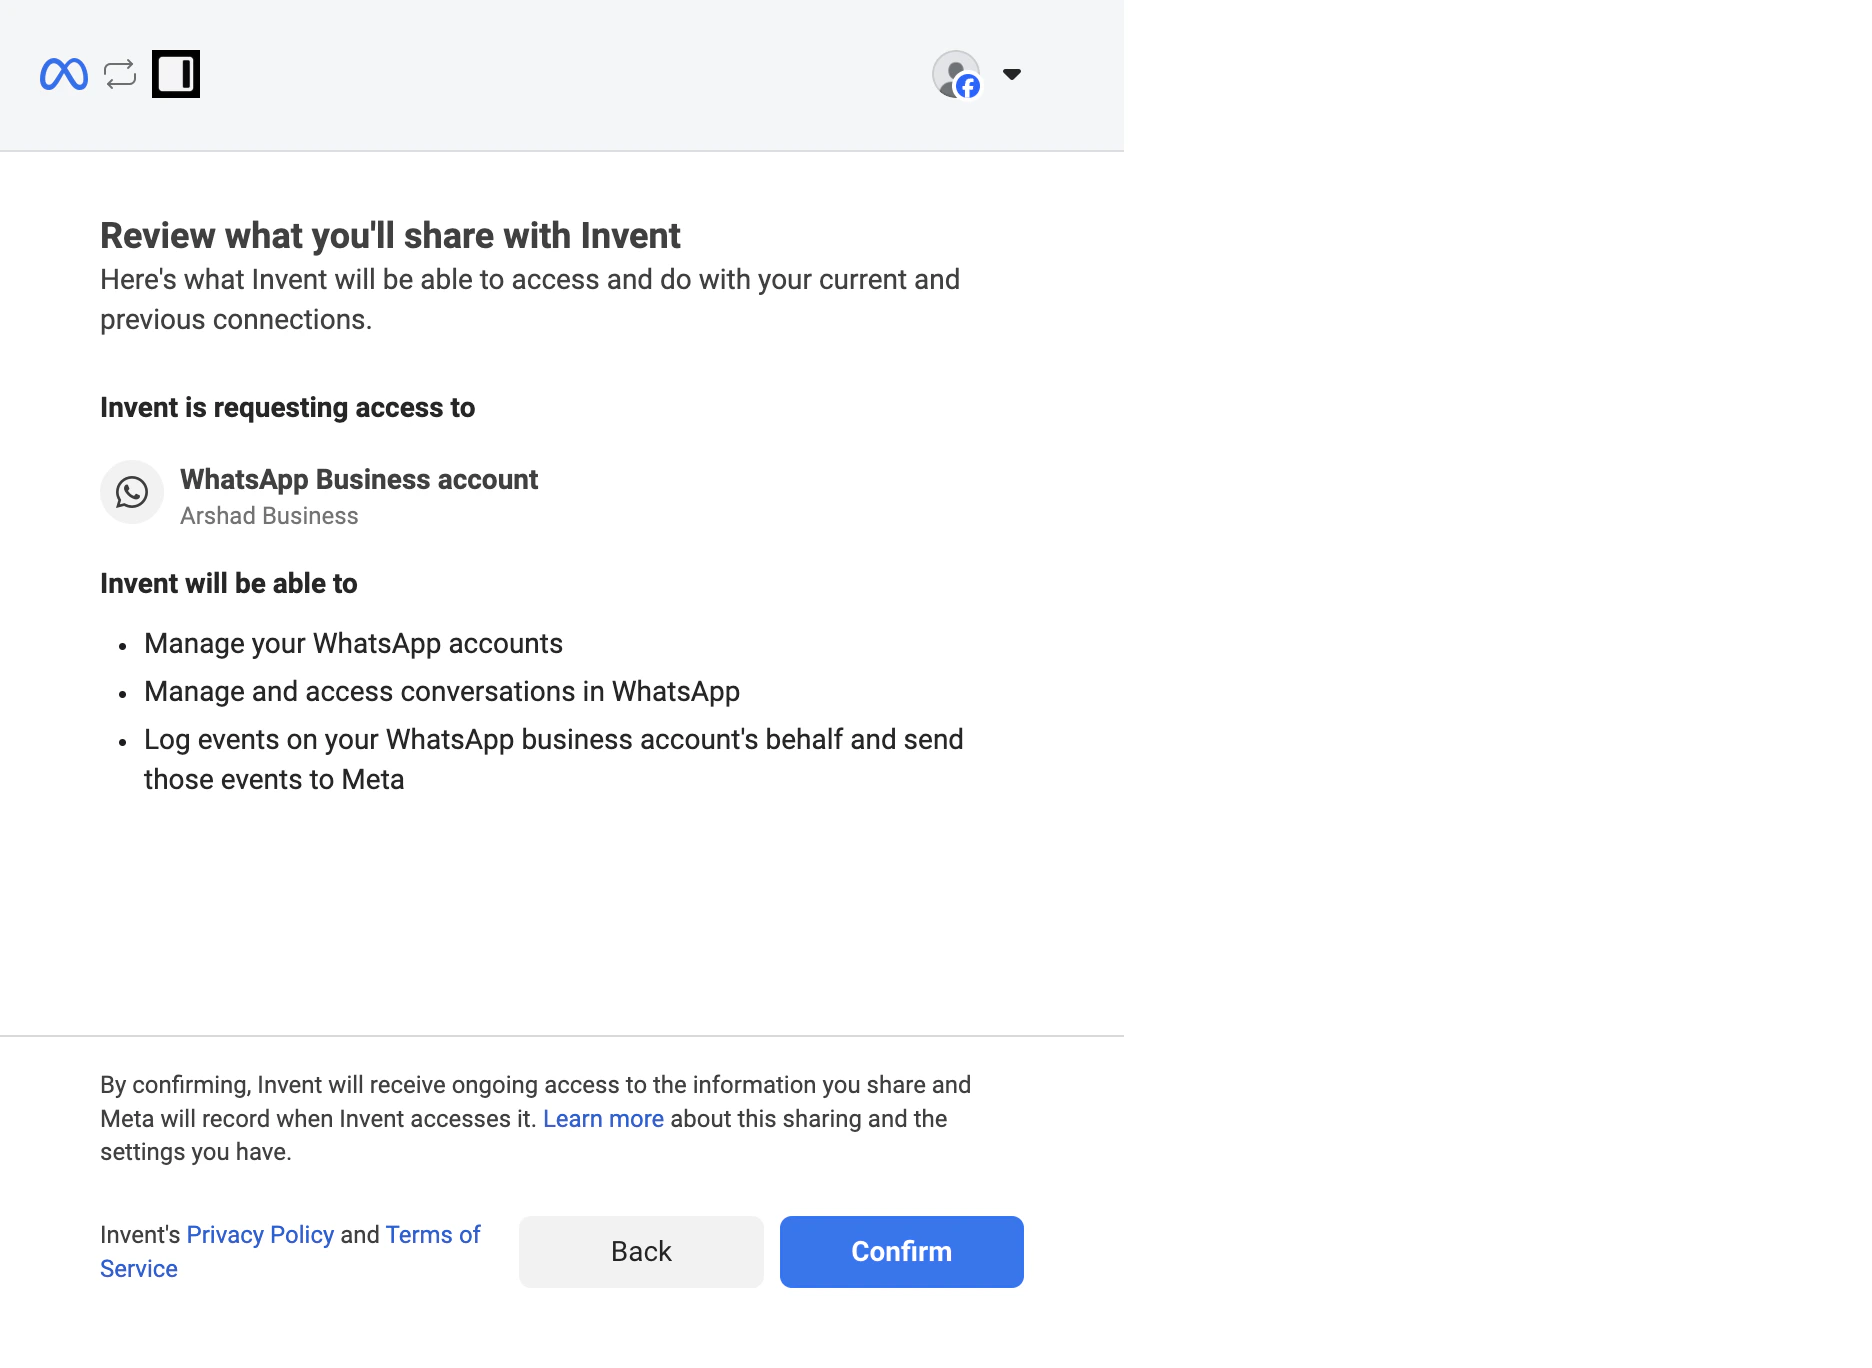
- Manage your WhatsApp accounts: list and bind the WABAs and phone numbers in your portfolio so the right one shows up in Invent’s dropdown.
- Manage and access conversations in WhatsApp: receive incoming messages and send replies on behalf of the number. This is the core capability that powers the assistant.
- Log events on your WhatsApp business account’s behalf: send Meta the analytics events (delivery, read receipts, broadcast metrics) that drive the Inbox and Broadcasts reports.
Step A9: Wait for the connection to finalize
Meta shows a short Connecting your account spinner while it finalizes the binding.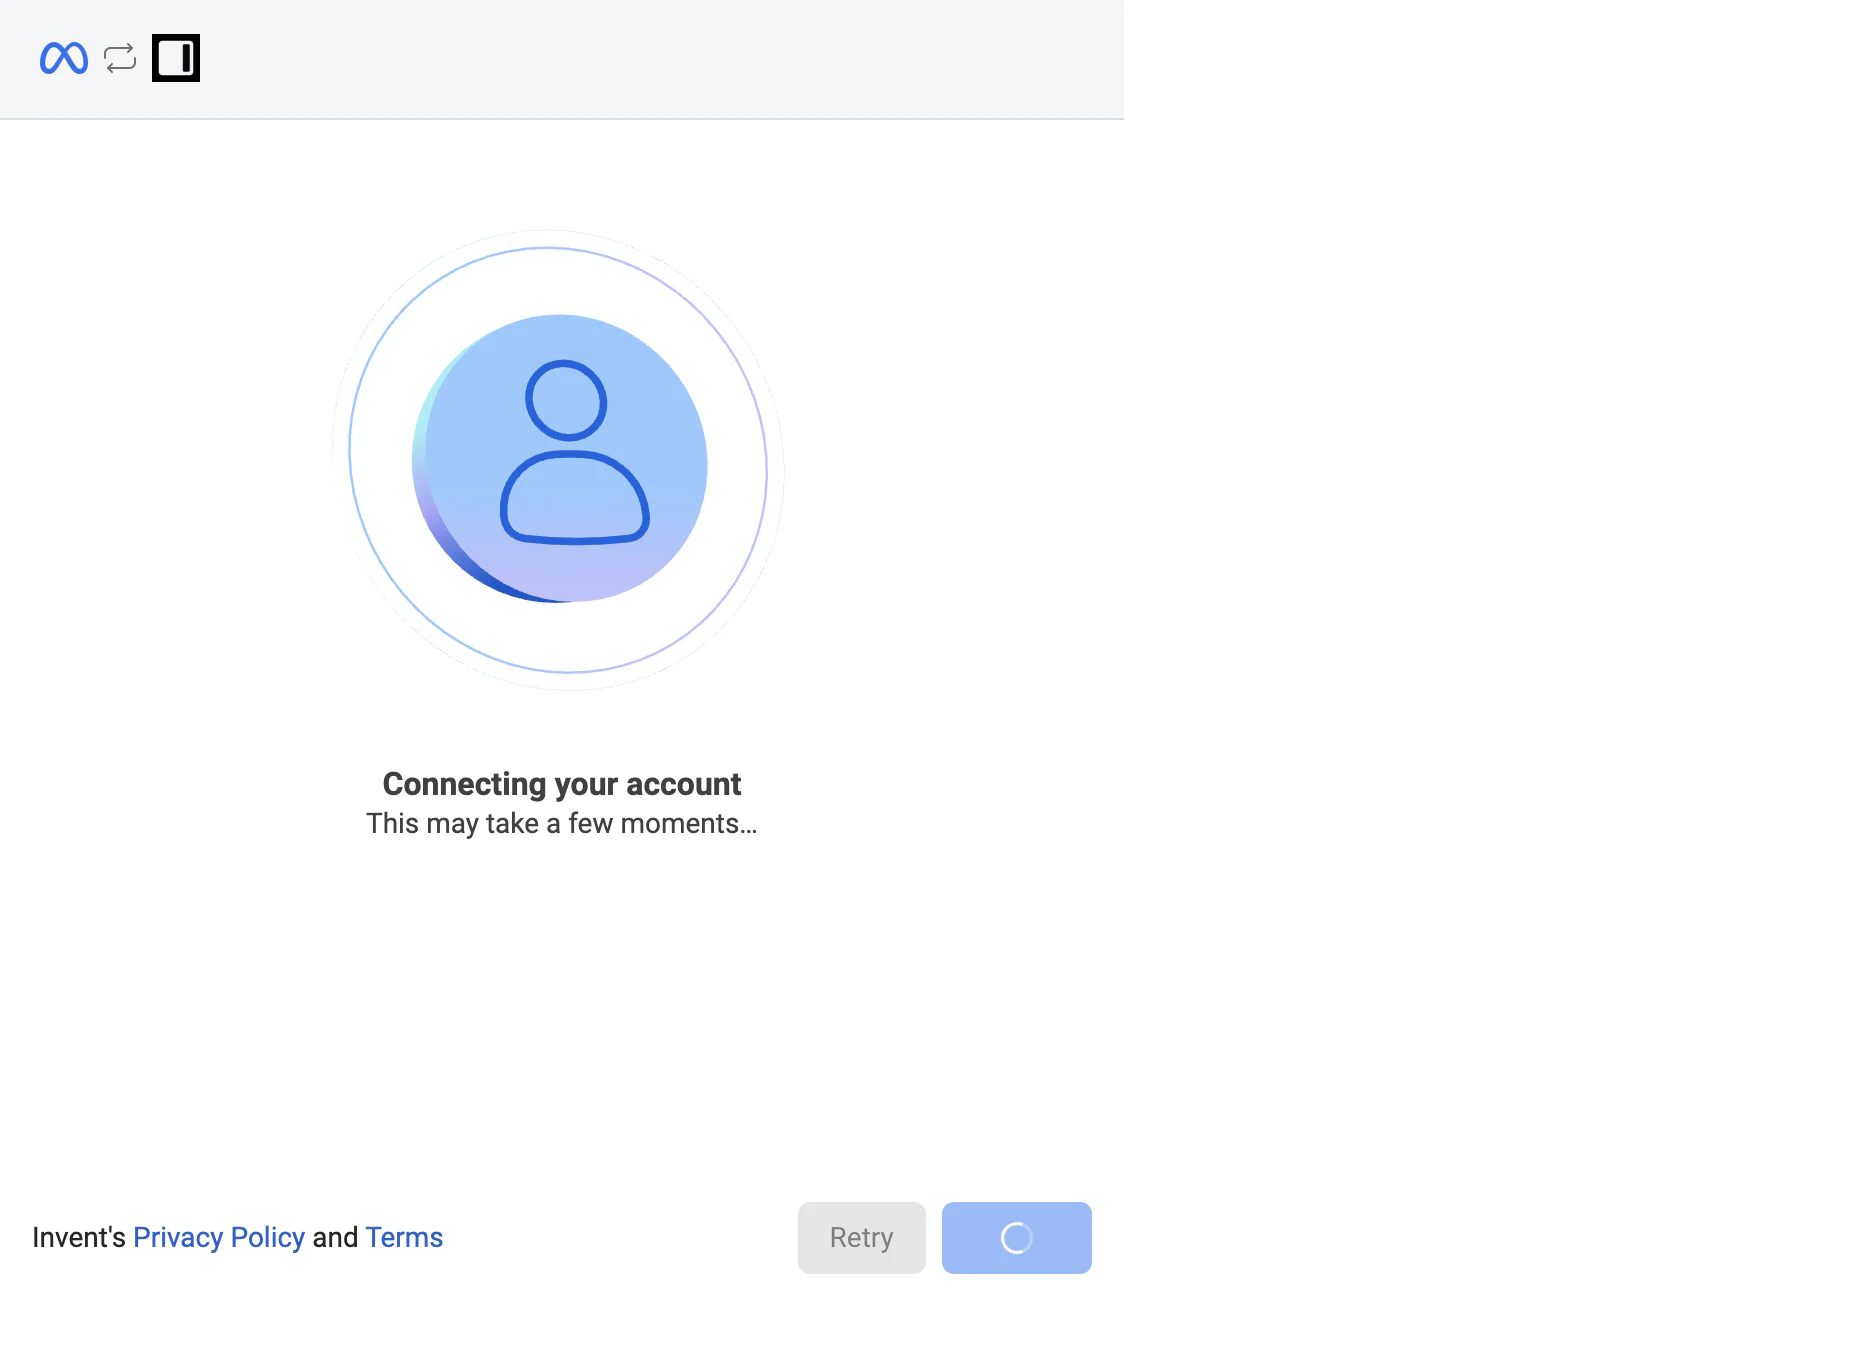
Path B: API-only (Create a New WhatsApp Business Account)
Use this path if you picked Create a WhatsApp Business account at Step 3. Skip back to Path A if you picked the other option.Step B1: Enter business information
Meta asks for business details that will be attached to the new WhatsApp Business Account. Compared to coexistence, this form has an extra Category field because you are creating a fresh WABA.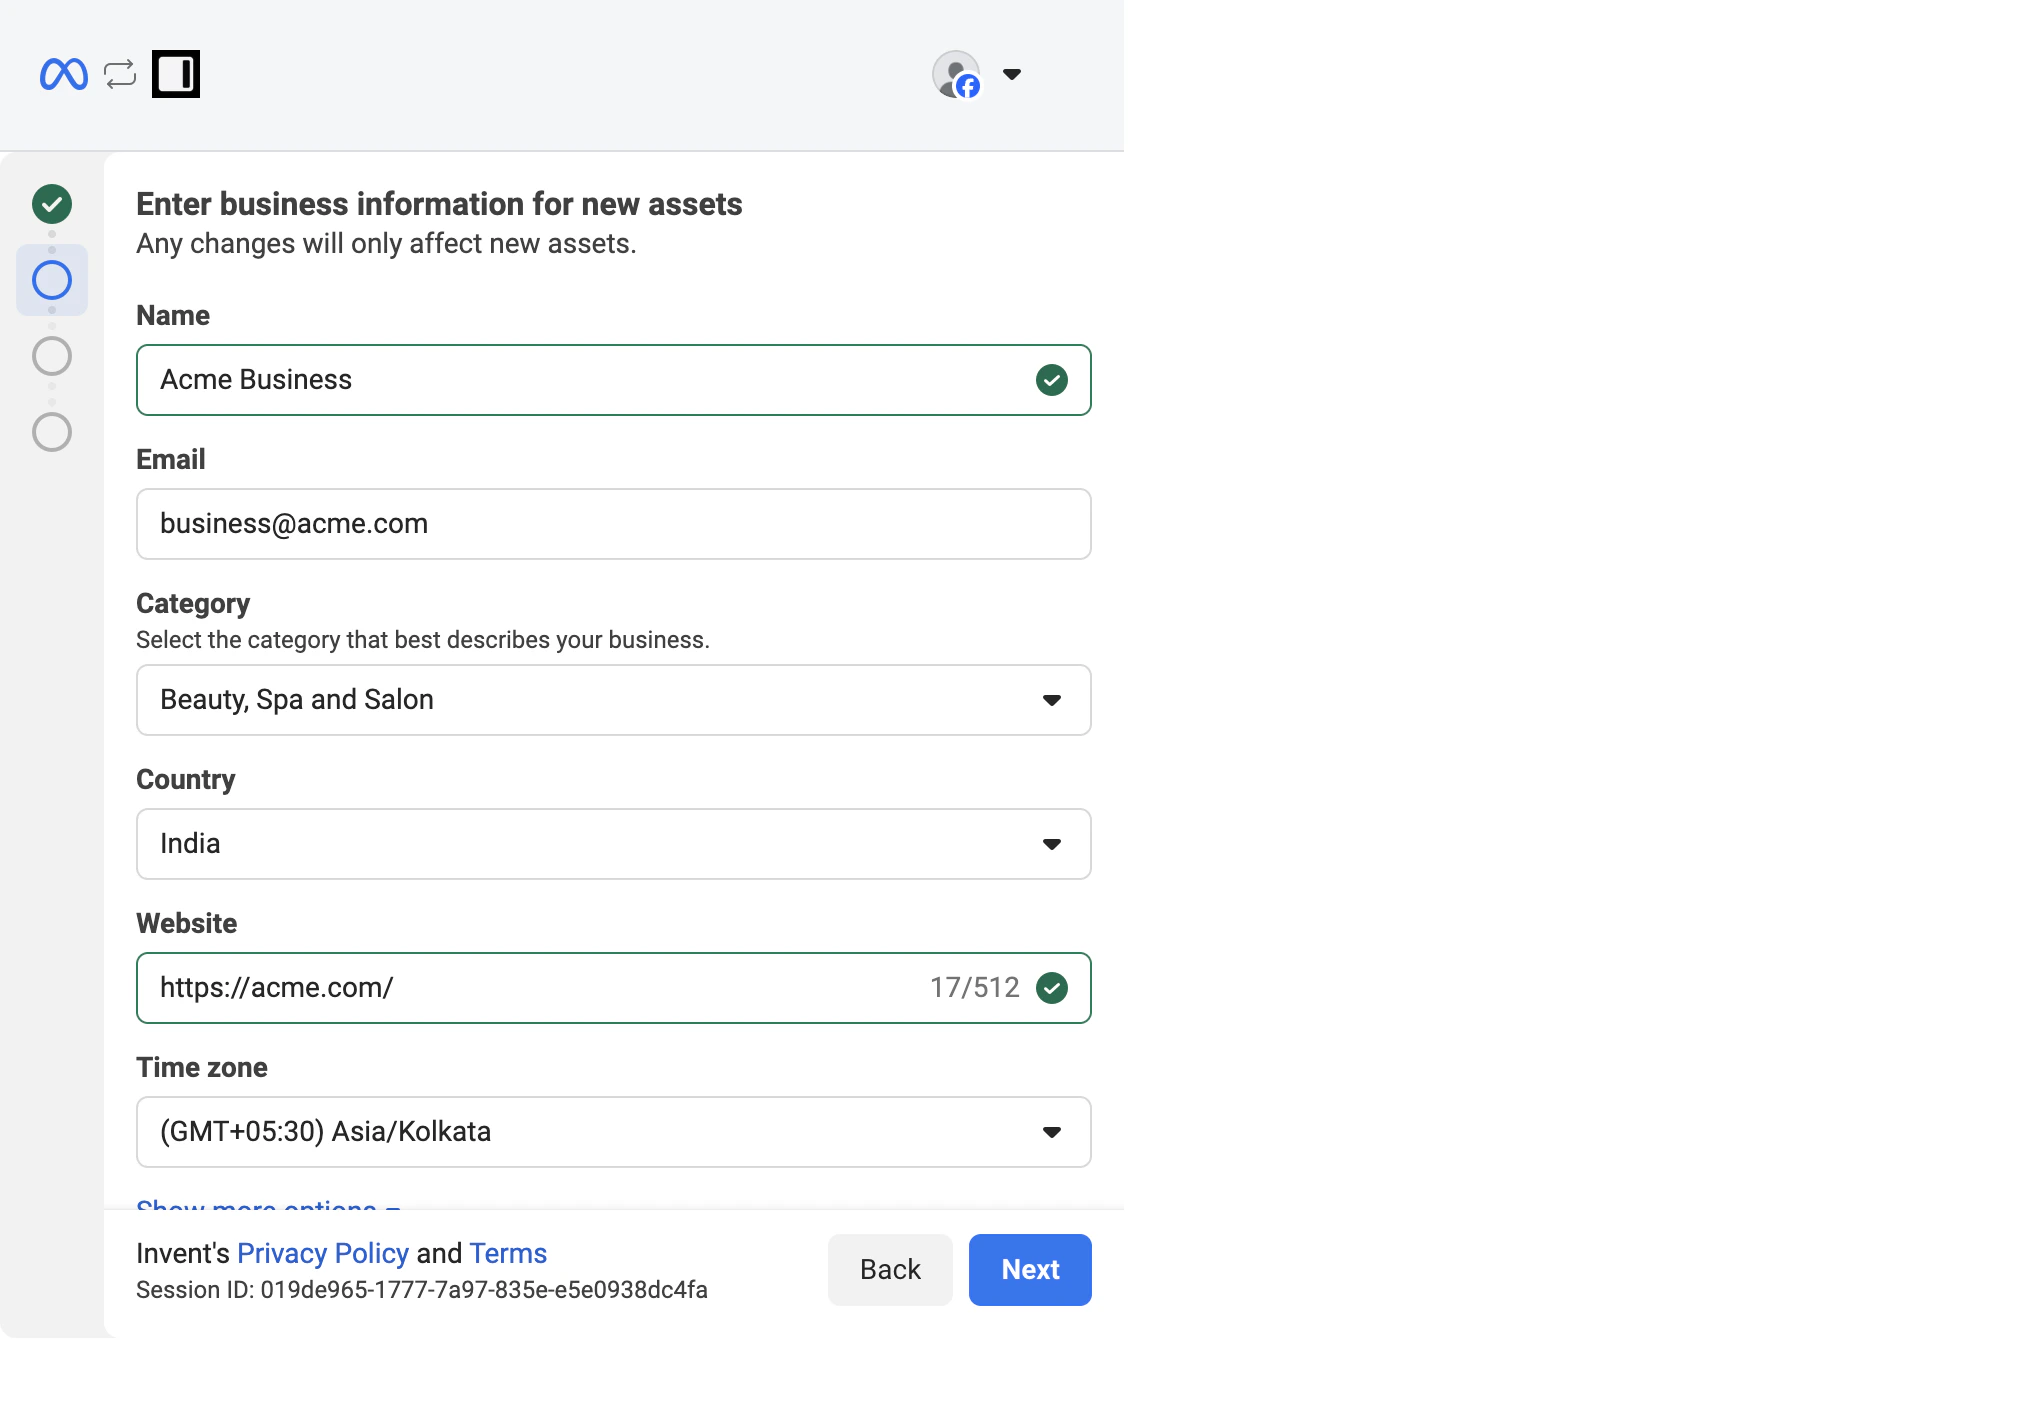
Step B2: Add the phone number, display name, and verification method
This is the screen where you commit a brand-new number to the API.
Step B3: Verify with the 6-digit code
Meta sends a 6-digit code to the number using the method you picked.
Step B4: Review permissions and confirm
Meta shows the same permissions screen as coexistence, listing what Invent will be able to do on the new WABA.Step B5: Wait for the connection to finalize
You see the same Connecting your account spinner.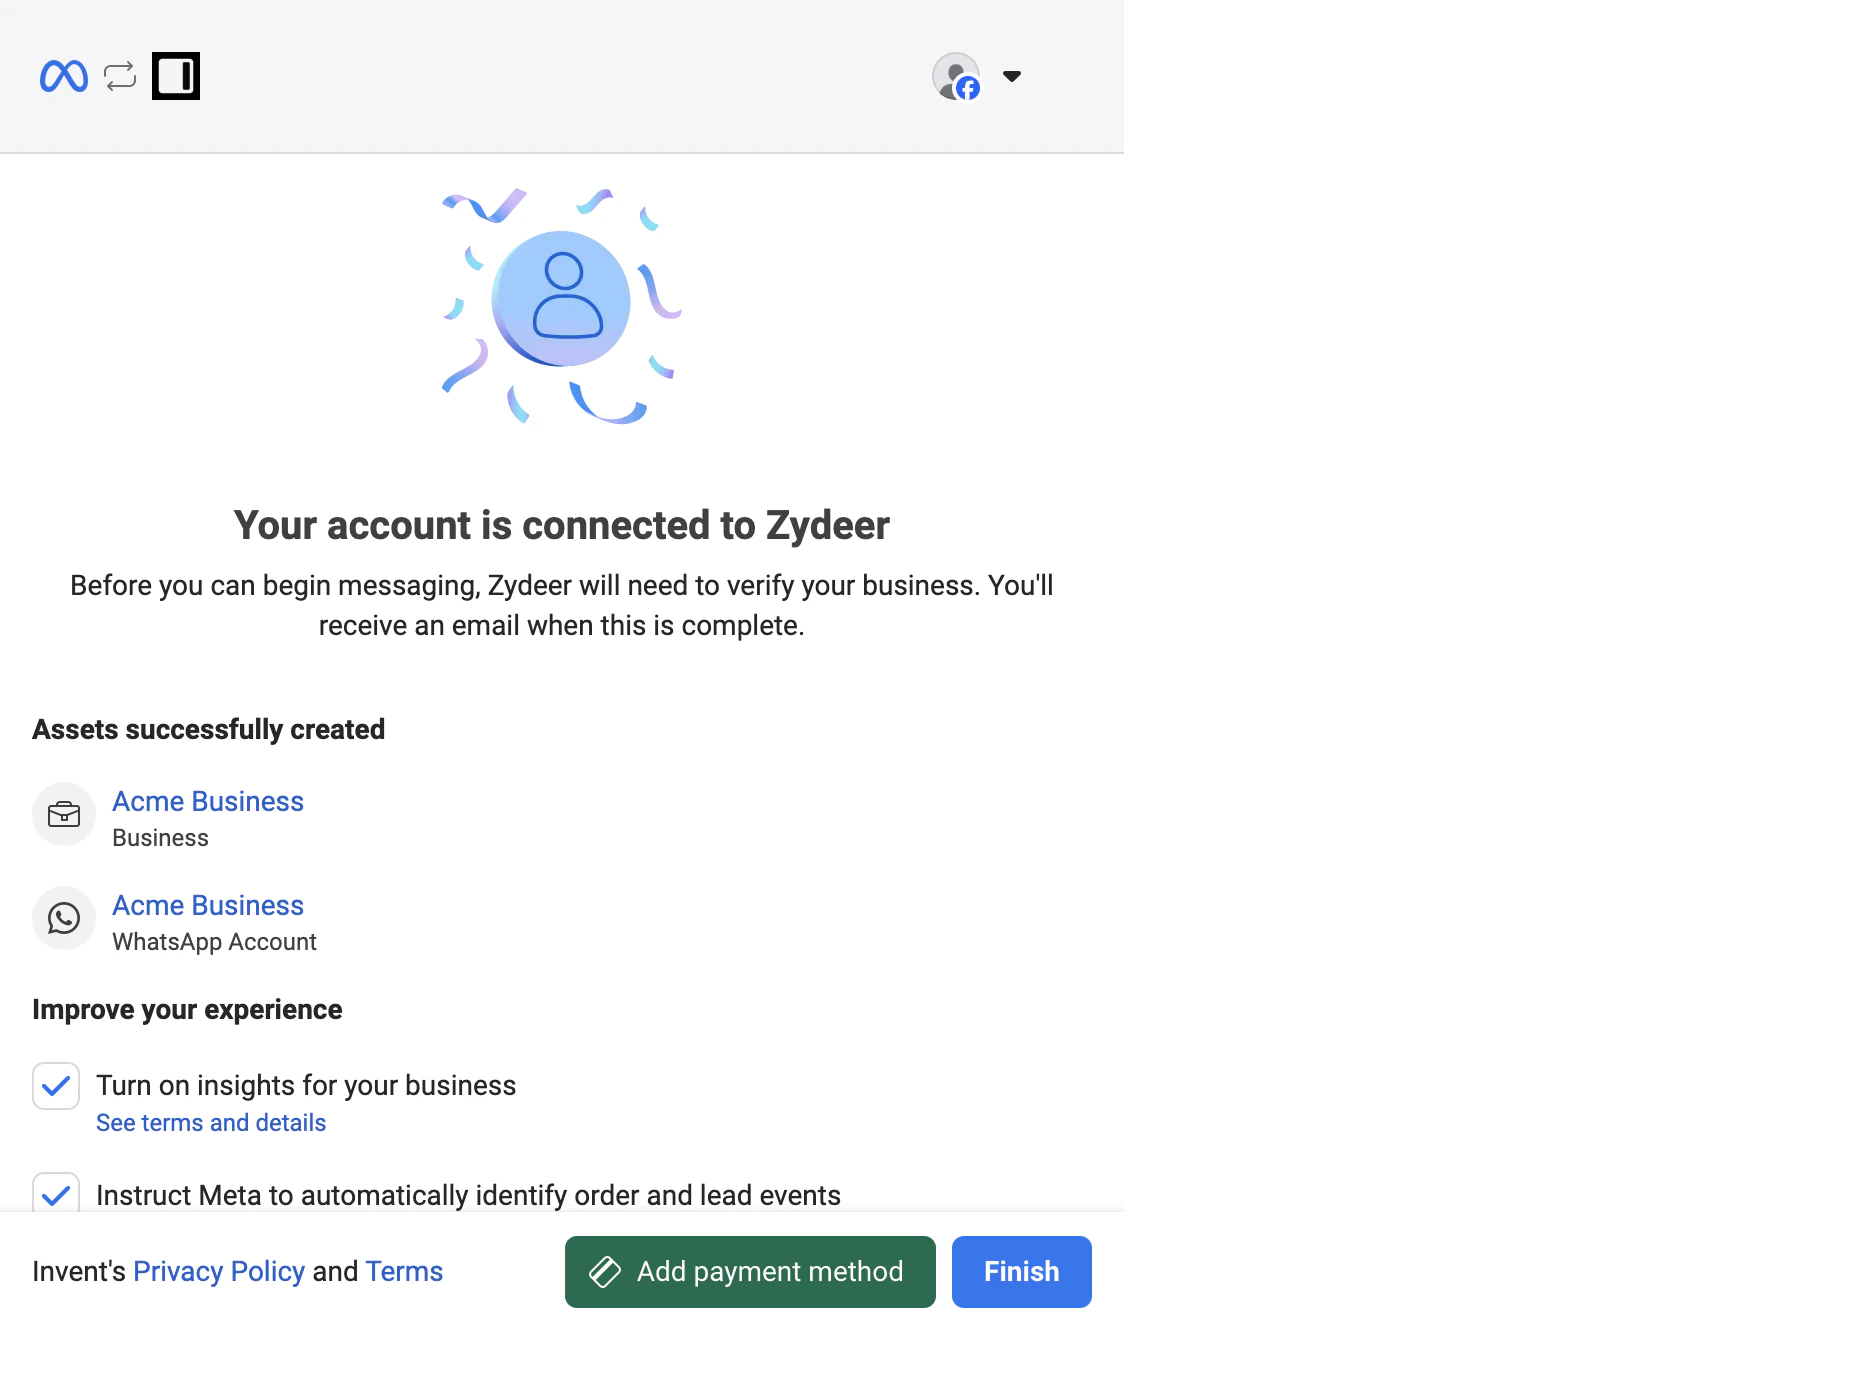
Step 4: Name the Connection in Invent
Whichever path you took, Meta now redirects you back to Invent and prompts you to label the new connection (for example, Acme Business or EU Sales WhatsApp).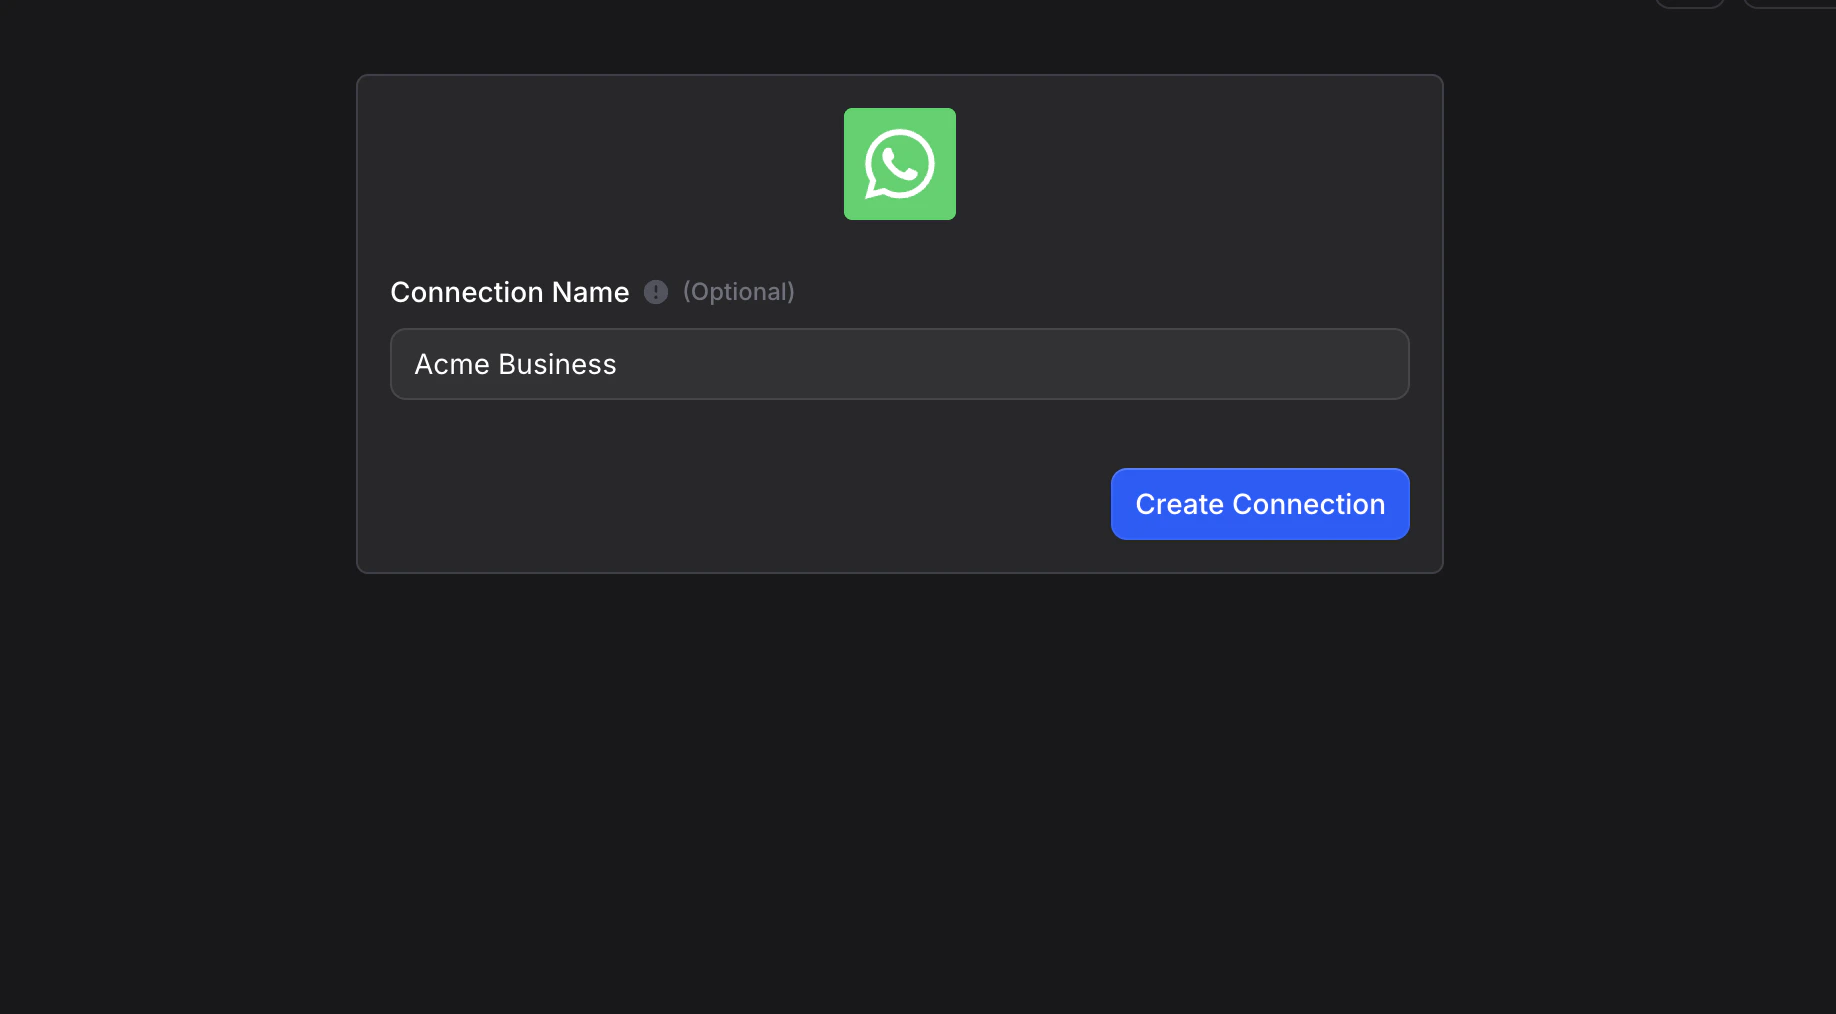
Step 5: Pick the Number and Connect Channel
Back on the WhatsApp connect dialog, your new connection is already selected. The WhatsApp Phone Number dropdown now lists every number that connection has access to.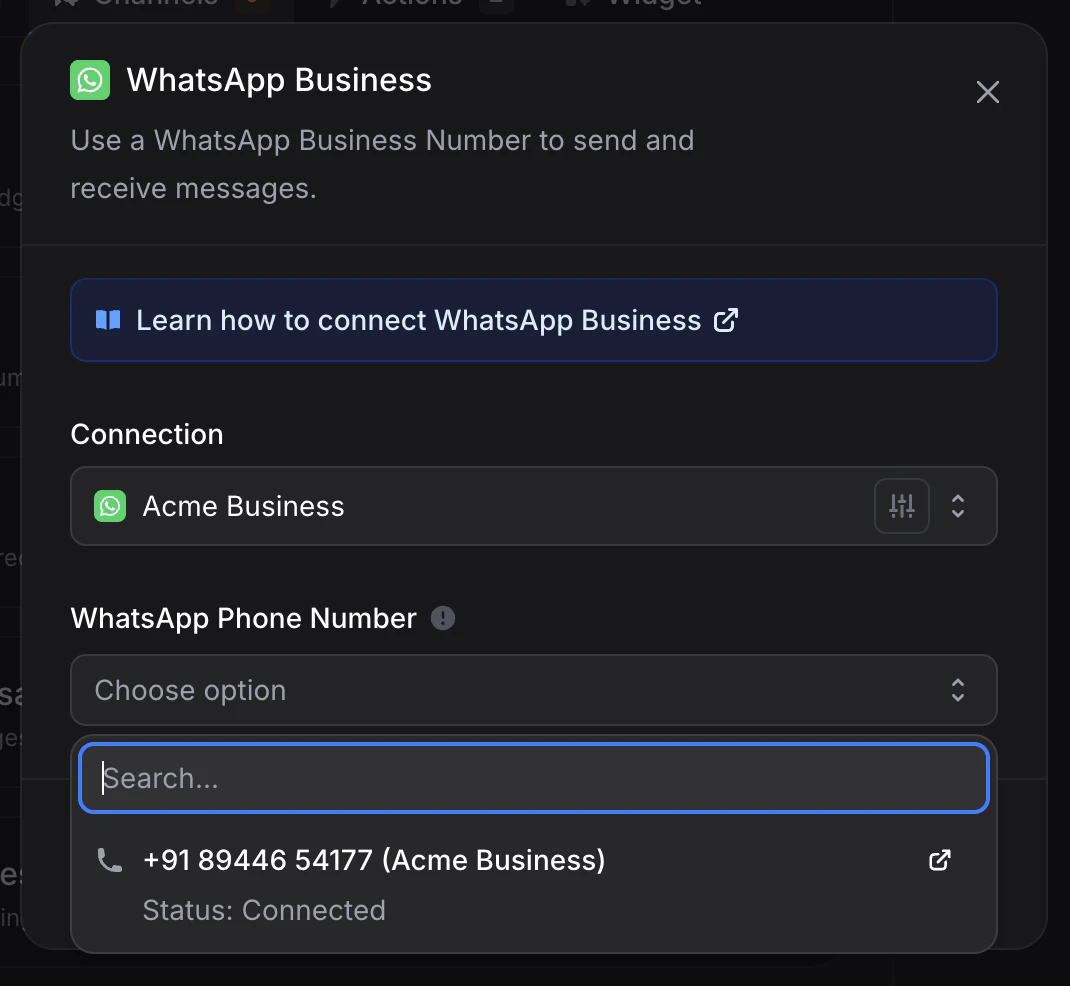
- Connected: ready to send and receive immediately. This is the normal state for coexistence numbers and for verified API-only numbers.
- Pending: Meta is still finalizing the WABA. Inbound messages still work; high-volume outbound (Broadcasts) is gated until Meta clears it. This is normal for new API-only numbers in the first hour or two.
Step 6: Send a Test Message
Open WhatsApp on your personal device, message the connected number directly (or openwa.me/<your-number-with-country-code> from a browser to deep-link into the chat), and send a message. You should see your assistant reply within a few seconds. The conversation also appears in your Inbox immediately, with the originating number and the WhatsApp channel shown on the conversation.
That is it, the assistant is live on WhatsApp.
The 14-Day Rule (Coexistence Only)
This is a Meta platform rule, not an Invent limitation. The reason is straightforward: coexistence is a shared-control mode, and Meta uses the periodic app open as a signal that the number is still legitimately operated by the original owner. Without that signal, the API binding is treated as orphaned and revoked. In practice, for any business with active staff using the app, this is invisible. The risk shows up when:- The phone the number is registered on is sitting in a drawer.
- The original owner left the company and nobody is opening the app anymore.
- The number is purely receiving and the team replies exclusively from the Invent Inbox, never from the app.
- Have someone open the app every couple of weeks. Even briefly counts. Set a recurring calendar reminder if your team is light.
- Migrate to API-only. If nobody actually needs the mobile app, the 14-day rule is pure overhead. Open WhatsApp Manager, find the number, and migrate it from coexistence to API-only. After migration the number stops requiring the periodic app open.
What Syncs and What Stays in the App (Coexistence)
When a number is on coexistence, Meta splits message types between the app and the API. Knowing which is which avoids surprises in the Inbox.If Meta says “this phone number is already registered”
This error fires whenever the number you typed in is already in use somewhere else on WhatsApp. It can show up on either path: Coexistence and API-only both go through Meta’s number verification, and Meta blocks both with the same inline message: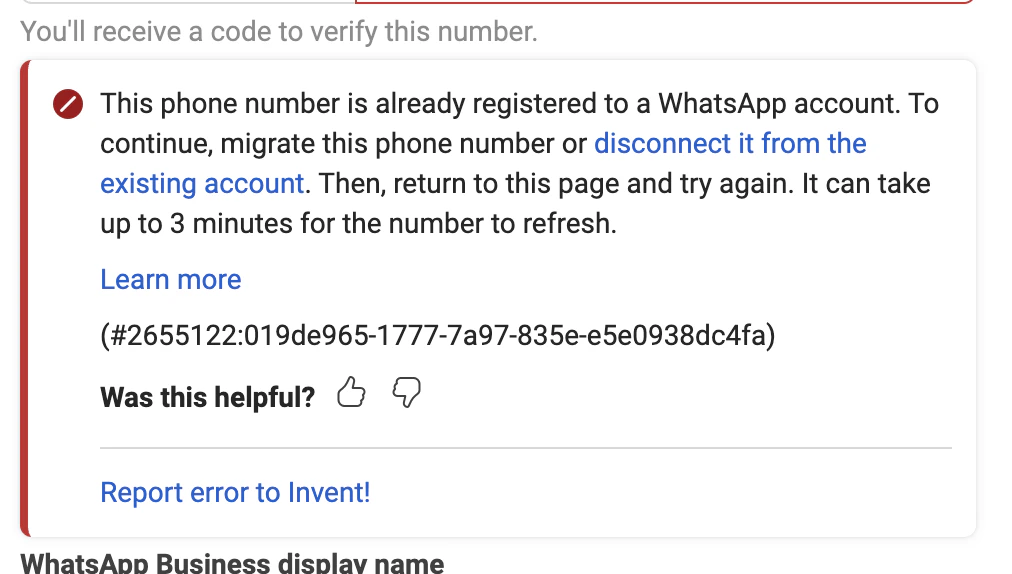
A. The number is on a regular WhatsApp account (the green app)
The number is in active use on the personal WhatsApp app on someone’s phone. Coexistence does not work for personal WhatsApp, so the only way to reuse the number is to delete the personal account first, then run Path B.Back up history first if you want to keep it
Delete the WhatsApp account
Wait up to 3 minutes
Re-run the Invent connect flow
B. The number is on the WhatsApp Business app
The number is registered on the WhatsApp Business app (the dark-green icon, not the personal one). You have two ways forward:- Best option for most teams: switch to Coexistence. If you originally picked Create a WhatsApp Business account at Step 3 and hit this error, the cleanest fix is usually to go back and pick Connect a WhatsApp Business App instead. Coexistence is built exactly for this case: it links your existing WhatsApp Business app number to a WABA without you having to delete anything, and it preserves the last 6 months of chat history. Run Path A instead of Path B.
- API-only by deletion. If you genuinely do not want the WhatsApp Business app on this number anymore (purely automated, no manual mobile replies), open the WhatsApp Business app on the registered phone, go to Settings → Account → Delete my account, enter the number to confirm, and follow the prompts. Wait up to 3 minutes, then re-run Path B.
C. The number is on another BSP or Cloud API instance
The number is currently bound to a different platform’s webhook (Twilio, Wati, 360dialog, MessageBird, an old in-house integration, or another Invent workspace). Only one BSP can hold the active webhook on a number at a time, so you have to release it from that platform first.Open Meta Business Suite
Open the WABA's settings
Open the Partners tab and remove the BSP
Disconnect from the WhatsApp Business app (Coexistence numbers only)
Disable Two-Step Verification on the number
Cancel the previous BSP's subscription
Connecting More Numbers
You can add additional WhatsApp numbers to the same assistant at any time. From the Channels tab, click + Add another under the WhatsApp section and either:- Pick another number from the same connection (when your existing connection’s WABA already has more than one number registered), or
- Connect a new number by opening the Connection dropdown and choosing + Connect WhatsApp again. Run Path A or Path B for the new number, or release it first if it is already registered somewhere else.
Reusing a Connection Across Assistants
Once a WhatsApp connection exists in your workspace, any assistant can pick it up from the Connection dropdown without going through Meta’s Embedded Signup again. Authenticate once, reuse everywhere. Manage every connection centrally from Settings → Connections:- Rename a connection to keep the list readable as you add more.
- Reconnect if Meta’s session expires, an admin removes the integration from
facebook.com/settings/business_integrations, or the underlying Business Portfolio is reorganized. - Disconnect to remove the link entirely. Any assistant still using that connection stops sending and receiving until it is pointed at a new one.
Troubleshooting
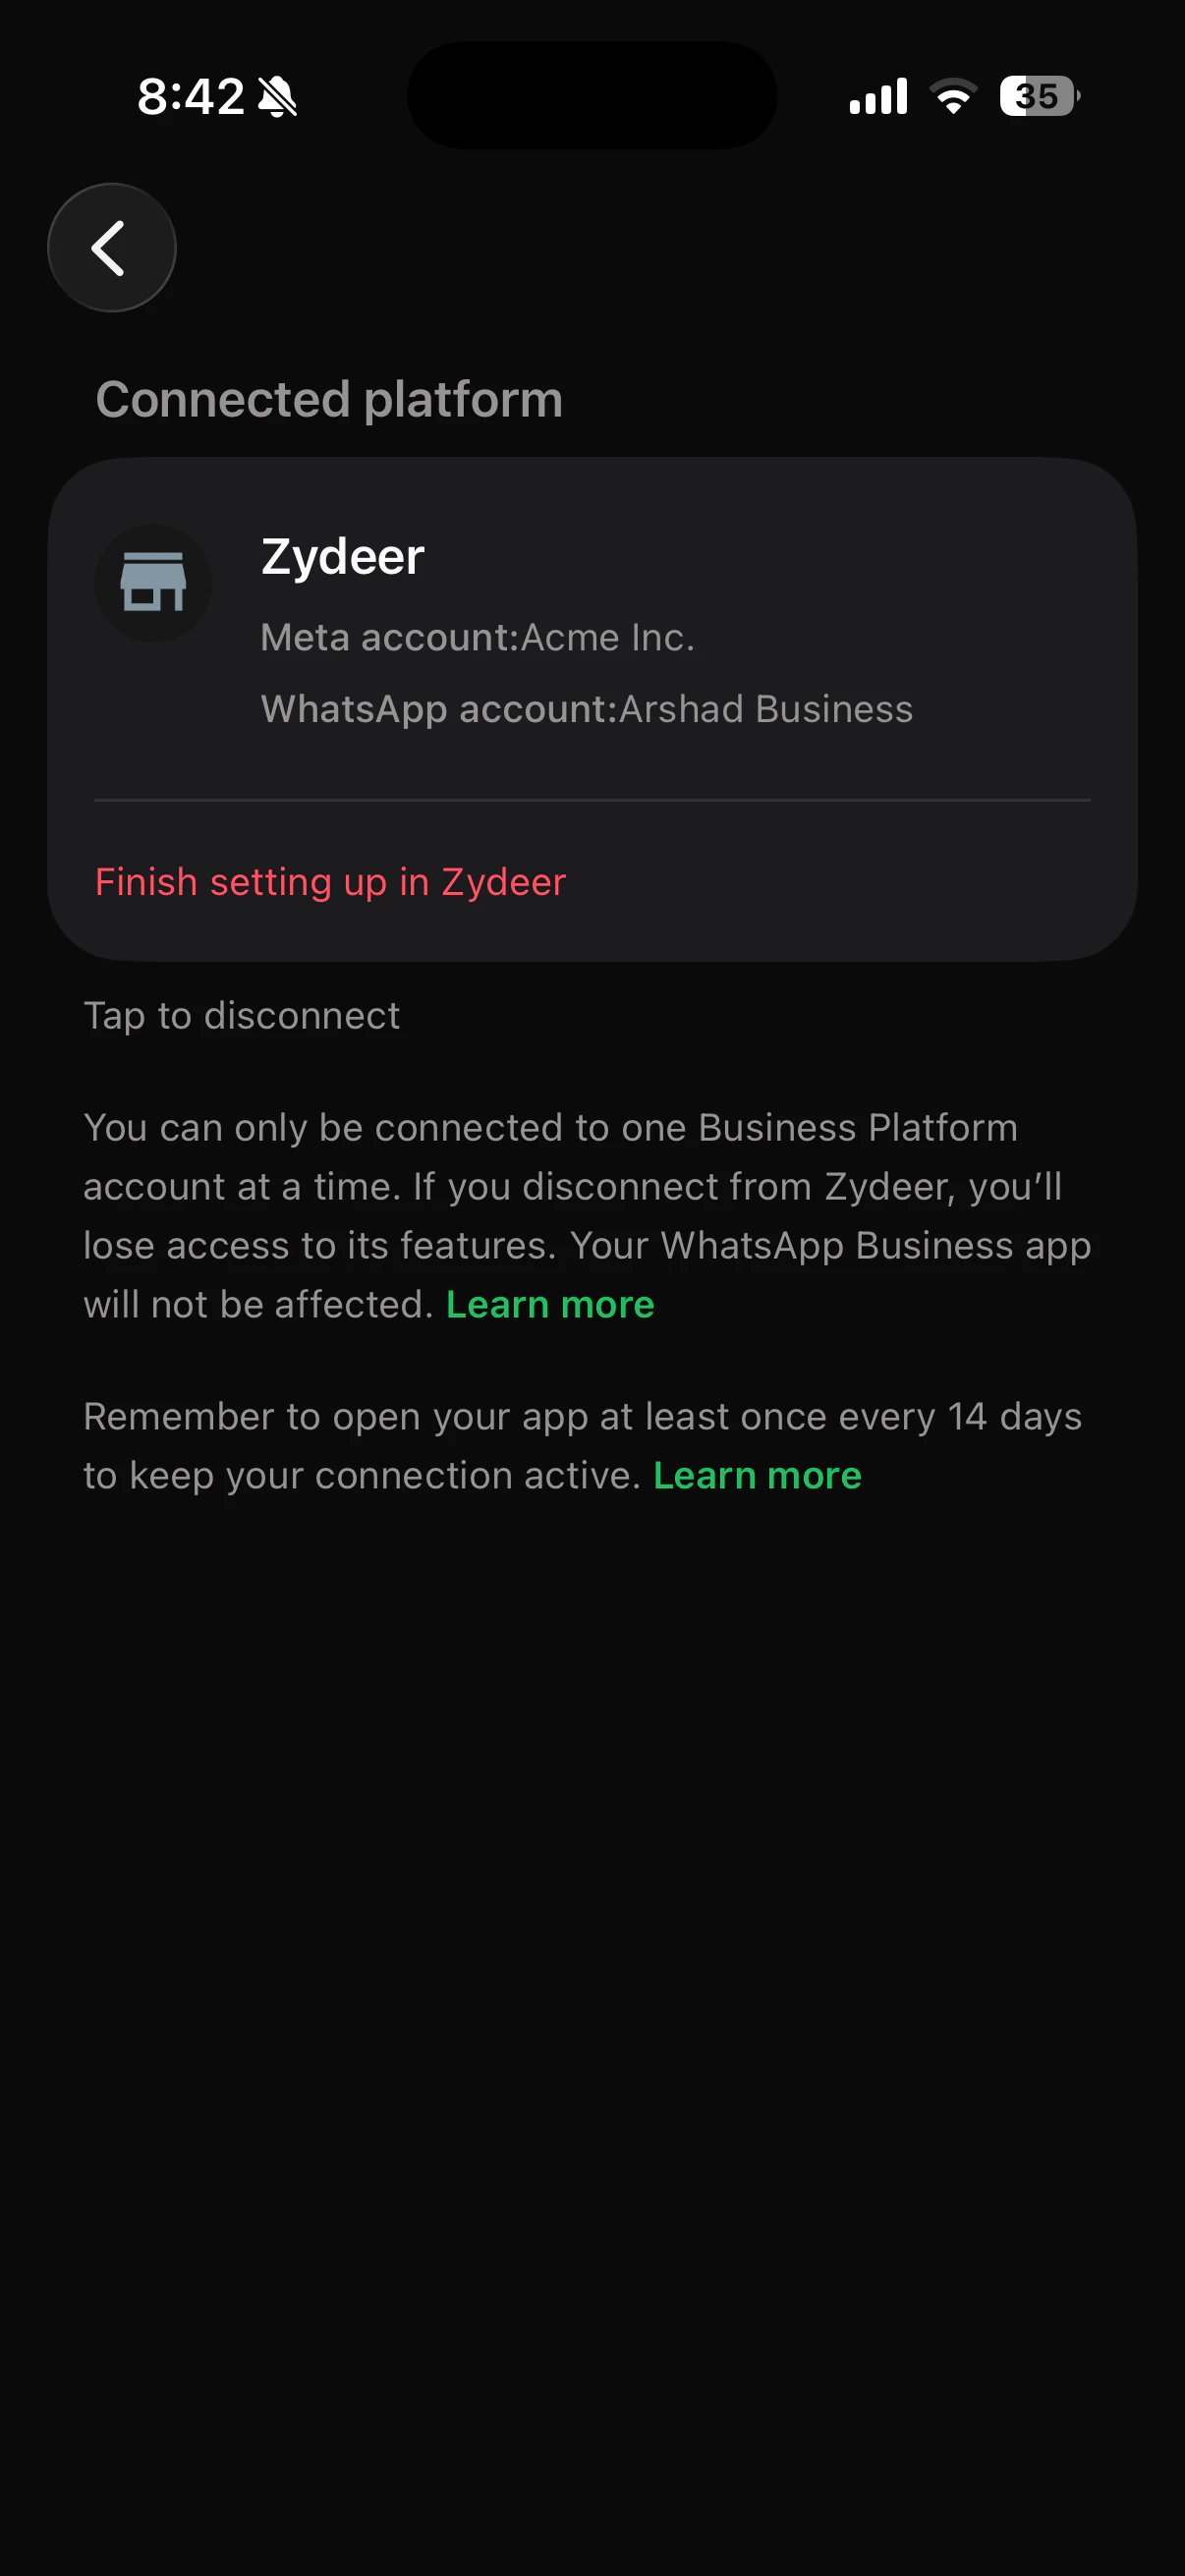
I scanned the QR code, my phone says 'Connected platform', but the Invent setup never advanced
I scanned the QR code, my phone says 'Connected platform', but the Invent setup never advanced
- On the phone, open the WhatsApp Business app, go to Settings → Account → Business Platform.
- You will see the Connected platform card with Tap to disconnect at the bottom.
- Tap Tap to disconnect and confirm.
- Close the Invent setup popup if it is still open.
- Re-run the connect flow in Invent from Step 1.
'This phone number is already registered to a WhatsApp account'
'This phone number is already registered to a WhatsApp account'
'Business account is restricted from messaging users in this country' (error 130497)
'Business account is restricted from messaging users in this country' (error 130497)
- Confirm it is the cross-country rule. If the recipient is in Brazil or Indonesia and your account is registered elsewhere, this is expected and there is no override.
- Register a local WhatsApp Business account. To message users inside Brazil or Indonesia, the only reliable path is a separate WABA whose business is registered in that country. Run Path B (API-only) for a locally-registered business.
- Keep your Business Manager profile complete. A missing business address or incomplete profile on the Business Portfolio, WABA, or linked Facebook Page can widen the restriction. Fill these in at WhatsApp Manager.
- Watch for policy changes. Meta has described this as a temporary measure. The affected-country list can change, so check Meta’s announcements before assuming it is permanent.
My number is not in the dropdown after I finished setup
My number is not in the dropdown after I finished setup
- The Embedded Signup popup closed before the success screen. Nothing is saved until Meta shows Your account is connected to Zydeer. Re-run Step 1.
- The number is in a different WABA on the same Business Portfolio that Invent did not pick up. Open Settings → Connections, click Reconnect on the WhatsApp connection, and finish the prompt. The dropdown refreshes with every visible number.
Verification SMS or call never arrived (API-only)
Verification SMS or call never arrived (API-only)
- Wait for the 60-second countdown to finish, then use the option Meta shows on the verify-code screen to request a new code or switch delivery method (SMS to call, or call to SMS). Some carriers silently drop SMS from short codes; voice calls usually go through.
- Use Phone call for landlines and toll-free numbers. SMS does not exist for landlines.
- Check the number you typed has the right country code, including for numbers that locally drop the leading zero. Meta uses the international format.
My display name was rejected
My display name was rejected
- All caps (use Acme Support, not ACME SUPPORT).
- Emojis or special characters.
- Generic terms like Support, Sales, Customer Service without the business name attached.
- A brand the Facebook account is not authorized to represent.
Why is 'Acme Primary' already pre-selected in the Business portfolio dropdown?
Why is 'Acme Primary' already pre-selected in the Business portfolio dropdown?
What's the difference between 'Create a WhatsApp Business account' and 'Connect a WhatsApp Business App'?
What's the difference between 'Create a WhatsApp Business account' and 'Connect a WhatsApp Business App'?
My assistant stopped replying after about two weeks (coexistence)
My assistant stopped replying after about two weeks (coexistence)
Group chat messages and Status replies don't appear in the Inbox
Group chat messages and Status replies don't appear in the Inbox
Can two tools manage the same WhatsApp number at the same time?
Can two tools manage the same WhatsApp number at the same time?
Outbound messages outside the 24-hour window are being rejected
Outbound messages outside the 24-hour window are being rejected
How do I switch from Coexistence to API-only later?
How do I switch from Coexistence to API-only later?