

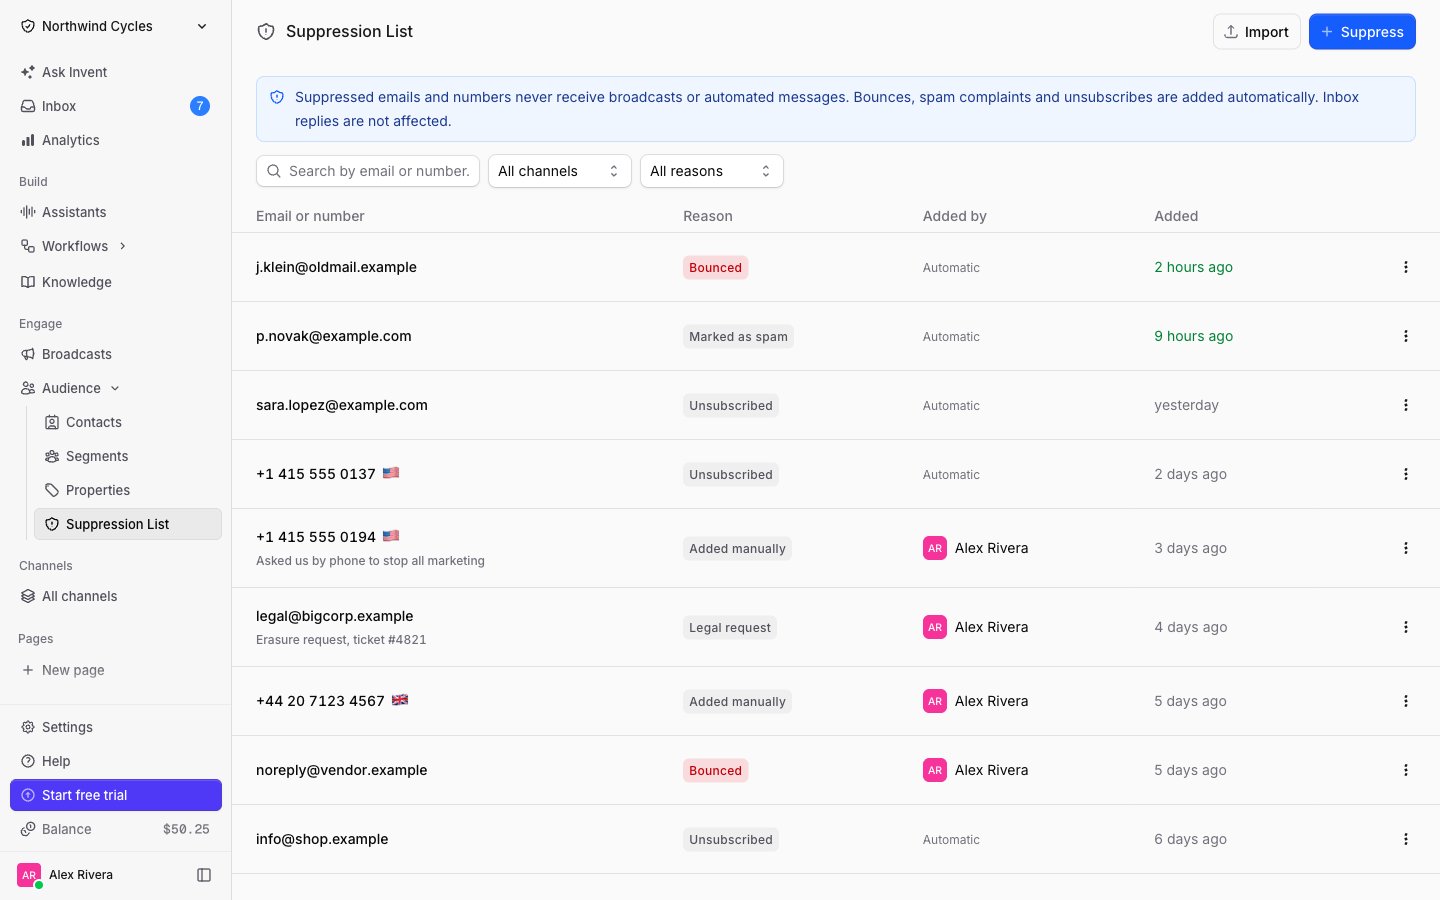
- If two contacts share the same address, suppressing it stops both.
- Deleting a contact does not bring the address back into circulation.
- You can suppress an address that has no contact record at all, for example one a customer gave you by phone.
What lands on the list automatically
You rarely have to add anything by hand. Invent adds entries as it learns about them:
The Source of each entry (visible in the detail panel) tells you how it arrived: a delivery event, an unsubscribe link, someone in the app, an import, or the API.
What suppression blocks
Suppression stops outbound, automated messaging. It never stops a conversation.
The middle row is the important one. “Stop sending me your newsletter” is not “never send me my one-time code”, so an Unsubscribed or Added manually entry leaves transactional sends alone. An address that bounced, complained, or is under a legal request is blocked everywhere, because a message to it either cannot arrive or must not be sent.
A suppressed recipient is not silently dropped from a broadcast. The send is skipped at delivery time and recorded as skipped in the broadcast’s recipients, so you can see exactly who was left out and why.
Finding an entry
Use the search box to look up an exact address or number, and the two filters to narrow by channel (email or phone) or by reason. Click any row to open its details.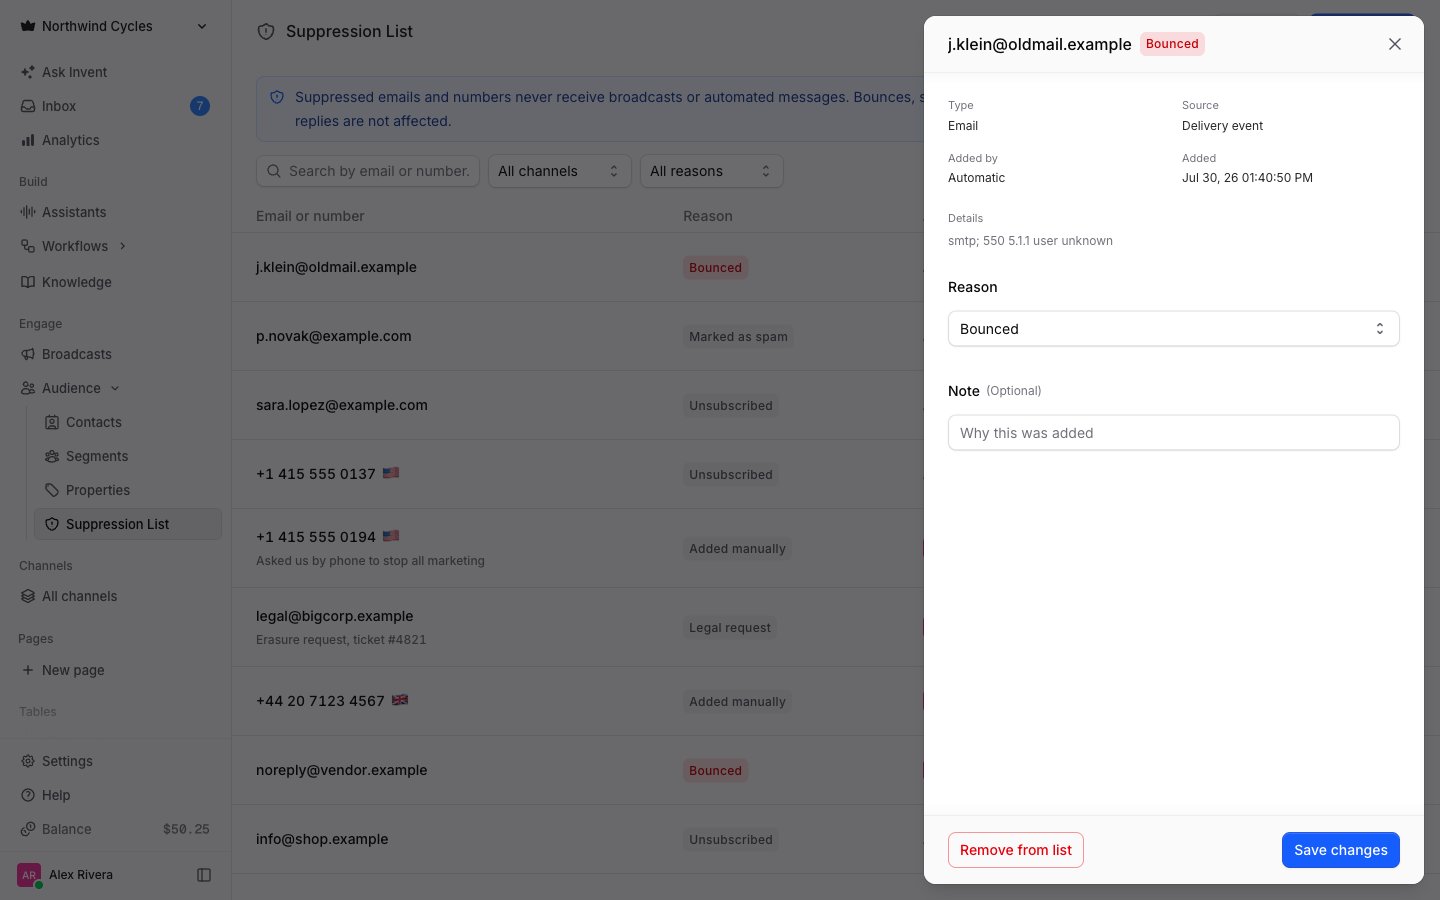
Adding an address or number
1
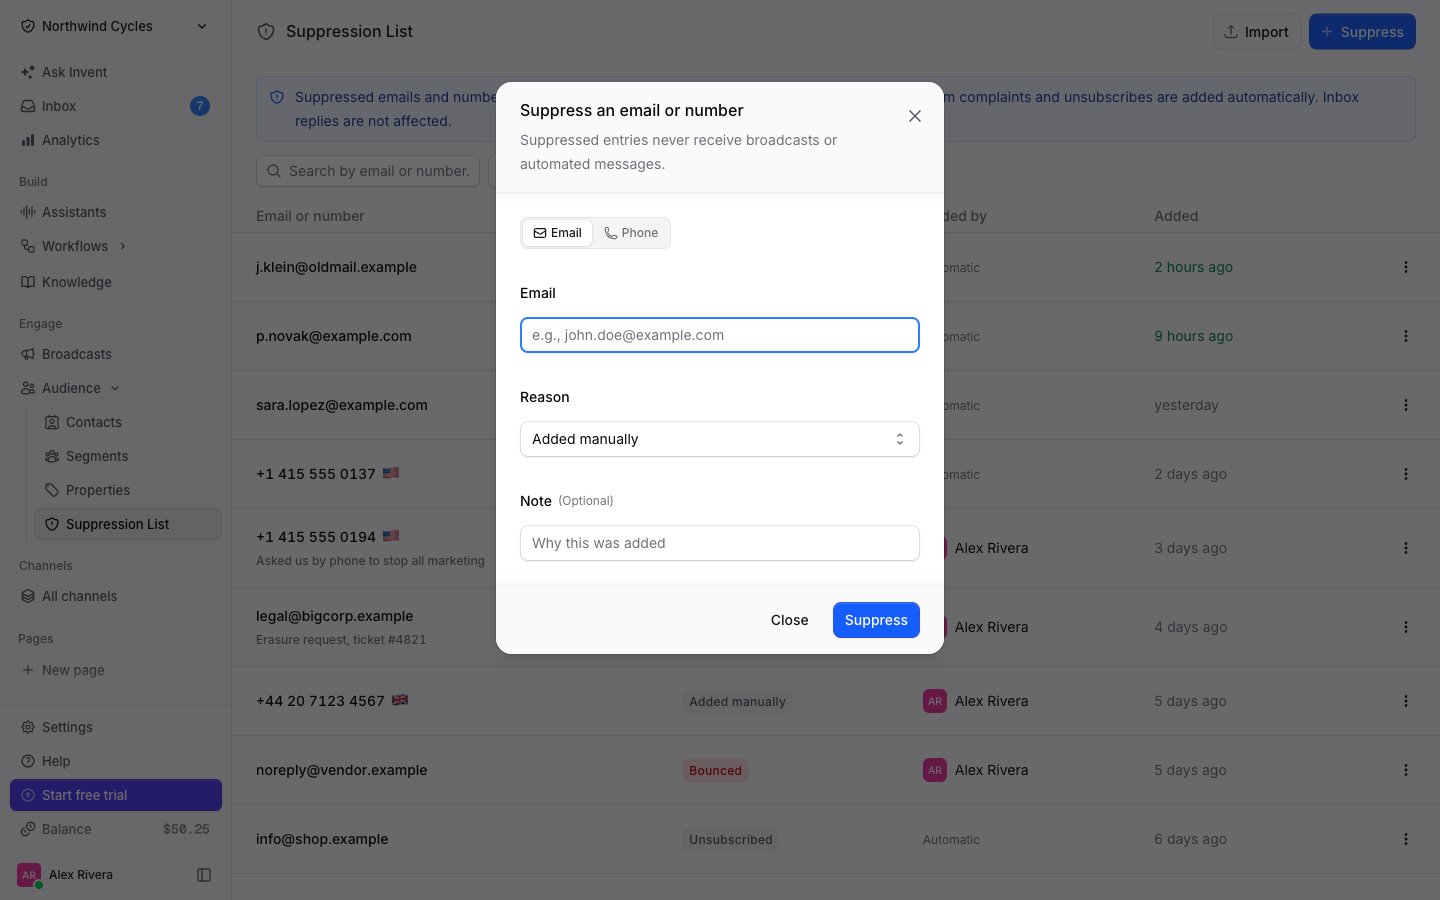
Click Suppress
Pick Email or Phone at the top of the dialog.
2
Enter the address or number
Emails are lowercased and numbers are stored in international format, so the entry matches however it was written elsewhere.
3
Choose a reason and add a note
The reason decides how strictly the entry is enforced (see the table above). The note is free text for your team, for example a ticket number.
Importing a list
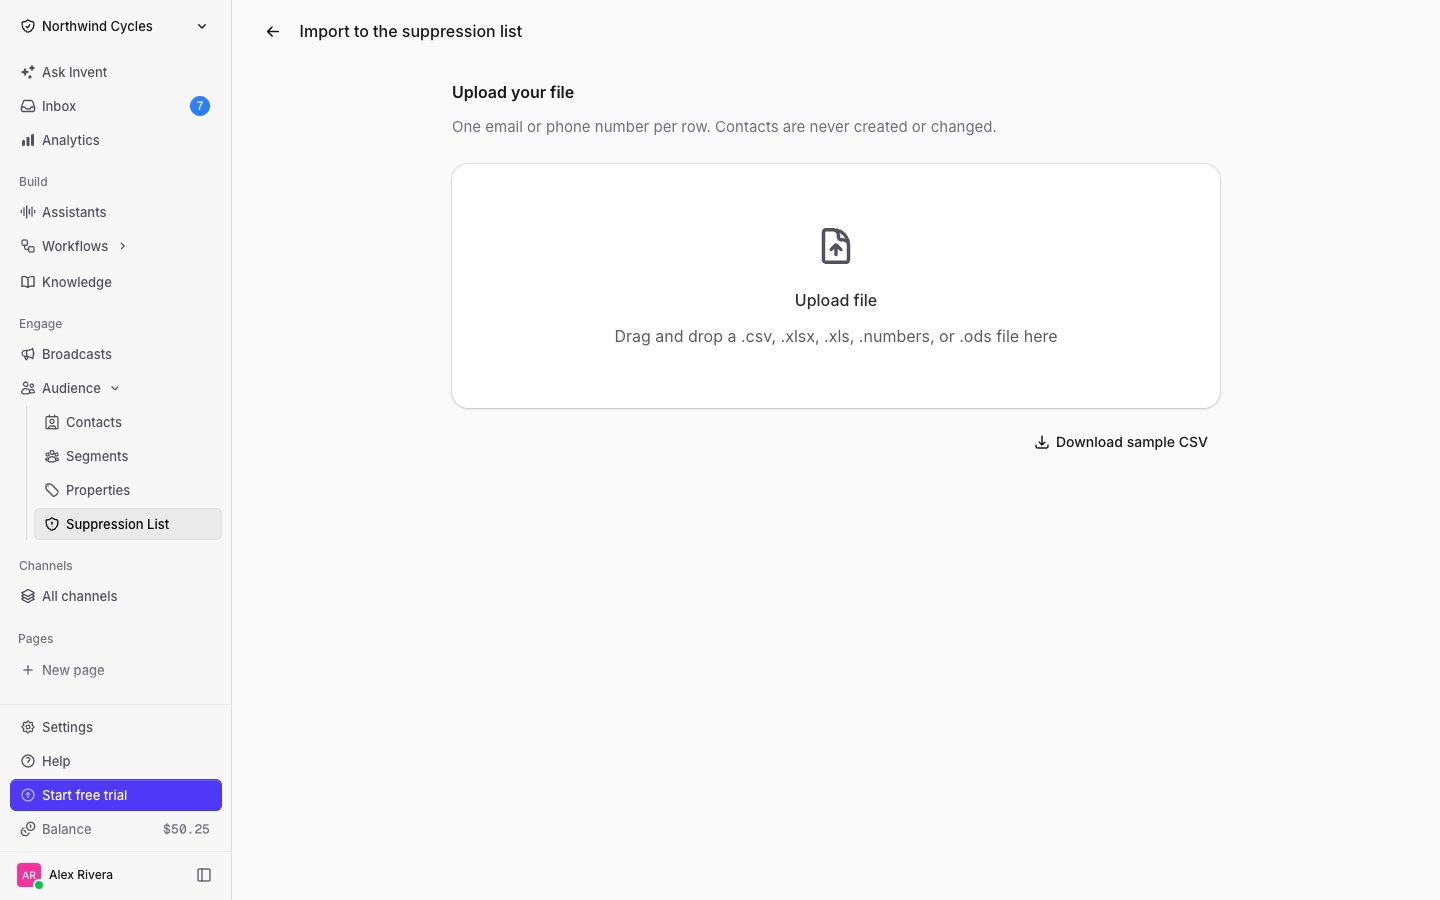
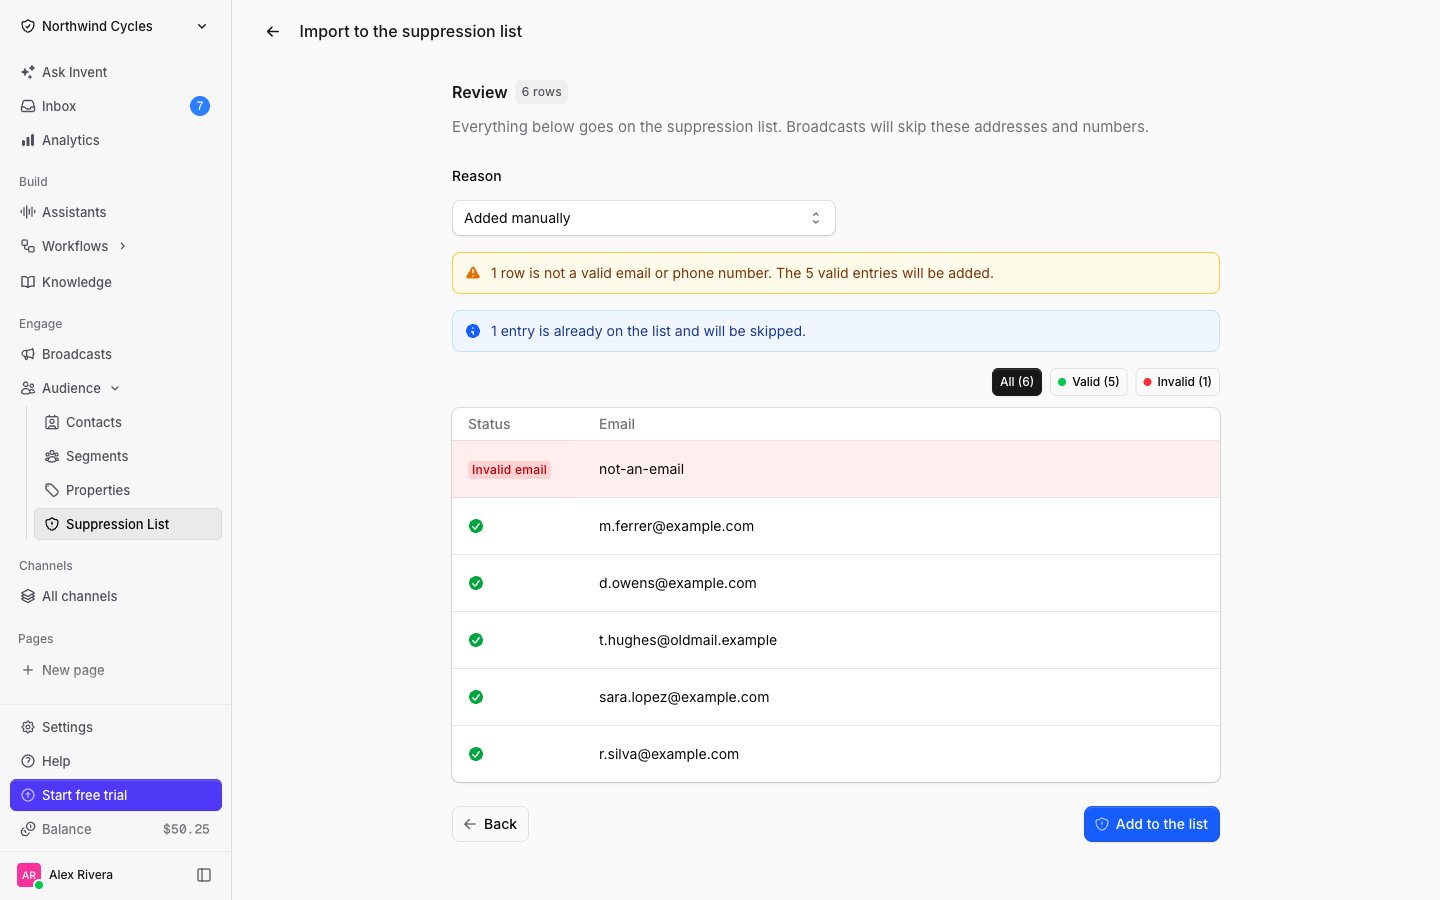
Migrating from another tool? Bring its suppression list with you before your first broadcast, so you never email an address that already opted out elsewhere. Click Import, then upload a.csv, .xlsx, .xls, .numbers, or .ods file with one email or phone number per row, and map the column.
Removing an entry
Open the entry and click Remove from list. Broadcasts and automated messages can reach that address or number again from that moment on. Remove an entry only when you know the person asked to hear from you again. Sending to an address that bounced or complained hurts the deliverability of every email your workspace sends.Suppression and a contact’s subscribed status
These are two different things and both apply:- Suppression is about an address or number. It is workspace-wide and survives the contact.
- A contact’s subscribed status is about that one contact record.
Next Steps
Broadcasts
See how suppression is applied to marketing and transactional sends
Webhooks
Mirror bounces, complaints and opt-outs into your own systems